Your house looks great in daylight. The Front Range backdrop does a lot of the heavy lifting, and Colorado Springs neighborhoods have a way of showing off stone, stucco, timber, and landscaping without much help. Then the sun drops, the walkway fades out, the patio goes dark, and the parts of your home you want to enjoy after work disappear.
That's usually when homeowners start asking the same practical questions. Where should the light go? How bright is too bright? What belongs on the front path versus the back patio? And if you're going to invest in residential lighting installation, how do you do it in a way that still works after snow, wind, summer hail, and fast temperature swings?
Your Guide to Residential Lighting in Colorado Springs
A lot of homes around Colorado Springs don't need more light. They need better placed light. A front entry may feel dim because one fixture dumps light straight down and leaves the house number in shadow. A backyard may look unfinished because the grill area is usable but the seating area disappears. On sloped lots, steps and retaining walls often need attention before decorative accents do.
That local reality matters. Our sun is strong, our evenings cool off quickly, and outdoor living gets stretched across more of the year than many people expect. Good residential lighting installation makes the house feel finished after dark, but it also helps with footing, visibility, and how the property reads from the street in winter when everything looks flatter.
Here's the practical approach I'd use if we were talking over the fence:
- Start with safety first: Front walks, stairs, grade changes, side yards, and dark transitions from driveway to entry.
- Add function second: Patio seating, grilling zones, garage approach, gates, and backyard routes.
- Finish with aesthetics: Stone columns, mature trees, textured walls, rooflines, and seasonal lighting options.
Practical rule: If a fixture only looks good on a plan but doesn't solve a real nighttime problem, it probably doesn't belong in phase one.
For homeowners who want one contractor handling exterior detailing and lighting work, Cultivate House Detailing offers permanent LED lighting installation and seasonal lighting services in Colorado Springs and nearby communities. That matters because the same crew mindset that protects glass, trim, screens, and exterior finishes tends to carry over into cleaner lighting layouts and tidier installation work.
Transform Your Home with Professional Lighting Types
A good lighting plan changes how the house works after dark. In Colorado Springs, that means more than making the place look nice from the street. It means seeing icy steps in January, keeping the patio usable on a windy spring evening, and giving the front elevation enough shape that it does not disappear by 6 p.m. in winter.
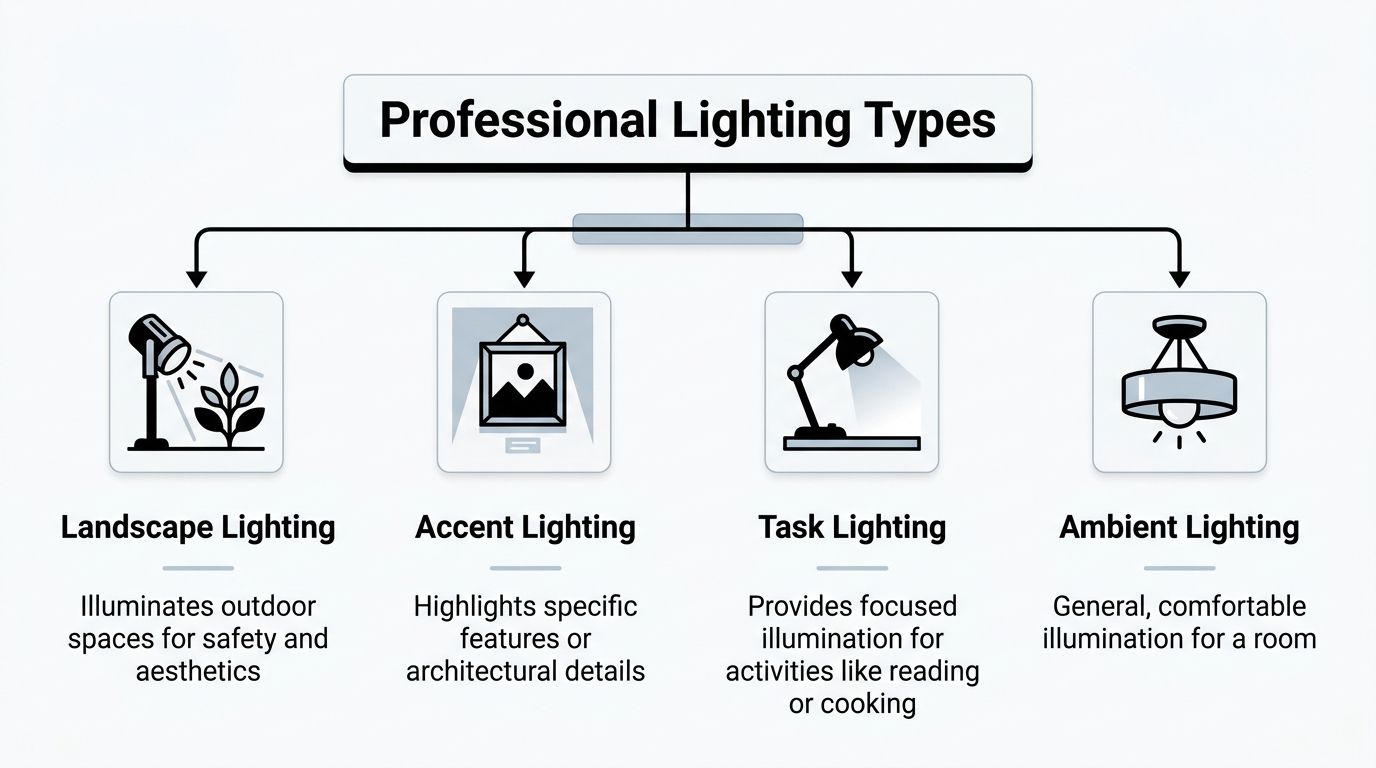
Yard and garden lighting that carries the property
Outdoor lighting usually starts with circulation and visibility. Front walks, side-yard gates, driveway edges, garden beds, and changes in grade all benefit from controlled light that helps people move confidently without blasting the whole property.
- Path and walk lights: Good for entries, side yards, and the route from the driveway to the front door.
- Uplights on trees or masonry: Useful for mature trees, stonework, retaining walls, and other surfaces that disappear at night without some vertical light.
- Low-glare placement: A smart choice in Colorado Springs neighborhoods where homes often sit close enough that poorly aimed fixtures shine into neighboring windows.
The trade-off is simple. More fixtures do not always produce a better result. A smaller number of well-placed lights usually looks cleaner, costs less to maintain, and handles snow, mulch, and seasonal yard work better.
Accent and architectural lighting that adds depth
Accent lighting highlights selected features instead of treating every surface the same. Entry columns, address numbers, timber details, stone veneer, or a single street-facing tree often deserve attention. The rest can stay quieter.
That restraint matters here. Our bright daytime sun gives homes a lot of texture and contrast, but that character can flatten out at night if the lighting is too even. Good accent lighting brings back some of that depth without turning the house into a stage set.
The best-looking homes at night usually highlight fewer features, not more.
Task and ambient lighting for daily living
Task lighting belongs where people do something. Kitchen counters, mudroom benches, garage work areas, grill stations, and back entries all need directed light with enough output to make hands, tools, and surfaces easy to read. As noted in the lighting reference cited in the next section, work surfaces need much more light than living areas do.
Ambient lighting does a different job. It fills a room or outdoor sitting area with enough general light to feel comfortable, but it should not flatten the whole space. Indoors, that might come from recessed lights, pendants, under-cabinet lighting, or wall fixtures working together. Outside, it may come from soffit-mounted fixtures, patio lighting, or discreet roofline systems that add usable light without harsh glare.
LED planning now drives most residential work because homeowners want lower maintenance, better control, and fewer bulb changes in high or awkward locations. That matters even more in Colorado Springs, where winter access can be inconvenient and temperature swings expose weak products fast.
If you want a second opinion on fixture choices and layout logic, this Brisbane LED lighting guide offers a useful outside perspective. For homeowners comparing year-round roofline options, permanent outdoor lighting installation is one practical route.
The Lighting Installation Process From Start to Finish
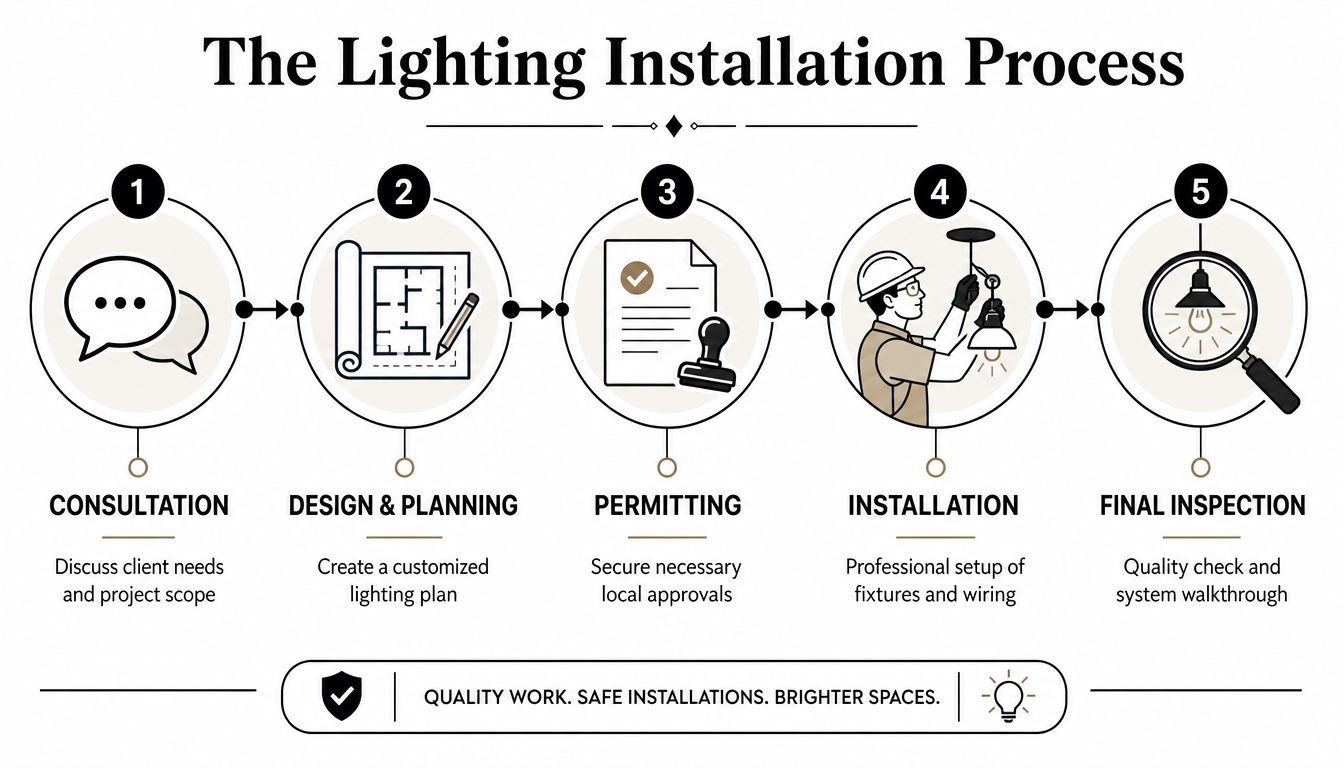
You get home after a January sunset, the driveway has a skim of ice, and the front walk disappears into shadow. That is usually when homeowners in Colorado Springs decide they want better lighting. The process works best when it starts before the next cold snap, with a clear plan for how the house is used, how the wiring will be run, and how the fixtures will hold up through snow, wind, hail, and sharp temperature swings.
Consultation and site review
The first visit should happen on the property, not just over text or from a few photos. A good walk-through answers practical questions fast. Which entry gets used after dark? Where do guests hesitate on the path? Which side yard turns into packed snow in winter? Are there HOA expectations about brightness, fixture style, or how visible the system looks during the day?
In Colorado Springs, site conditions shape the plan early. South-facing elevations get more UV. North sides stay icy longer. Some neighborhoods have mature trees and root zones that limit trenching. Other homes have stucco, stone, or finished ceilings that make access slower and change how fixtures should be mounted.
This is also the point where an installer should spot conflicts before labor starts. Existing switch legs, overloaded boxes, soffit depth, attic access, irrigation lines, and drainage patterns all matter.
Design and planning choices
A solid design narrows the options to what fits the house, the way you live, and the conditions outside. The goal is not to fill every dark corner with more fixtures. The goal is to put light where it helps, avoid glare through windows, and keep the house looking like it belongs in the neighborhood.
Brightness levels should match the task and the room. As noted earlier, work areas need stronger, more direct light than general living spaces. Outside, path and entry lighting should guide movement without blasting the whole front elevation. That trade-off matters here because reflective snow can make an overlit system feel harsher in winter than it did during a summer demo.
A planning conversation should cover:
- Fixture job: path lighting, step safety, entry visibility, accent lighting, patio use, or security support
- Mounting method: recessed, surface-mounted, under-eave, ground-mounted, or roofline channels
- Material and finish: products that can handle UV, freeze-thaw cycles, wind-driven dust, and irrigation overspray
- Controls: simple switches, dimmers, timers, photocells, smart scenes, or separate zones for different seasons
- Future service: access to drivers, transformers, connections, and lamps or modules without opening finished surfaces
For another perspective on planning your LED installation, this guide is useful because it shows how layout mistakes become expensive once wiring and fixture locations are already set.
A short visual example helps if you haven't gone through the process before.
Installation and final walkthrough
Once the layout is approved, the work should follow a clean order. Protect floors and landscaping. Mark fixture locations. Run cable or branch wiring. Set boxes, channels, or transformers. Mount fixtures. Test circuits. Then check the lighting after dark, when aiming and output can be judged correctly.
Night testing is where a good install separates itself from a rushed one. A path light that looked fine at noon may throw glare into a bedroom window. An uplight may need to shift a few inches to avoid lighting the gutter instead of the stone column. On rooflines and exposed exteriors, connections also need to be secured for weather, not just hidden.
The final walkthrough should cover operation, timer settings, dimming, seasonal adjustments, and what to do if a fixture stops working. The job is finished when the system makes sense on a cold Colorado Springs night, not just when the power turns on.
Understanding Residential Lighting Costs and Pricing
A lighting quote in Colorado Springs can swing quite a bit even when two homes look similar from the street. Roof height, freeze-thaw exposure, wind on exposed elevations, attic access, fixture finish, and control choices all change labor and material costs. That is why a useful estimate explains the parts of the job, not just the total.
The simplest projects are usually focused and strategic. A front walk, porch, and house number light package costs far less than a whole-property plan with soffit lighting, outdoor accents, dimming zones, and app controls. Homes on sloped lots or in older neighborhoods can also take longer because wire routes, stonework, and existing electrical conditions are less predictable.
For homeowners comparing options, a Colorado Springs residential lighting service page can help frame the difference between a basic install and a more custom-built system built for local weather and architecture.
What changes the quote
A good installer should be able to point to the specific cost drivers on your property.
- Fixture construction: Plastic and thin metal fixtures cost less up front. Brass, copper, and heavier powder-coated housings usually last longer in sun, snow, and irrigation-heavy areas.
- Number of fixtures and zones: Ten lights on one control schedule are simpler than twenty lights split across entries, paths, trees, and backyard living areas.
- Mounting conditions: High peaks, stucco, masonry, mature landscaping, and tight crawlspaces all add labor time.
- Control system: A basic timer is less expensive than dimmers, smart switching, color tuning, or phone-based scheduling.
- Electrical work required: Existing junction boxes, available panel space, transformer placement, and trenching distance all affect the final number.
- Serviceability: Installers who leave accessible transformers, labeled zones, and room for future expansion may cost more now, but those choices usually reduce headaches later.
Cheap pricing usually means something was trimmed. Sometimes it is fixture quality. Sometimes it is labor that should have been included, like nighttime aiming, cleanup, or programming.
That pattern shows up in other property trades too. This expert guide to tree removal pricing is a useful comparison because it shows how access, risk, and site conditions often drive the actual cost more than the visible work itself.
What a low bid may leave out
The lowest number on the page can still become the highest-cost choice if the scope is thin. I see this most often with exterior lighting quotes that list fixture counts but say very little about fixture grade, transformer capacity, wiring method, or whether the installer is coming back after dark to aim and adjust.
In Colorado Springs, weather protection belongs in the price discussion too. Exterior connections, mounting points, and control locations need to hold up through snow, wind, hail, and wide temperature swings. If a bid ignores those details, the savings may disappear in service calls.
| Cost driver | Lower-cost version | Higher-cost version |
|---|---|---|
| Fixture body | Basic finish and lighter materials | Heavier housing with better corrosion resistance |
| Layout | Limited coverage | Layered lighting for safety, accent, and curb appeal |
| Controls | Standard switch or timer | Zoned dimming, automation, or app control |
| Install conditions | Open access and simple runs | Tall rooflines, masonry, tight access, or trenching |
| Weather durability | Basic exterior rating | Materials and installation details chosen for Colorado conditions |
A quote worth trusting should make it easy to compare scope line by line. If one proposal is much lower, ask what was excluded, what fixture line is being used, and whether the system is priced to look right on a cold January night, not just to pass a daytime power test.
Navigating Codes Permits and Safety in Colorado Springs
Lighting feels decorative until it starts a problem. Then it becomes an electrical and liability issue. That's why code compliance isn't red tape. It's the line between a system that works reliably for years and one that creates heat, moisture, inspection, or insurance headaches.
Listed fixtures and insulation contact are not small details
Homeowners often focus on style first. Installers have to think about listing, location rating, and thermal conditions first. Permanently installed residential fixtures have strict requirements, and recessed ceiling fixtures need to be listed for zero-clearance insulation contact, or IC-rated, to prevent fire hazards in insulated assemblies, as outlined in this residential luminaire requirement reference.
That matters in Colorado Springs because many homes are well insulated, and remodels often bring old fixtures into contact with newer insulation levels. If the wrong housing is buried where it shouldn't be, heat buildup becomes the issue.
Homeowner takeaway: If a fixture is going into a ceiling, soffit, or enclosed cavity, ask whether it's properly listed for that exact location and surrounding material.
Outdoor work needs local judgment
Exterior systems deal with more than electricity. They deal with water, freeze-thaw movement, wind, sun exposure, and physical mounting conditions. A neat daytime install can still fail early if the mounting surface, weather exposure, or splice protection wasn't considered.
Ask direct questions:
- Is the fixture listed for exterior use?
- How are wire connections protected from moisture?
- Will the mounting method hold up through winter expansion and contraction?
- Does this project trigger any permit or inspection requirement locally?
For homeowners comparing project types or looking at exterior-focused options, lighting in Colorado Springs gives a broader look at what these systems can include.
DIY lighting can be tempting. But once you involve permanent wiring, hidden cavities, exterior penetrations, or insulated ceilings, mistakes get expensive fast. Safety isn't the place to learn by trial and error.
Maintaining Your Lighting System Through Colorado Seasons
A well-installed system still needs attention. Colorado weather is hard on exterior components, and most small issues stay small only if someone catches them early.
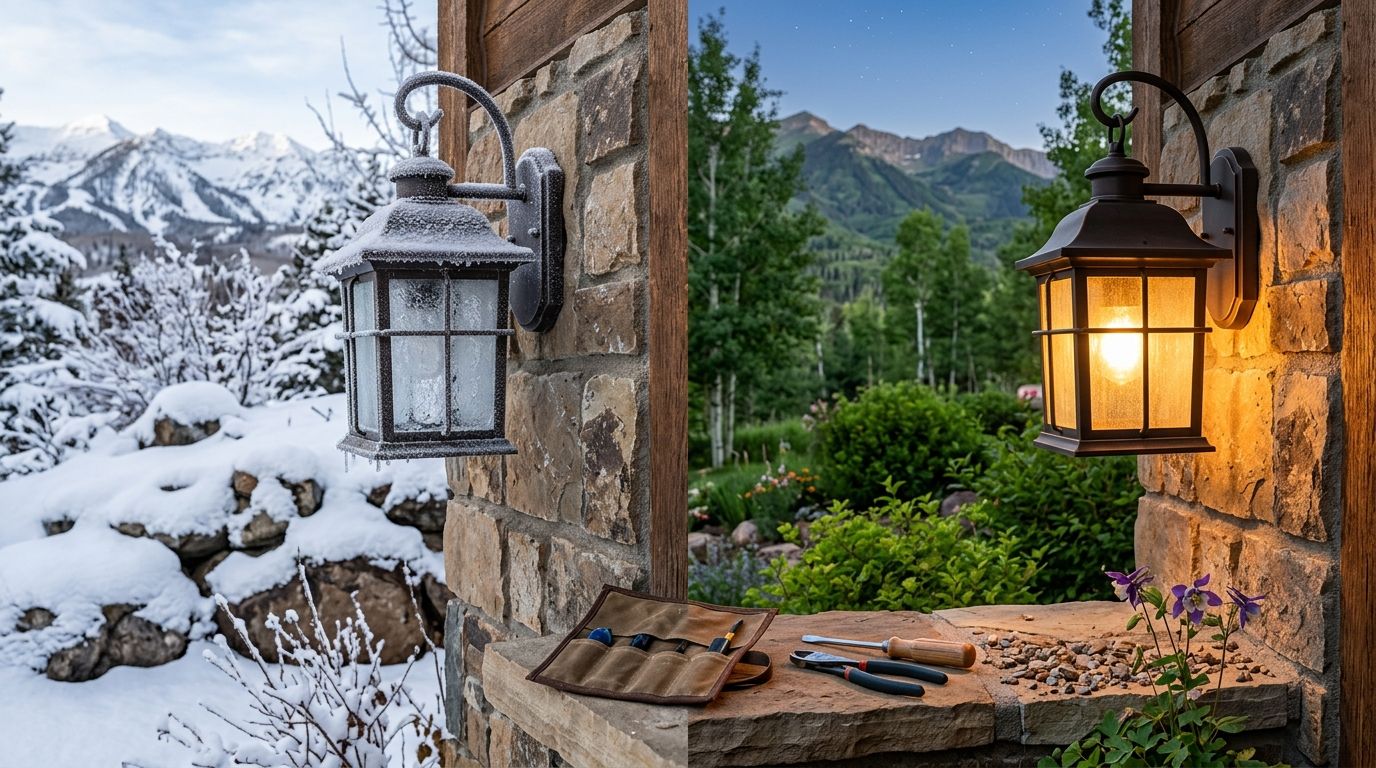
Seasonal checks that actually matter
You don't need an elaborate maintenance routine. A simple walkaround a few times a year is enough for most homes.
- Clean lenses: Dust, irrigation residue, and hard water spots can dull output and distort beam pattern.
- Check alignment: Ground fixtures shift after soil movement, pets, foot traffic, or outdoor maintenance.
- Inspect visible wire runs: Look for exposed sections, loose clips, or abrasion near edges and corners.
- Trim plant growth: Shrubs and ornamental grasses can block light faster than most homeowners expect.
Spring and late summer are especially good times for this. Plants move fast in one season, and a path light that worked in April can be buried by August.
Winterization in the Pikes Peak region
Winter changes the job. Snowpack redirects light, ice can stress mounts, and freeze-thaw cycles test every connection and fastener. Exterior lanterns, roofline systems, and low-mounted fixtures all need a closer look before the first prolonged freeze.
A basic winter prep list helps:
- Clear debris before snow season so fixtures aren't holding damp leaf matter against housings.
- Confirm drainage around low fixtures so melting snow doesn't leave standing water.
- Tighten mounts and hardware before repeated expansion and contraction loosen them further.
- Check timers and controls because shorter days expose bad scheduling quickly.
Snow reflects more light than mulch or lawn. If your system suddenly feels brighter in winter, the fixture may be fine. The ground plane changed.
If a system is maintained with the seasons in mind, it usually stays attractive and predictable. If it's ignored, small alignment and moisture issues tend to stack up.
How to Choose Your Colorado Springs Lighting Installer
A Colorado Springs lighting job can look great on estimate day and disappoint by the first hard winter. I have seen clean-looking installs fail because the contractor chose the wrong fixture body for full sun, skipped proper connection methods near grade, or treated a windy west-facing entry like any other porch. The right installer is not just selling fixtures. They are making choices that hold up to snow, freeze-thaw cycles, summer UV, and the style expectations of your neighborhood.
Experience matters, but judgment matters more. Ask questions that reveal how the installer thinks on your specific house, with your exposure, mounting surfaces, electrical capacity, and goals.
Questions worth asking before you sign
Use the estimate to get specific answers.
- What fixture materials do you use for this part of the house? Powder-coated aluminum, brass, and composite bodies each have strengths. The right answer should match the weather exposure and the look of your home.
- How do you make and protect outdoor wire connections? Ask where connections will be located, what enclosure or connector method will be used, and how moisture protection is handled.
- Do you return after dark to verify aiming and glare? Night adjustment matters, especially on front entries, steps, and architectural lighting where a small change can improve visibility or send light into a bedroom window.
- Can you break the quote into fixtures, labor, controls, and repair work? Clear scope helps you compare bids without guessing.
- Have you installed systems on homes like this in Colorado Springs? Slope, mature plantings, stucco, masonry, HOA preferences, and wind exposure all change the approach.
One good follow-up question is simple. Ask what they would change if budget were cut by 20 percent. A capable installer can tell you what to keep, what to simplify, and what should not be value-engineered.
The technical question that separates pros from guessers
Ask this directly: How do you calculate continuous-load sizing for lighting circuits that operate more than three hours?
That question gets past sales talk fast. For continuous loads, branch-circuit and overcurrent protection sizing must account for 125 percent of the continuous load under NEC 210.20(A) and 215.3, as explained in this IAEI article on residential lighting under the NEC. Exterior accent lighting, holiday lighting circuits, and dusk-to-midnight systems can all bring that issue into play.
A solid installer should be able to explain the rule in plain language and apply it to your project. If the answer is vague, or if they brush off the question, keep looking.
What a good fit looks like
A good installer usually communicates in a way that makes decisions easier. You should hear real trade-offs. Better fixture bodies cost more upfront but often hold finish and alignment longer in our sun and weather. Cleaner wire routing takes more labor, but it protects the house and makes future service simpler. Smarter control placement can cost a little more now and save frustration every week after the job is done.
Look for respect for the home, too. That shows up in neat penetrations, careful ladder placement, orderly routing, labeled controls, and no casual drilling into finished surfaces.
The finished system should feel intentional. You should know what was installed, how it turns on, what can be adjusted, and what maintenance to expect in Colorado Springs through winter and summer.
If you want help planning a lighting project that fits your home, your layout, and Colorado Springs weather, contact Cultivate House Detailing for a quote. A good consultation can clarify placement, fixture options, and installation scope before you commit.
Prefer to leave it to a professional? Cultivate House Detailing offers permanent outdoor lighting installation. Get a free quote.