You're getting ready for a summer barbecue, but the brick patio looks dull, stained, and tired. Leaf residue sits in the joints, dark organic growth marks the shaded areas, and mineral deposits make the surface look older than it is. A pressure washer seems like the fastest fix, yet brick isn't a concrete slab. It's porous masonry that can lose mortar, absorb water, and suffer surface damage when cleaned too aggressively.
That's why pressure washing a brick patio requires control rather than brute force. The right detergent, nozzle, distance, and post-wash care matter just as much as the machine itself. A careful cleaning can improve the patio's appearance while preserving its joints, brick face, and long-term performance. For broader property presentation ideas, this resource on improving curb appeal for commercial properties offers useful context, even though the same attention to detail applies at home.
Introduction to Pressure Washing Brick Patio
Concrete can often tolerate more aggressive cleaning than brick, but brick patios need a gentler approach. Water force can enter the pores and mortar joints, where it may contribute to erosion and freeze-thaw damage. Older brick, softer brick, and patios built with lime-based mortar deserve particular caution because their surfaces and joints may already be weathered.
A common DIY mistake is treating every stain as a pressure problem. Efflorescence, algae, rust, oil, and leafy residue respond differently, and pressure alone often leaves mineral deposits behind while gradually wearing down the masonry. A homeowner may finish with a patio that looks brighter from a distance but has recessed joints or a roughened brick face up close.
The safer method starts with inspection and preparation. Pre-wet the surface, use a brick-compatible detergent, test an inconspicuous area, and rinse with a broad fan pattern while keeping the wand moving. Cleaning also needs an after-care plan, because washed-out joints may require new sand or mortar repair before the patio is ready for regular use.
The practical goal: remove grime without removing the material that holds the patio together.
Essential Tools Detergents and Preparation
Before starting, assemble the equipment that lets you control water and chemical exposure. A pressure washer with adjustable output is preferable to a machine that delivers one fixed, aggressive setting. You'll also need a wide fan nozzle, a low-pressure detergent attachment, a garden hose for pre-wetting, a stiff nylon brush, protective goggles, gloves, and knee pads if you'll be working close to the ground.
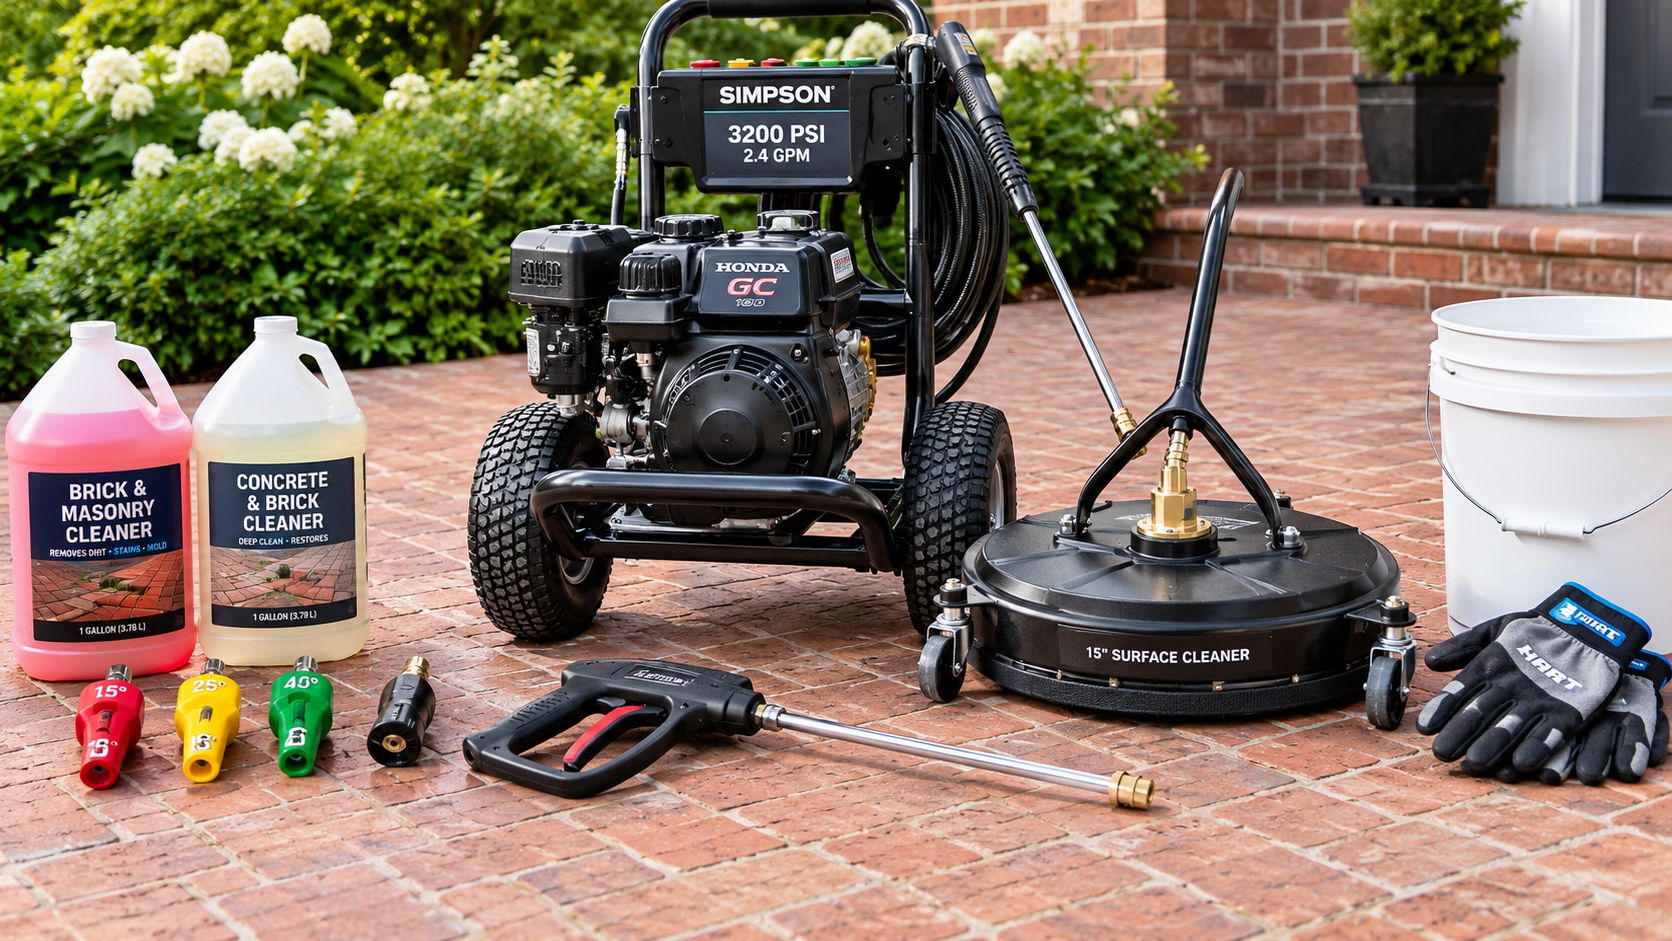
Match the cleaner to the stain
A mild, brick-safe detergent helps loosen general dirt and organic residue before rinsing. Algae and leafy buildup usually need time to soak, while rust and mineral deposits may require a product specifically labeled for masonry. Pressure alone often fails on efflorescence and algae, so soaking with detergent first can improve removal while reducing the temptation to increase water force, as explained in this stain-specific brick patio cleaning guidance.
Don't mix cleaning chemicals unless the product label explicitly permits it. Test the chosen detergent in a hidden area, then inspect the brick after rinsing and drying. A cleaner that appears harmless while wet can still alter the color or leave a residue.
Prepare the patio and its surroundings
Clear chairs, grills, planters, toys, and loose debris from the work area. Sweep first so the washer isn't pushing grit across the brick. Cover or gently rinse nearby plants, protect finished woodwork from overspray, and make sure runoff won't flow into an area where it can damage landscaping.
A surface cleaner attachment may be useful on compatible, stable masonry, but it doesn't remove the need for a small test patch. Brick patios vary widely in age, hardness, joint condition, and previous repairs. Preparation gives you a chance to identify loose bricks, missing joint material, cracks, or areas that should be repaired instead of blasted.
Choosing PSI and Nozzle Settings
Pressure is only one part of the cleaning equation. Nozzle angle, distance, movement, and the condition of the brick determine how much force reaches the surface. Historic masonry guidance recommends starting at 100 PSI or below and generally keeping cleaning at no more than 300 PSI, with the lowest pressure that produces an acceptable result, according to the U.S. General Services Administration's historic masonry guidance.
The Brick Industry Association also advises keeping the nozzle tip at least 305 mm, or 12 inches, from the brick surface, as stated in its brickwork cleaning guidance. Wider fan patterns spread the force over a larger area, reducing the chance of etching the face or washing material from the joints.
| Pressure Range (PSI) | Nozzle Angle | Standoff Distance |
|---|---|---|
| 100 to 300 PSI for older, softer, or historic masonry | 25° to 40° fan | At least 12 inches |
| 300 to 400 PSI only after careful testing on suitable, sound brick | 25° to 40° fan | About 12 to 18 inches |
| Above 400 PSI requires significant caution and is generally unsuitable for preservation-focused brick cleaning | Avoid concentrated tips | Increase distance and reassess |
Some residential pressure-washing guides describe broader operating ranges, including 500 to 1500 PSI, while warning that pressures above 2000 PSI materially increase damage risk on older or softer brick. Those figures should not override historic masonry standards. For a patio with aging joints, uncertain construction, or visible deterioration, start lower and stop increasing pressure if the surface isn't responding.
For comparison, patio paver pressure-washing guidance can help explain how hardscape cleaning methods differ by material. Brick needs its own test-based settings, not a concrete-cleaning routine.
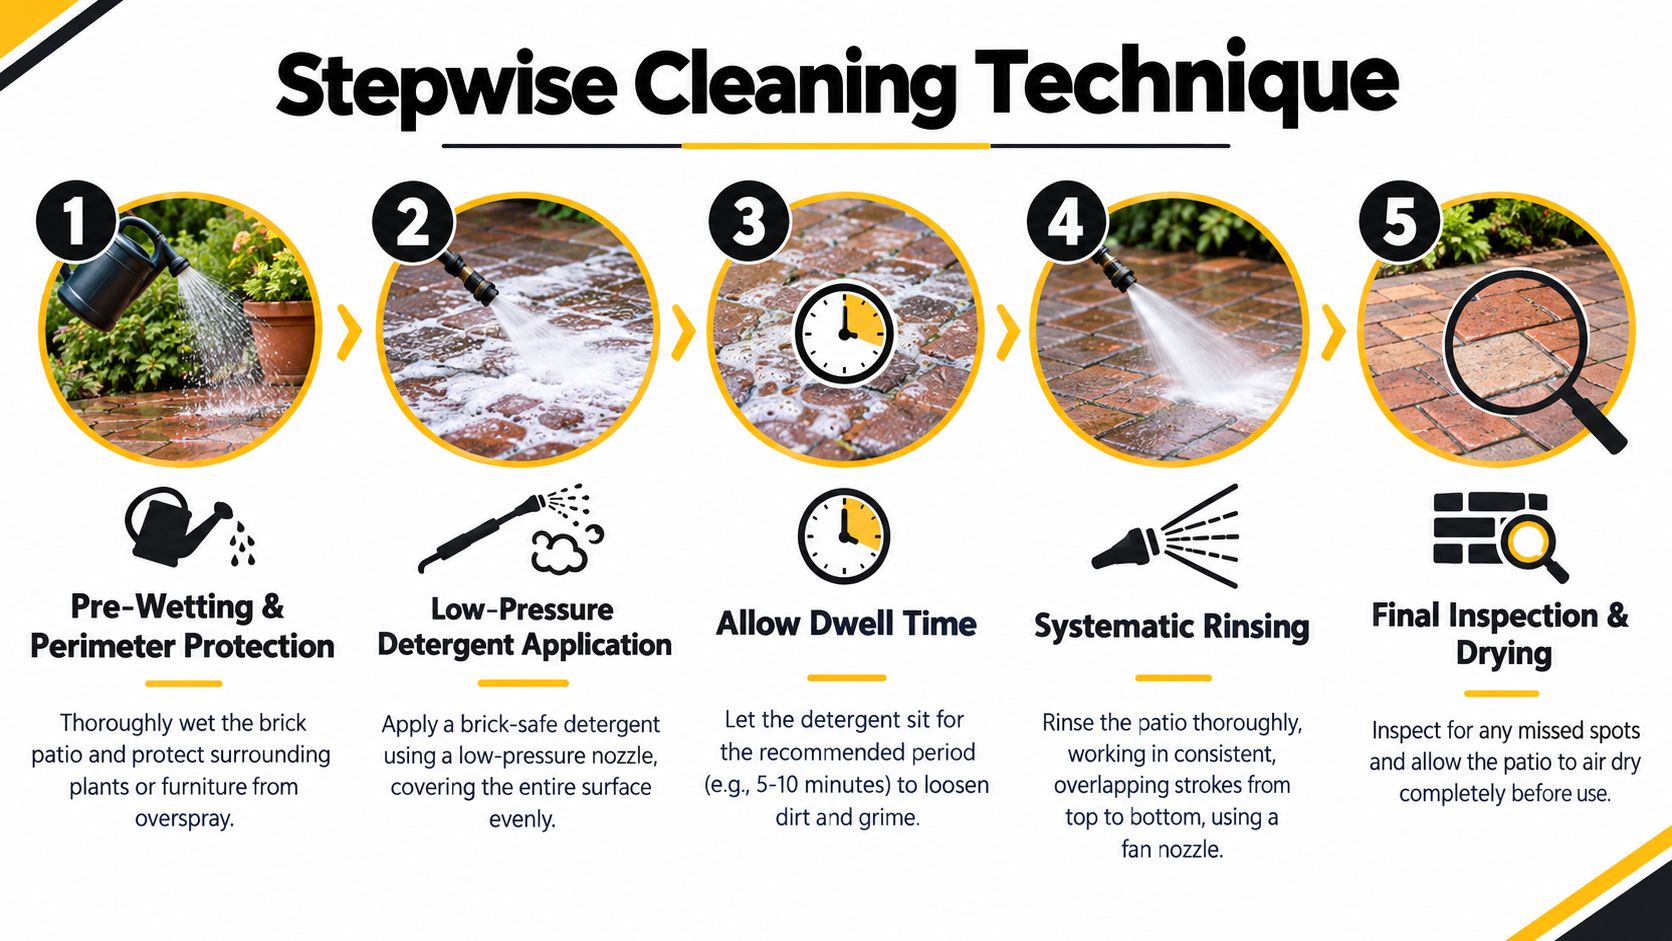
Stepwise Cleaning Technique
A controlled sequence keeps the work predictable. Divide the patio into manageable sections, finish each section before moving on, and watch the joints as closely as the brick faces.
Pre-wet and protect the perimeter
Use a garden hose or the washer's lowest output to wet the brick thoroughly. Pre-wetting limits how quickly the porous masonry absorbs detergent and helps loosen surface dirt before mechanical cleaning begins.
Rinse surrounding plants and move vulnerable furniture out of the spray zone. Keep doors, low siding, outdoor outlets, and finished woodwork protected from direct overspray. Check where the runoff is traveling before you apply detergent.
Apply detergent at low pressure
Apply a brick-safe detergent evenly with a low-pressure nozzle. Start at the farthest edge and work toward the area where you'll collect or direct runoff. Cover the surface without flooding the joints.
Let the cleaner dwell according to its label. The point is to soften grime, not to let the solution dry on the brick. If a section begins drying, lightly re-wet it rather than adding stronger pressure later.
Rinse with a moving fan pattern
Switch to a 25° or 40° fan nozzle and begin at a cautious distance. Hold the wand at a consistent angle, keep it moving, and overlap each pass so you don't create light and dark stripes. A safe workflow uses pre-wetting, low-pressure detergent application, and a moving fan rinse. Pressures above 1500 PSI increase the risk of joint erosion, as noted in this brick patio washing guide.
Keep the spray directed across the surface instead of straight into the joints. Don't stop over a dark spot. If a grease mark remains, pause the washing, apply an appropriate spot treatment, allow it to work, and then rinse with the same controlled motion.
For leafy residue or algae in a shaded corner, detergent and gentle agitation usually work better than trying to carve the stain out with a narrow stream. A stiff nylon brush can help on stubborn areas, provided it doesn't shed abrasive grit into the joints.
Detail the edges and inspect while wet
Use lower output and extra distance near steps, borders, repaired sections, and exposed mortar. These areas often receive more concentrated spray because the operator slows down to see detail. Instead, reduce force and make several light passes.
Rinse until detergent and loosened soil leave the patio. Look for washed-out joints, loose brick, remaining efflorescence, and striping before the surface dries. For homeowners comparing cleaning methods across hardscape materials, this resource from Concrete Resurfacing Products, Inc. provides a useful contrast with stamped concrete care.
Let the patio air-dry fully before deciding whether the cleaning succeeded. Damp brick can hide uneven color, remaining deposits, and joint loss.
Common Mistakes and Troubleshooting
Most damage happens when the operator tries to make the machine do the work that detergent, dwell time, and brushing should handle. A narrow stream aimed at a stubborn stain may remove the stain, but it can also remove part of the brick face or mortar.
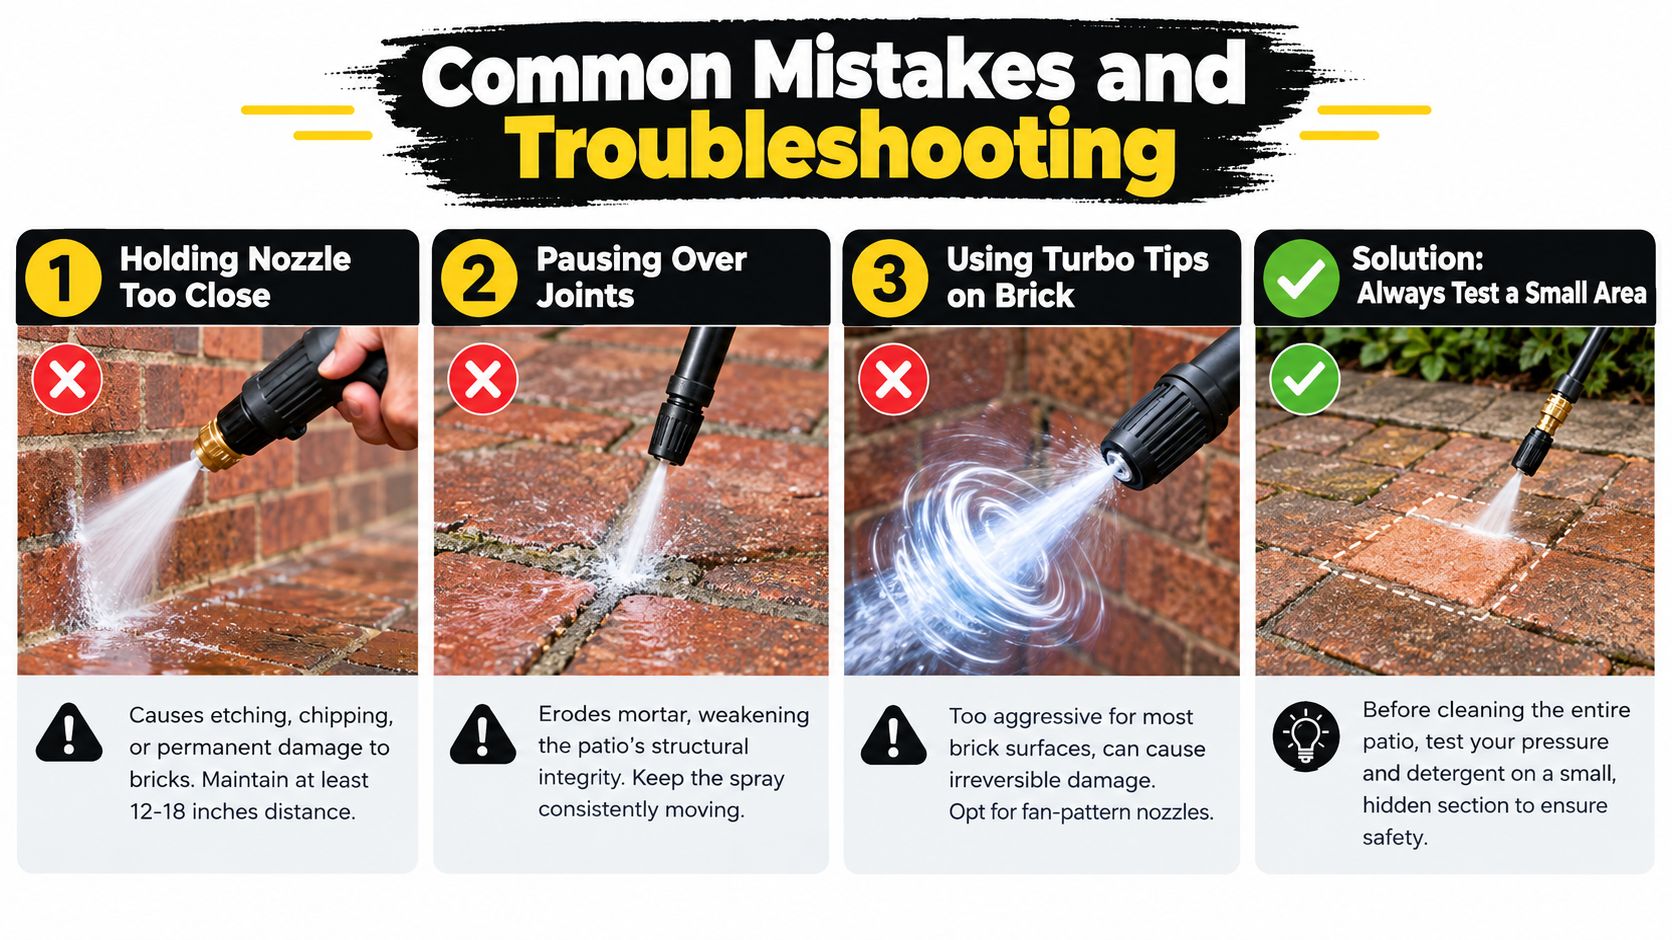
Problems that show up quickly
- Holding the nozzle too close: Keep the wand roughly 12 to 18 inches away when testing and cleaning. A brief high-pressure pass held too close can erode mortar and pit brick surfaces, according to this masonry damage overview.
- Pausing over joints: Keep the spray moving at a steady pace. A stationary stream concentrates force on the weakest part of the patio and can wash sand or mortar from the joint.
- Using a turbo tip: Turbo tips create a concentrated, rotating impact that's too aggressive for many brick surfaces. Use a broad fan nozzle instead.
- Skipping the test patch: Test pressure and detergent in a hidden location, then check the result after drying. If the brick color changes or joint material loosens, stop and revise the method.
If you notice sand or mortar collecting in the runoff, lower the pressure, increase the distance, and switch to a wider fan. Don't try to repair a damaged joint while the patio is still wet. After drying, determine whether it needs compatible joint sand, mortar repair, or a masonry professional's assessment.
A clean-looking patio isn't a successful job if the joints are weaker afterward.
Post-Wash Sealing Maintenance and Colorado Tips
The patio isn't finished when the last dirty rinse leaves the surface. Dry conditions can reveal missing joint material, while wet conditions may expose loose mortar or areas where water is entering the brickwork. Inspect the entire surface after drying, especially edges, steps, repaired sections, and places where the spray removed visible sand.
If joints have lost material, re-sand or repair them with a product compatible with the existing construction. Don't bury deteriorated mortar under sealer. A breathable masonry sealer may help limit water infiltration, but the brick must be clean, dry, and structurally sound first. Post-wash joint repair and sealing are often overlooked, even though masonry guidance connects these steps with reducing water entry and freeze-thaw damage, as discussed in this brick patio maintenance resource.
Colorado Springs patios face a combination of hard water deposits, dry weather, shaded organic growth, and freeze-thaw exposure. Hard water can leave pale mineral spotting after washing, particularly when runoff dries on the brick. Shaded areas may need gentle spot treatment between full cleanings, while joints should be checked after seasonal weather changes rather than only when the patio looks dirty.
A practical after-care routine
- After cleaning: Allow the patio to dry, inspect the joints, and remove any remaining residue with the gentlest effective method.
- Before sealing: Confirm that the brick and joints are sound, clean, and fully dry. Follow the sealer manufacturer's directions rather than applying a heavy film that traps moisture.
- Between washes: Sweep leaves and soil away, treat algae or rust spots selectively, and avoid using concentrated pressure on isolated stains.
- After harsh weather: Look for cracked mortar, displaced sand, loose bricks, or new spalling before adding furniture or hosting guests.
For broader outdoor-surface upkeep, Maintaining your Central Coast Stratco patio offers another example of why routine inspection matters, even though Colorado masonry has different weather demands. If you're weighing cleaning against protection, this guide to patio cleaning and sealing can help you think through the order of operations.
Cultivate House Detailing offers pressure washing for patios and other exterior living spaces, with a focus on careful surface handling and clear communication. If your Colorado Springs patio has aging joints, hard-water buildup, or stains that won't respond to gentle cleaning, visit Cultivate House Detailing to request an assessment and schedule service.
Prefer to leave it to a professional? Cultivate House Detailing offers pressure washing in Colorado Springs. Get a free quote.