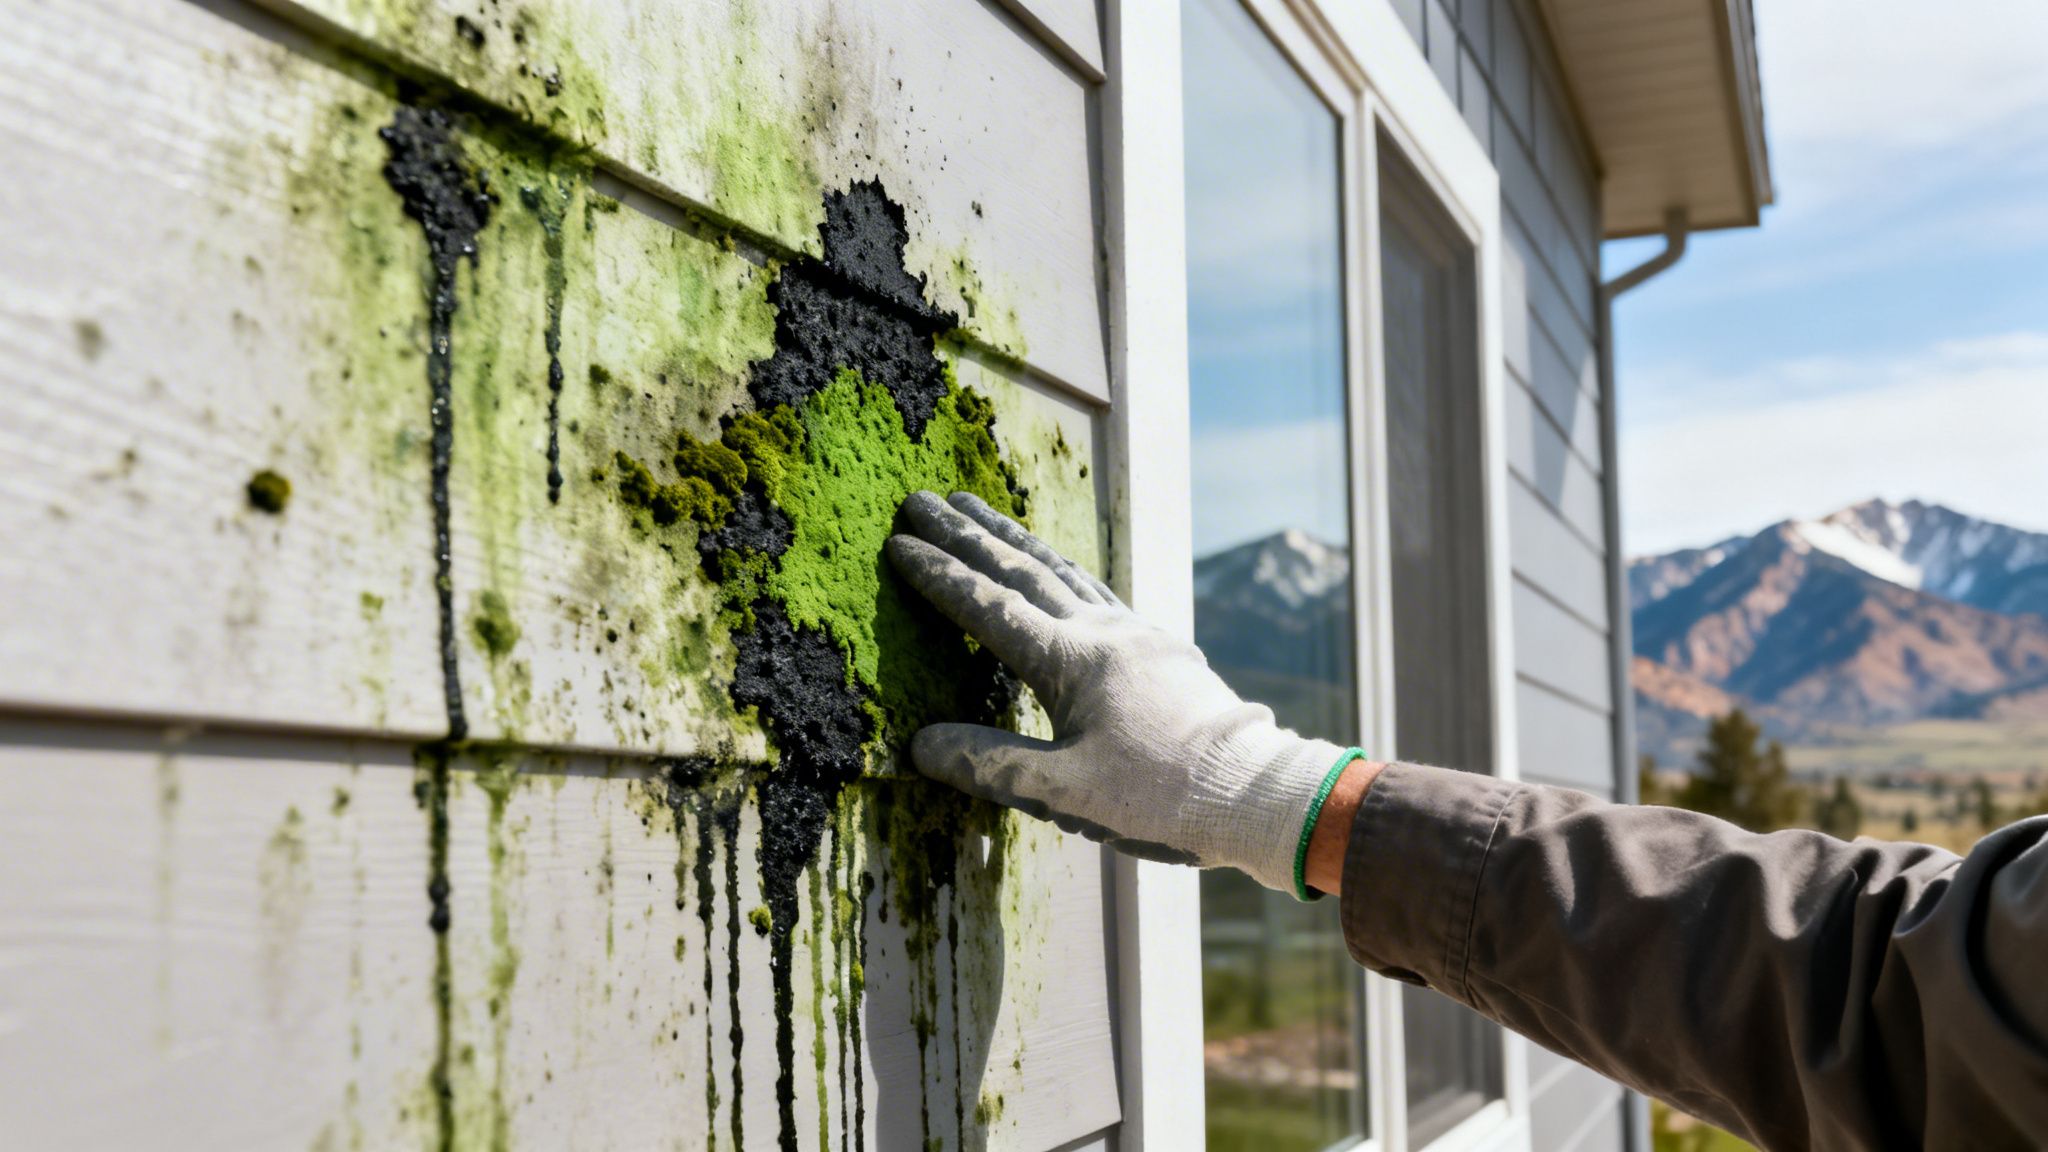
If you are standing in the yard looking at green or black streaks on your siding, you are not alone. In Colorado Springs, mold shows up fast on shaded walls, under rooflines, around downspouts, and anywhere snowmelt or summer storm moisture hangs around longer than it should.
Homeowners want the same thing. Get rid of it quickly, avoid damaging the siding, and keep it from coming right back. That is possible, but the method matters. A lot of DIY advice skips over the trade-offs, especially the downside of harsh bleach mixes on siding exposed to Colorado sun, wind, and freeze-thaw cycles.
This guide covers how to remove mold from house siding in a practical way. It also covers when a simple DIY wash is reasonable and when it is smarter to stop before a small exterior cleaning project turns into water intrusion, discoloration, or surface damage.
Identifying and Understanding Mold on Your Siding
A common call starts the same way. A homeowner notices staining on the north side of the house, assumes it is dirt, sprays it down, and realizes it is still there. Then they get closer and see patchy growth around lap joints, trim edges, or behind bushes where airflow is poor.
What you are probably seeing
Homeowners often lump everything together as mold, but exterior growth can look a little different depending on the organism and the surface.
- Mildew often shows up as a lighter, flatter film.
- Mold usually looks darker and more rooted into the grime on the surface.
- Algae tends to leave green streaking, especially on damp, shaded walls.
From the ground, the difference does not always change the first cleaning decision. What matters more is the location, depth of staining, and siding material.
Why it shows up in Colorado Springs
Colorado is dry compared with many parts of the country, but exterior mold still thrives when moisture sits in the wrong places. North-facing siding gets less direct sun. Spring thaw adds moisture. Summer thunderstorms wet the wall again before it has fully dried. Shrubs, fences, and tight side yards block airflow.
That combination is why one wall can look clean while another side of the same house develops staining.
Tip: If growth is heaviest near landscaping, under gutters, or below a leaky spigot, fix that moisture source first. Cleaning the siding without correcting the cause usually leads to repeat growth.
Why this is more than a cosmetic problem
At first, mold looks like a curb appeal issue. Left in place, it becomes a maintenance issue.
Organic buildup holds moisture against the siding. On wood, that can speed up wear. On vinyl, it can settle into textured surfaces and seams. On stucco and fiber cement, it can stain unevenly and become harder to remove with mild cleaners alone.
A dirty wall also hides other problems. During inspection, it is common to find loose caulk, failed paint, cracked trim, or splashback from poor drainage that the homeowner did not notice until the growth made them look closer.
The first question to ask before cleaning
Before choosing a cleaner, decide which of these situations you are dealing with:
| Condition | What it usually means |
|---|---|
| Light surface spotting | Often manageable with a gentle DIY method |
| Thick growth in shaded sections | Needs longer dwell time and more careful scrubbing |
| Staining on upper stories | Safety and reach become a significant issue |
| Repeated regrowth in the same area | Moisture, shade, or ventilation is driving it |
If the growth is limited and easy to reach, a homeowner can often handle it with the right tools and patience. If it covers large sections, sits high on the house, or has already survived one cleaning attempt, the job gets less forgiving.
Essential Safety and Preparation for Siding Cleanup
Most siding damage in DIY mold removal does not come from the cleaner. It comes from rushing. Good prep protects you, protects the house, and gives the cleaning solution a fair chance to work.

Wear the right protective gear
Start with the basics before mixing anything.
According to this mold cleanup guide from COIT, you should wear protective gear like gloves and goggles before cleaning. The same source also notes that trimming nearby vegetation matters because poor air circulation contributes to 70% of recurrent mold growth.
A simple checklist works well:
- Gloves keep cleaners and grime off your skin.
- Goggles protect your eyes from splashback when spraying overhead.
- Mask helps when you are disturbing moldy residue, especially during scrubbing.
- Long sleeves and older clothes make cleanup easier afterward.
- Non-slip shoes matter if the ground is wet or you are working around hoses.
If you need a ladder to reach the area, pause and reconsider whether this is still a sensible DIY project. Mold removal is not worth a fall.
Inspect the siding before you wash it
Do a slow walk around the house first. You are looking for signs that cleaning could make an existing problem worse.
Check for:
- Loose vinyl panels
- Cracked caulk
- Soft or deteriorated wood
- Damaged trim around windows and doors
- Open seams near penetrations
- Fixtures or outlets that should not be soaked
If the siding is already compromised, water can get where it should not. That is one reason exterior cleaning jobs fail. The wall may look better for a week, but moisture ends up behind the siding and creates a larger issue.
Clear the work area
Trim back anything rubbing against the siding. Bushes and vines trap moisture, block your spray pattern, and keep the wall from drying evenly.
Move outdoor furniture, grills, planters, and decorations away from the work zone. Cover delicate plants if you plan to use anything stronger than a basic soap solution. Even with safer products, reducing runoff onto landscaping is smart practice.
A short visual walkthrough helps if you are new to the process:
Gather tools before you start
Do not start mixing and spraying, then stop halfway because you forgot a brush or hose nozzle. Set everything out first.
A practical setup usually includes:
- Garden hose with an adjustable nozzle
- Pump sprayer or spray bottle
- Soft-bristle brush on a hand grip or extension pole
- Bucket for mixing
- Microfiber cloths or rags for detail areas
- Plastic or drop cloths for nearby plants and fixtures
Skip abrasive pads and stiff wire-style brushes. They can leave visible marks, especially on painted surfaces, vinyl texture, and softer wood siding.
Key takeaway: Prep is not busywork. It is what keeps a mold removal project from turning into scratched siding, dead plants, or water pushed into the wall assembly.
Choose the right day
Weather matters more than most homeowners expect.
Avoid cleaning in direct hot sun because many solutions dry too quickly on the wall. Avoid windy conditions because overspray drifts onto windows, plants, and yourself. Mild temperatures with some cloud cover are easier to work in and give the cleaner enough contact time.
A calm day also makes rinsing more controlled, which is a big deal if you are trying to keep water out of seams and openings.
Choosing Your DIY Mold Cleaning Solution
Not every siding cleaner belongs on every house. For most homeowners, the primary decision is not whether a product can remove mold. It is whether it can remove mold without creating a second problem.
The safest place to start is a mild cleaner, then step up only if the staining calls for it.
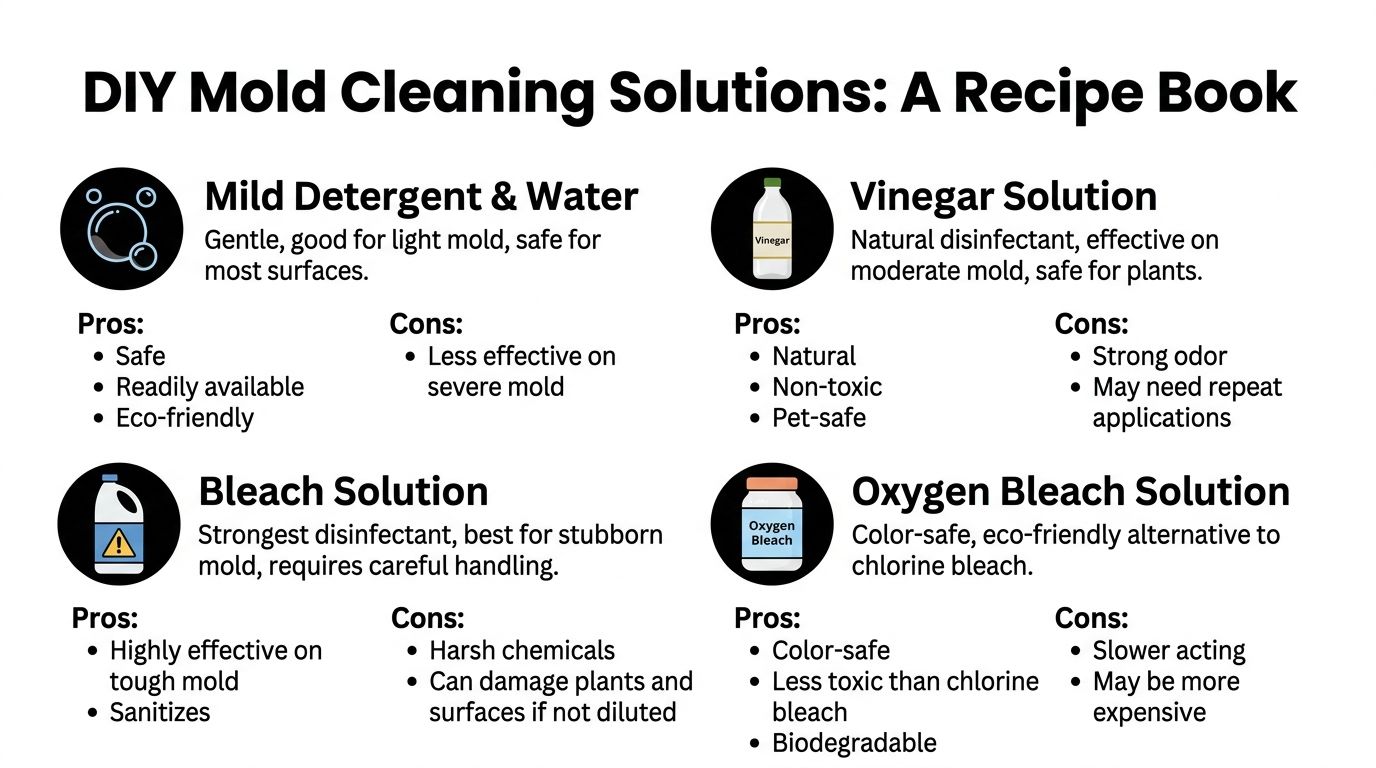
A side by side look at common options
| Cleaning option | Where it fits | Main trade-off |
|---|---|---|
| Mild detergent and water | Light dirt, dust, very light growth | May not do much on established mold |
| Vinegar solution | Moderate mold and mildew on many siding types | Strong smell, may need repeat work |
| Oxygen bleach cleaner | Heavier growth when you want a non-chlorine approach | Usually slower and more product-specific |
| Chlorine bleach mix | Strong on stubborn staining | Higher risk to siding, plants, and finishes |
Vinegar is the best first DIY option for many homes
For most reachable sections with visible mold, white vinegar is the first solution I would consider before harsher chemistry.
According to this guide on cleaning siding mold with vinegar, white vinegar kills up to 82% of mold species and can be used as an eco-friendly option without the same risk bleach poses to siding or nearby plants.
That makes vinegar a strong fit for homeowners who want a practical cleaning method without bringing chlorine into the project.
How to use it
Use a pump sprayer or spray bottle. Apply it evenly to the affected section, let it dwell, then scrub gently with a soft brush if the growth does not release on its own. Rinse with a garden hose.
The same reference above recommends letting vinegar sit for 10 minutes before scrubbing and rinsing.
For light to moderate exterior growth, this is often enough. For heavier staining, you may need a second round.
Tip: Work in small sections so the solution stays active on the wall instead of drying before you can rinse it.
Mild detergent works for surface grime, not serious growth
A simple bucket of mild detergent and water still has a place. It is useful when you are dealing with pollen, dust, and light film that is making the wall look dingy.
It is not often the answer for obvious mold colonies. On those jobs, soap may clean the dirt around the stain while leaving the growth itself rooted in place. Homeowners often mistake that partial improvement for success, then the wall looks bad again after the next damp week.
Use mild detergent when the wall is dirty. Use a mold-targeted cleaner when the wall is biologically stained.
Oxygen bleach is the stronger non-chlorine alternative
If vinegar is not enough, oxygen bleach is the next cleaner worth considering. It gives you a stronger option without the same downside profile as chlorine bleach.
For Colorado homeowners, that matters. Siding here deals with intense sun, sudden weather changes, and long dry stretches followed by moisture events. Harsh residues can become part of the problem.
Use oxygen bleach when:
- Growth is heavier than a vinegar wash can reasonably handle
- The siding is painted or color-sensitive
- Landscaping is close to the wall
- You want a stronger cleaner without chlorine
Always follow the product label for mixing and dwell time. Different oxygen bleach products vary, and this is one area where guessing is not worth it.
Why I do not recommend jumping straight to chlorine bleach
Bleach is common in DIY articles because it sounds decisive. Strong smell. Fast whitening effect. Easy to buy. That does not make it the right default.
In Colorado’s high-altitude conditions, bleach carries extra downside for siding materials that already take a beating from UV and weather swings. Bleach can also harm plants and create uneven results if it dries too fast or is mixed too aggressively.
The temptation is understandable. Homeowners see dark staining and want the most aggressive cleaner on the shelf. But on many houses, the smarter move is a cleaner that removes the mold while being gentler on the wall.
Picking the right solution for your siding
A simple way to decide:
- Vinyl with light to moderate mold: start with vinegar
- Painted wood or trim: use a gentler approach first
- Heavier staining with nearby landscaping: consider oxygen bleach
- Unknown siding finish: test a small area before full application
If you are uncertain how the surface will react, treat the first section like a test panel. Watch for discoloration, streaking, or residue before expanding the job.
One local option homeowners sometimes compare with DIY methods is soft wash house cleaning from Cultivate House Detailing, which uses low-pressure water and cleaning solutions designed for exterior organic growth rather than relying on high-force rinsing alone.
Cleaning Techniques for Vinyl Wood Stucco and Fiber Cement
The right cleaner still needs the right technique. Siding materials do not all react the same way to moisture, brushing, or rinse pressure. The mistake I see most often is using one method on every surface because it worked on one wall.
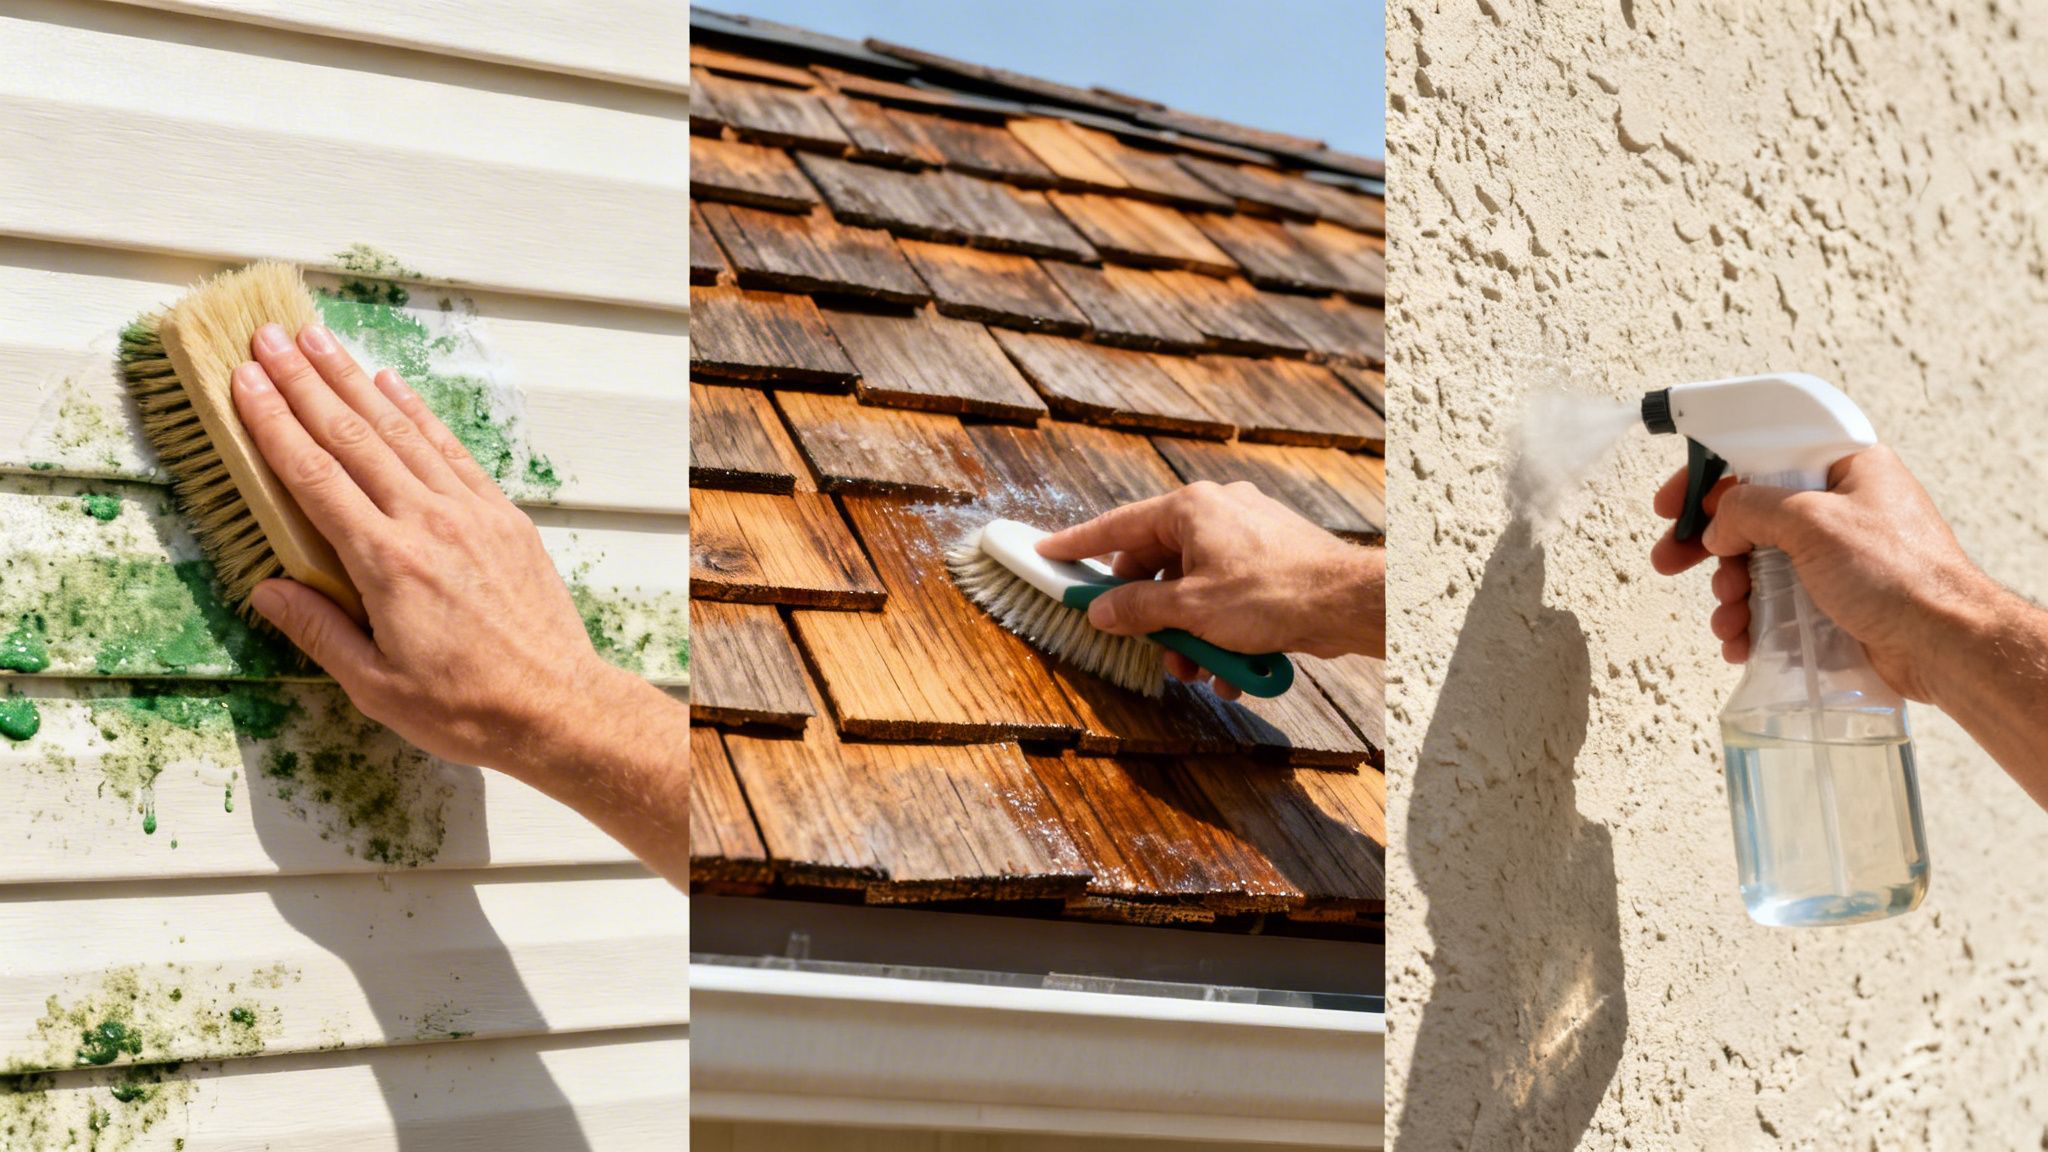
Cleaning vinyl siding
Vinyl is forgiving in some ways and surprisingly easy to damage in others. It handles a soft wash well, but seams and panel edges create risk if you blast water upward.
For vinyl, the safest approach is usually:
- Rinse loose dust and debris gently.
- Apply your chosen cleaner from the lower section upward to avoid streaking.
- Let the solution dwell.
- Agitate only where needed with a soft-bristle brush.
- Rinse downward with controlled water flow.
A soft extension brush works well on textured panels. Scrub enough to release the growth, not enough to grind grit into the finish.
If you are thinking about bleach for vinyl, there is a climate-specific downside to keep in mind. According to this article on removing algae, mold, and mildew from wood siding, in high-altitude climates like Colorado's, bleach residue can amplify UV damage on siding, and oxygen-based cleaners can reduce mold re-growth by 40% over six months, compared to 25% for bleach, without harming local vegetation.
That is one reason many homeowners here lean away from chlorine products on exposed siding.
Cleaning wood siding
Wood needs more patience. It can hold moisture longer, and aggressive scrubbing can rough up the surface or strip failing paint.
A few rules matter:
- Use a soft brush or cloth, not a stiff deck brush.
- Work with the grain when the wood surface is exposed.
- Keep rinse pressure low and controlled.
- Watch joints, end cuts, and trim details closely.
If the wood is already weathered, chalking, or peeling, cleaning may reveal that the issue is no longer just mold. At that point, the wall may need repair, prep, or repainting after cleaning.
Tip: On wood, the goal is not just getting it clean. The goal is getting it clean without forcing moisture into a material that already absorbs more than vinyl.
Cleaning stucco
Stucco changes the job because it is porous. That means mold and staining can sit in pits and texture rather than only on the surface.
The wrong move is a hard rinse that saturates the wall. The better move is slower chemistry and lighter agitation.
Use this approach:
- Pre-wet lightly if the surface is dusty
- Apply cleaner evenly with a pump sprayer
- Allow adequate dwell time
- Agitate stained areas with a soft brush
- Rinse gently and avoid prolonged soaking
Expect stucco to take longer. It is common to improve it in stages rather than make it look perfect in one pass.
Cleaning fiber cement siding
Fiber cement is durable, but it is not indestructible. It responds well to careful cleaning, especially when you keep pressure moderate and avoid driving water into joints.
A practical method is similar to vinyl:
| Step | What to do |
|---|---|
| Apply cleaner | Use a sprayer for even coverage |
| Dwell | Give the product time to work |
| Brush only as needed | Focus on stubborn patches |
| Rinse downward | Keep water moving off the wall, not behind it |
Pay attention to caulk lines and butt joints. A clean wall is not a win if the rinse water ends up behind the siding.
For homeowners comparing DIY work with a lower-risk professional method, soft washing for house cleaning is built around that same principle of cleaning the surface thoroughly without relying on aggressive pressure.
What does not work well
Some methods keep showing up because they seem convenient, not because they are reliable.
Avoid these shortcuts:
- Straight high-pressure blasting that removes surface grime but pushes water into seams
- Harsh bleach-first cleaning on sensitive or sun-exposed siding
- Metal brushes that scar finishes
- One giant all-day wash where cleaner dries before you can rinse sections properly
The best results come from working methodically, one manageable section at a time.
Using a Pressure Washer Safely on Siding
A pressure washer can remove mold fast. It can also create hidden moisture damage just as fast. That is why I never treat it like the automatic answer.
According to Iowa State University Extension guidance on cleaning house siding, pressure washing can dislodge 99% of surface spores, dirt, and debris when used annually, and siding can be cleaned in the 1,500-3,000 PSI range when done correctly. The same source also warns that improper use forces water behind siding in an estimated 20-30% of DIY jobs.
That risk is the whole story. Mold on the outside is bad enough. Water pushed behind the siding is worse.
The safe way to approach it
If you are going to use a pressure washer, stack the odds in your favor.
- Use a wide spray pattern rather than a pinpoint stream.
- Keep distance from the wall so the spray is cleaning, not cutting.
- Spray downward, never upward under laps or panel edges.
- Test a small area first before committing to a full wall.
- Avoid damaged sections where water can enter easily.
Even when the machine is set correctly, operator technique matters more than homeowners expect. A small change in angle can send water behind vinyl or under trim.
Where DIY pressure washing goes wrong
These are the most common mistakes:
| Mistake | Likely result |
|---|---|
| Spraying upward | Water intrusion behind siding |
| Standing too close | Etching, cracking, or surface damage |
| Using pressure to replace chemistry | Incomplete cleaning and faster wear |
| Washing loose or aging siding | Damage to already weak sections |
Pressure washers are also poor substitutes for ladders and access planning. Reaching high sections from the ground often means bad spray angles. That is when water gets forced into places it should never go.
When soft washing makes more sense
For mold removal, pressure is often overused because it feels productive. In practice, the safer answer is frequently lower pressure with the right cleaner and proper dwell time.
If you want a clearer comparison between those approaches, this breakdown of power washing vs pressure washing helps explain why cleaning force and cleaning safety are not the same thing.
Key takeaway: Pressure can remove what you see. It can also cause damage you do not see until much later.
When DIY Is Not Enough Call a Pro in Colorado Springs
Some mold jobs are realistic for a homeowner. Some are not. The hard part is being honest about which one you have.
A small patch on reachable vinyl siding is one thing. A second-story wall with stubborn staining, landscaping below, and questionable panel seams is a different project entirely.
Signs the job has outgrown DIY
Call a professional if any of these apply:
- The mold covers a large area instead of one contained section
- The affected wall is on an upper story
- You already cleaned it once and it came back
- The siding is painted, aging, loose, or visibly damaged
- You are considering strong bleach because milder methods failed
- You do not have safe access equipment
This is especially true for homes in Colorado Springs neighborhoods with shaded lots, tighter side yards, and long north-facing elevations. Those homes often hold moisture longer than homeowners realize.
What a professional brings to the job
A pro is not just selling labor. A good exterior cleaning contractor brings judgment.
That includes knowing when to avoid pressure, how to protect windows and plants, how to spot failed caulk and vulnerable seams, and how to match the cleaning method to the siding material. It also means finishing the job without turning a mold cleanup into a repair bill.
For many homeowners, that is the primary value. Not just a cleaner wall, but less risk.
A practical rule for homeowners
Use DIY methods when all of these are true:
- The growth is limited
- The wall is easy to reach
- The siding is in sound condition
- You can clean it gently and safely
Hire help when one or more of those conditions is missing.
That is not giving up on the project. It is making a smart call before a manageable maintenance job becomes a hidden moisture problem.
If your siding has visible mold, algae, or mildew and you would rather have it cleaned safely than experiment with pressure and bleach, a local exterior cleaning company can evaluate the material, access, and safest wash method for your home.
If you need help with mold on siding, house washing, or exterior cleaning in Colorado Springs and nearby communities, contact Cultivate House Detailing to request a quote. They provide exterior cleaning services for local homes and can help you figure out whether your siding needs a simple wash, a lower-pressure soft cleaning approach, or a more careful plan because of access or surface condition.