
You've just finished wiping a window in the Colorado Springs sunshine, and from across the room the glass looks perfect. Then the light shifts, and streaks, cloudy patches, and mineral shadows appear. That frustrating result usually isn't caused by a weak homemade solution. It comes from water quality, preparation, and the drying technique used after the cleaner hits the pane.
A reliable streak-free window cleaner DIY method starts with a simple recipe, then adds the habits professional window cleaners use on residential and commercial glass. Distilled water, clean tools, light application, and a properly timed squeegee pass matter more than adding extra ingredients. For homeowners considering how to prepare your property for sale, clear windows can also make a home feel better maintained during showings.
If you're searching for window cleaning near me, this guide will help you decide what you can handle yourself and when professional window cleaning in Colorado Springs, CO makes more sense.
Why Most DIY Window Cleaning Ends in Streaks
The usual failure happens after the spray bottle is put down. A homeowner applies a generous mist to a hot pane, wipes in circles, and steps back expecting a clean reflection. The solution dries before the cloth or squeegee can remove it evenly, leaving overlapping wipe marks that become obvious as soon as sunlight crosses the glass.
Direct sun is one of the biggest problems. Heat causes water and alcohol-based mixtures to evaporate quickly, so the cleaner dries in sections instead of being removed as one uniform film. The result can look like mineral shadows even when the glass was washed with an otherwise effective recipe. Guidance from Pella on cleaning windows also emphasizes cloudy conditions and minimal product use because rapid drying increases streaking.
The cleaner usually isn't the main culprit
Vinegar, dish soap, and rubbing alcohol can all have a useful place in DIY glass care. Vinegar contains acetic acid, which helps dissolve calcium and magnesium deposits associated with hard-water haze, as described by Wirecutter's window-cleaning guidance. Alcohol can speed evaporation, but that benefit becomes a drawback if the pane is hot or the cleaner is applied too heavily.
The tools can create streaks too. A worn squeegee blade drags moisture across the glass instead of leaving a clean edge. A cloth that has collected grease, lint, or fabric-softener residue redeposits those materials during the final wipe.
Practical rule: A light application and a fast dry pass beat a stronger mixture almost every time.
What changes the result
Professional-looking glass comes from controlling the entire process:
- Water quality: Tap water can leave dissolved minerals behind, particularly on glass cleaned in hard-water areas.
- Drying speed: Shade gives you time to wash and remove the solution before it flashes dry.
- Tool condition: Fresh rubber and glass-only microfiber cloths prevent dragging and lint.
- Application volume: Over-wetting creates more liquid, more run lines, and more residue to remove.
That's why the recipes below are only the starting point. The key to a perfect finish comes from staging the right tools, washing in manageable sections, and making the final dry pass before the solution can redeposit minerals or leave wipe marks.
Three Streak-Free Window Cleaner DIY Recipes
Choose the recipe based on the soil and the water available, not on which bottle has the most ingredients. For routine glass, diluted vinegar is usually enough. For greasy or heavily filmed panes, a low-residue blend can help, but it still needs light application and immediate drying.
Recipe one for routine interior glass
Mix one part white vinegar with one part distilled water in a clean, labeled spray bottle. This 1:1 approach is commonly recommended for regular glass cleaning, and the distilled water matters because it removes dissolved minerals that can remain behind after tap water evaporates. Vinegar's acetic acid helps loosen light film and mineral traces, making the formula useful for mirrors, interior windows, and glass doors. Wirecutter explains the role of diluted acetic acid in dissolving hard-water deposits.
Spray lightly rather than soaking the pane. Use a microfiber cloth or squeegee, then dry the edges. Don't use vinegar on natural stone frames or nearby stone surfaces, where acid can damage the finish.
Recipe two for heavier film
For greasy kitchen glass or exterior film, combine two cups distilled water, one tablespoon cornstarch, one teaspoon dish soap, and one tablespoon white vinegar. The cornstarch can help create a more effective wiping mixture, while the small amount of dish soap loosens oily soil without producing excessive foam. Shake the bottle before every use, because cornstarch settles and can clog the nozzle if the mixture sits.
This recipe is best made in a clean spray bottle and used as a fresh small batch. Apply sparingly, wash with a microfiber applicator, and dry immediately. The DIY window-cleaner guidance from The Spruce also highlights shaking before use when cornstarch is included.
Recipe three for fast flash-off
For cool-day work, mix one cup distilled water, one cup 70% isopropyl alcohol, and one tablespoon white vinegar. Alcohol accelerates evaporation, while distilled water reduces mineral spotting. That combination can be useful on interior panes where you want a quick dry-down, but it isn't a reason to work in direct sun. Avoid ammonia near tinted film, and check manufacturer guidance before using any DIY mixture on specialty glass or film.
A clean bottle, a light spray, and a dry microfiber finish are more important than extending shelf life. Homemade mixtures are best treated as working batches rather than stored indefinitely, especially when they contain cornstarch or soap.
| Recipe | Ingredients & Ratios | Best For | Key Caution |
|---|---|---|---|
| Routine vinegar blend | 1:1 white vinegar and distilled water | Interior glass and light mineral film | Keep vinegar away from natural stone frames |
| Heavier-film blend | 2 cups distilled water, 1 tablespoon cornstarch, 1 teaspoon dish soap, 1 tablespoon vinegar | Greasy kitchen panes and exterior film | Shake before every use and avoid over-spraying |
| Alcohol-based blend | 1 cup distilled water, 1 cup 70% isopropyl alcohol, 1 tablespoon vinegar | Cool-day cleaning and quick drying | Don't use ammonia near tinted film |
For readers comparing DIY formulas with spotless window cleaning products, the same principle applies: the solution must match the soil, and the glass must be dried before residue can settle.
Tools and Supplies That Make the Difference
Set everything on a counter or in a caddy before you begin. A clean spray bottle labeled with the recipe, a professional-grade squeegee with a fresh rubber blade, a strip washer or microfiber applicator sleeve, and a bucket will keep the work moving without searching for supplies mid-clean.
Add several lint-free microfiber cloths reserved only for glass. Keep a small scrub pad for sills, plus distilled or filtered water for the final rinse. Fresh rubber wipes cleanly, while a worn blade leaves trails. Glass-only microfiber avoids the grease and fabric-softener residue that often lives in general household rags.
This is also where many homeowners overcomplicate the job. Paper towels can leave lint, newspaper can smear ink, and kitchen cloths washed with fabric softener can leave a film that looks like streaking. An old towel placed below the work area is useful for protecting floors from drips, but it shouldn't be used to polish the pane.
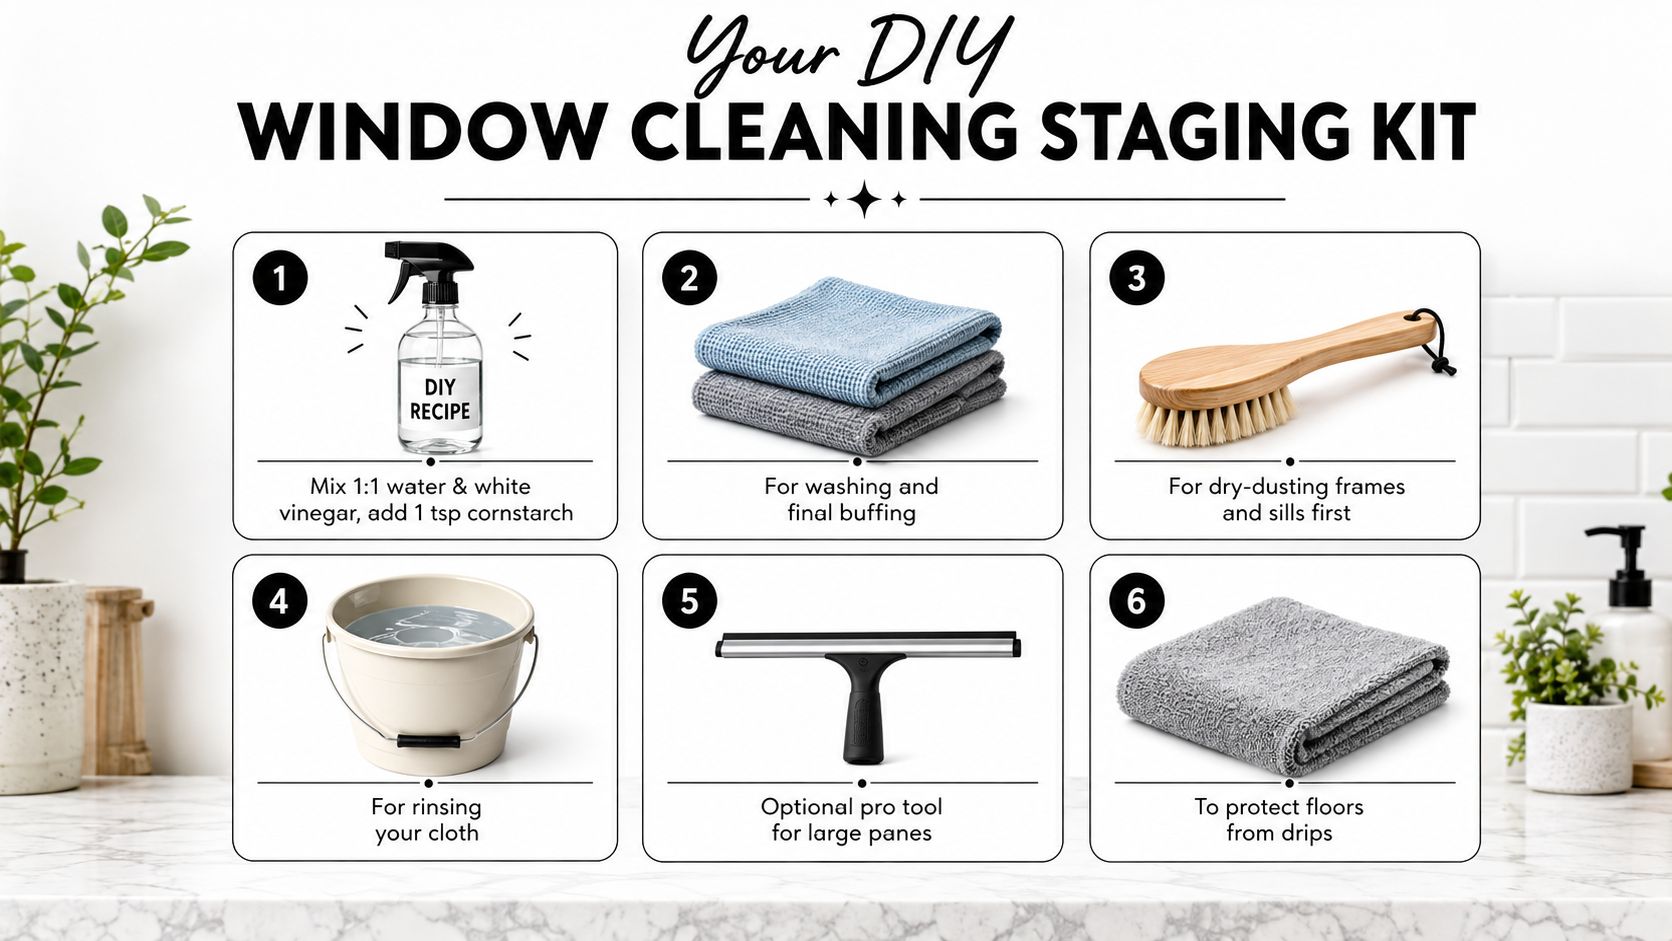
For larger panes, a strip washer loads the glass evenly and a squeegee removes moisture with fewer passes. If you're evaluating the difference between household supplies and trade equipment, this guide to professional window cleaning tools explains why blade condition, applicator quality, and water control affect the finish.
The Window Cleaning Technique That Actually Works
Start with the exterior when the layout allows it, but don't begin by spraying. Remove loose dust from the frame, sill, screen, and glass with a soft brush or dry microfiber. Grit left in place can turn into muddy streaks as soon as water reaches it.
Use a small amount of solution and work in sections. Apply with a strip washer or microfiber pad in an overlapping S-pattern, rather than making random circular swipes. The goal is even coverage with enough moisture to loosen soil, not a pane covered in runoff.
Squeegee before the solution flashes
Hold the squeegee at a consistent angle and pull in straight, overlapping strokes from top to bottom. Start at an upper corner and work edge to edge, keeping the rubber in contact with the pane. Wipe the blade after each pass so the next stroke starts clean.
The timing matters more than pressure. Pull the squeegee while the solution is still wet, especially on warm glass or in moving sunlight. If the surface begins drying before you reach it, reduce the section size and apply less product.
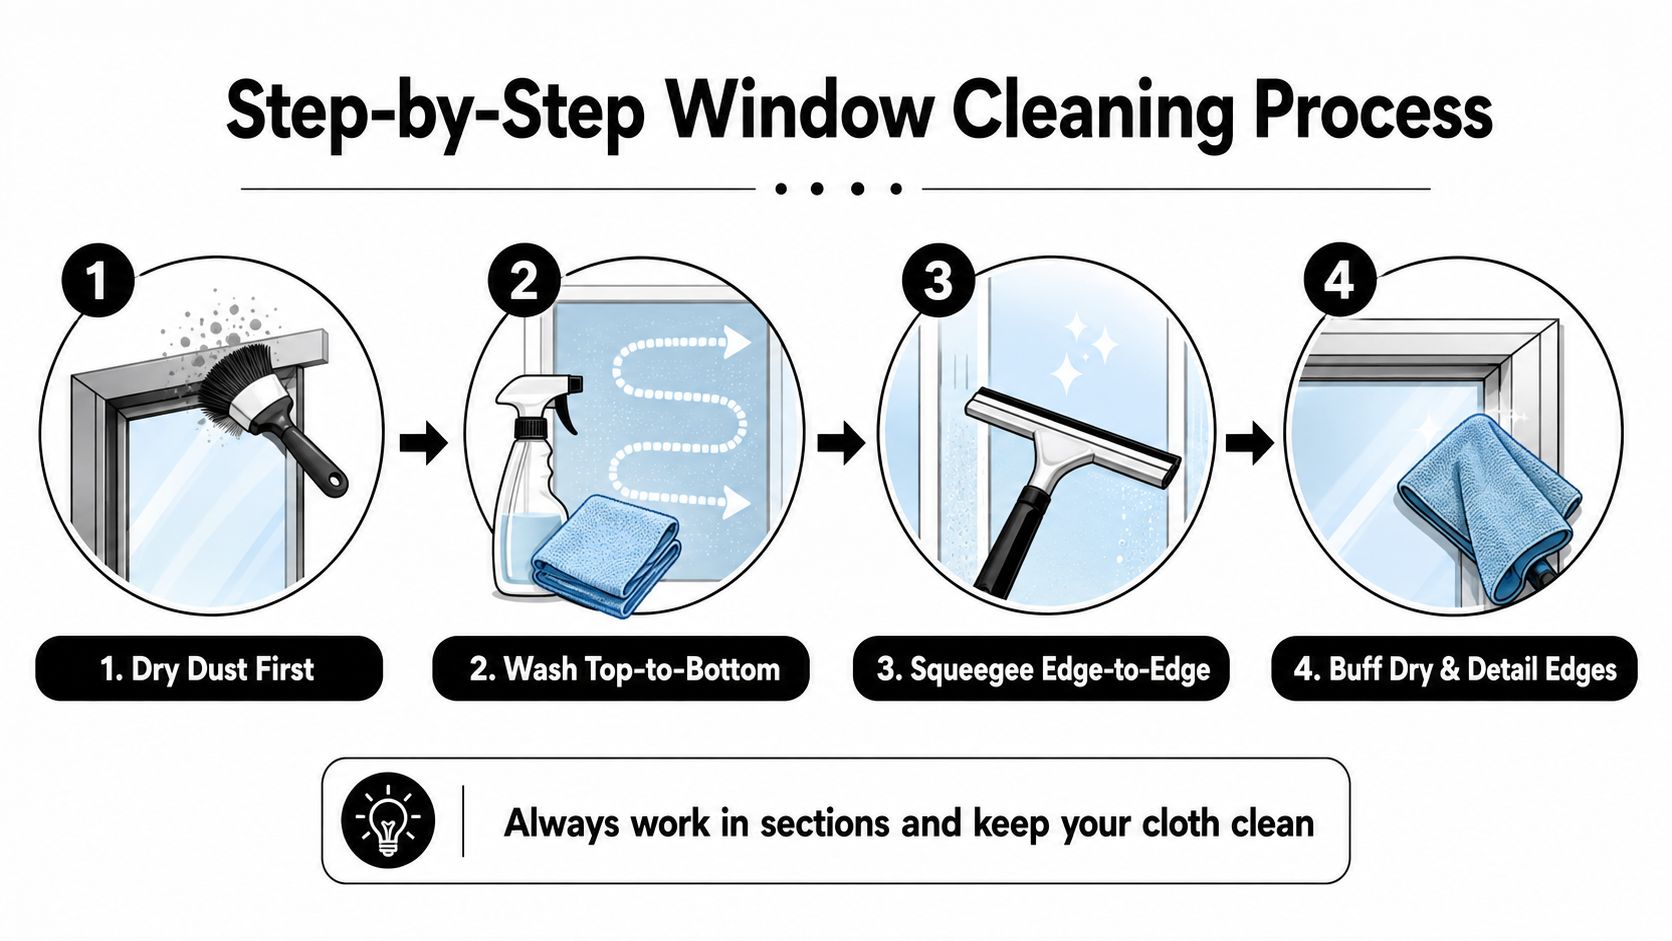
Interior glass usually needs a lighter solution load because it carries less exterior dust. A microfiber wipe can work well, followed by a dry buff pass. Keep one cloth for washing and another for finishing, and fold the dry cloth so you're always using a clean face.
Detail the perimeter last
Most amateur-looking results fail at the edges. Use a dedicated lint-free cloth to wipe the top rail, side edges, bottom corners, and sill. A folded corner of the cloth can reach into tight angles without spreading moisture back across the pane.
Before moving on, wipe the squeegee blade dry and make a final corner swipe. This small habit removes the moisture line that often remains after the main pass.
Watch the process here for a visual demonstration:
Troubleshooting Streaks, Smears, and Hard Water Spots
A streak that starts at the top edge usually has a different cause from a haze covering the entire pane. Check the residue before changing the cleaner. In Colorado Springs homes, water quality often matters as much as the formula because tap water can leave minerals behind as it dries.
| Streak Cause | What's Happening | Targeted Fix |
|---|---|---|
| Direct sun | The solution dries before it can be removed evenly | Work in shade, early morning, or on a cloudy day |
| Mineral-heavy water | Dissolved minerals remain after evaporation | Use distilled water for the final rinse |
| Dirty cloth or applicator | Grease and lint are transferred back to the pane | Rotate clean, glass-only microfiber cloths |
| Over-wetting | Excess liquid dries in runs and uneven bands | Load the applicator lightly and blot drips immediately |
Correct the conditions before changing the formula
If glass looks worse after cleaning in full sun, move to the shaded side and reduce the working area. Dry each section before the pane heats up again. A cloth that drags is usually dirty or overloaded, so replace it rather than pressing harder.
Exterior work can present a water-quality problem that a spray bottle cannot solve. A water-fed pole with purified water rinses away loosened soil without depositing the same minerals left by tap water. It is especially useful on upper panes, screens, and broad exterior surfaces where a final hand wipe is difficult.
Treat mineral spots carefully
Light mineral buildup may respond to a vinegar-based treatment, but hard-water removal depends on contact time. Pine Country Windows recommends allowing a 50/50 vinegar-and-distilled-water mixture to dwell for about 10–15 minutes before rinsing. Keep the glass wet during that dwell period, and test a small area first. A white mark is not automatically removable residue.
Older deposits may have etched the glass. Etching changes the surface itself, so stronger household chemistry may fail, while aggressive scrubbing can make the defect more visible. Use this guide to removing hard-water stains from windows for treatment considerations, then stop if the mark remains after careful removal.
Regular rinsing reduces the chance of minerals bonding to the pane. The same maintenance principle applies around the home, where homeowners can review guidance on how to prevent mineral crust on fixtures. If spots return quickly, address the water source and cleaning method instead of repeatedly adding vinegar.
When DIY Stops Working and a Pro Makes Sense
DIY cleaning is reasonable for accessible interior glass and lightly soiled ground-level windows. The boundary changes when the problem involves height, bonded mineral deposits, or construction residue.
Hard-water etching on older Colorado Springs homes is a common example. A vinegar solution may soften removable deposits, but it won't restore glass that has already been etched. Repeated scraping can create new scratches, so the sensible move is to stop and have the surface assessed.
Height creates a separate concern. Exterior panes above the second story, including fourth-story glass, require safe access and controlled equipment. A ladder placed on uneven ground or stretched beyond a stable working position isn't worth the risk for a cleaning job.
Remodel and construction glass can also exceed normal DIY territory. Paint overspray, stucco film, and sealant smears may require careful razor work and specialty solvents, with attention to the frame, seals, and glass coating.
A service such as Cultivate House Detailing can handle professional residential and commercial window cleaning up to the fourth story using purified water-fed poles, professional squeegee technique, frame and sill detailing, and screen cleaning. The practical value is risk reduction and saved time, not luxury. It also gives property managers, business owners, and sellers a repeatable result when exterior window washing, screen cleaning, or hard-water stain removal requires more than a spray bottle.
Your Streak-Free Window Cleaning Checklist
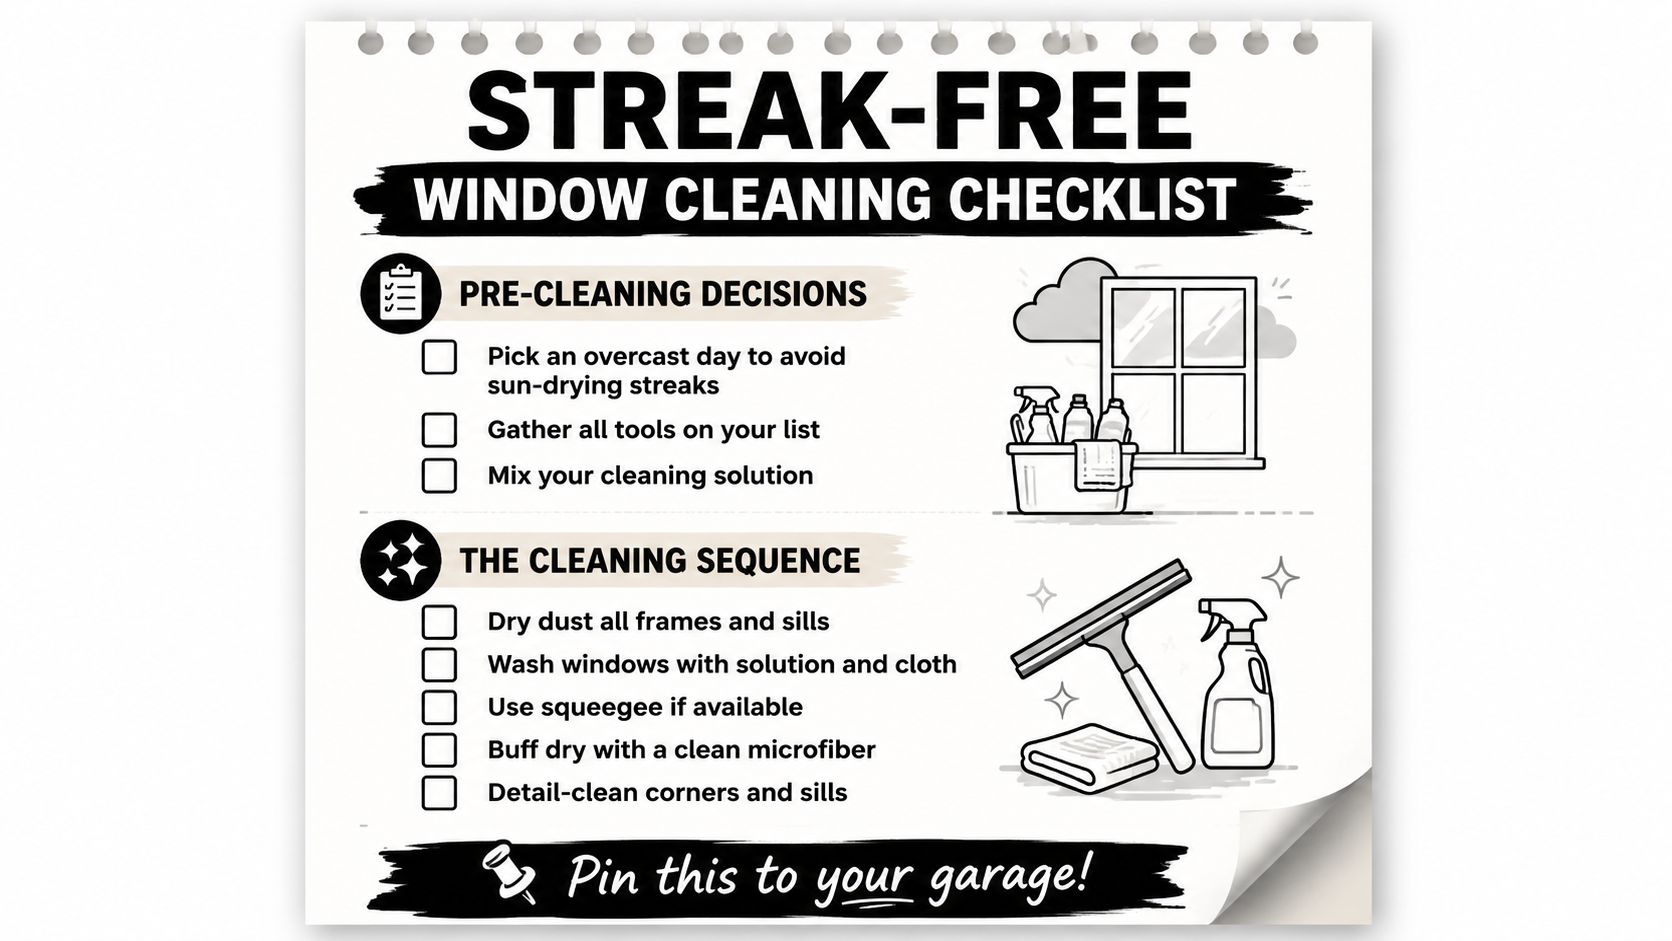
Use this list each time rather than relying on memory. A consistent routine prevents the small shortcuts that create visible streaks.
- Choose conditions: Pick an overcast day, watch for low wind, and decide whether distilled or tap water is appropriate for your local water quality.
- Stage supplies: Gather the labeled bottle, bucket, applicator, fresh squeegee blade, glass-only microfiber cloths, scrub pad, and floor towel.
- Prepare the window: Clear the sill, dry-dust the frame and sill, and remove loose dirt before applying solution.
- Mix carefully: Choose the recipe that matches the soil and shake any cornstarch mixture before use.
- Wash lightly: Apply solution to the microfiber scrub pad and work in overlapping S-patterns.
- Squeegee promptly: Pull from top to bottom with a clean rubber blade before the solution flashes dry.
- Finish dry: Buff edges, corners, and sills with a dry microfiber, then inspect the glass from an angle.
- Troubleshoot: Repeat stubborn smears, use a vinegar boost for mineral spotting, and stop if the glass appears etched.
- Know the limit: Book professional exterior cleaning if the windows sit above the second story, show mineral damage, or streak despite correct preparation and technique.
If you're ready to skip the ladder, mineral diagnosis, and repeat wiping, schedule residential or commercial window cleaning with Cultivate House Detailing. The Colorado Springs team provides exterior and interior window cleaning, screen and frame detailing, and purified-water service for hard-to-reach glass, so request a quote and arrange a convenient service visit.
Rather not do it yourself? Cultivate House Detailing offers residential window cleaning in Colorado Springs. Get a free quote.