A light fixture usually gives you warning before it fails. It flickers on cold mornings. The canopy starts to sag a little from the ceiling. A glass shade rattles when the door closes. Then one evening you flip the switch and nothing happens, or worse, the fixture pops, smells hot, or drops debris onto the floor.
That's the point where most homeowners in Colorado Springs start searching for help with broken light fixtures. Some want to fix it themselves. Others just want to know whether the fixture is still safe enough to leave in place until an electrician can get there. Both are reasonable questions, and the answer depends on what failed, how the fixture is mounted, and whether the problem is mechanical, electrical, or tied to a newer LED driver or smart control.
Understanding the Risks of Broken Fixtures
Colorado Springs homes go through wide temperature swings, dry air, dust, and the occasional storm-related power hiccup. Those conditions don't automatically break a fixture, but they do expose weak mounting, brittle components, and old wiring splices fast. A ceiling light that has been “mostly fine” for months can become dangerous the moment vibration, heat, or moisture pushes it over the edge.
One common example is a hallway or entry fixture that starts flickering during a winter storm. The fixture may still turn on, so it's easy to ignore. But if the base is loose, the wire insulation is damaged, or the glass is cracked, you're no longer dealing with a cosmetic issue. You're dealing with a fixture that can shock someone, overheat, or drop glass unexpectedly.
Practical rule: If a fixture is loose, hot to the touch, making noise, or shedding parts, treat it as unsafe until you've cut power and inspected it.
The injury risk is not theoretical. Between 1995 and 1999, lighting-related incidents accounted for thousands of emergency room visits annually due to electrical failures and broken glass in fixtures, according to the U.S. Consumer Product Safety Commission lighting hazard report. That history still matters because the same failure patterns show up today. Loose housings, overheated components, broken shades, and failed sockets still hurt people.
What makes a broken fixture dangerous
A bad fixture usually creates one or more of these hazards:
- Shock risk: Exposed conductors, damaged sockets, and loose wire connections can energize metal parts.
- Burn risk: Heat buildup inside a canopy or junction box can char insulation and overheat trim pieces.
- Falling parts: Glass shades, trim rings, and fixture bodies can detach if the mounting strap or screws fail.
- Hidden damage: Water staining, brittle insulation, and arcing marks inside the box often don't show from the floor.
Some failures are obvious. Others hide under a decorative cover. That's why the first smart move isn't replacing parts. It's making the fixture safe enough to inspect without guessing.
Assessing Fixture Condition Safely
Before you touch the fixture, cut power at the breaker. Don't trust the wall switch alone. A switch only interrupts one part of the circuit, and older wiring can surprise you. Use a non-contact voltage tester at the switch, the fixture body, and the conductors once the canopy is open.

If the fixture is mounted high, think hard before climbing. A shaky step stool under a heavy chandelier is how a lighting problem becomes a ladder injury. If you need safer setup guidance for work at height, review these ladder safety basics for home exterior access and apply the same caution indoors.
Start with the mounting and visible shell
Stand back and look at the fixture before removing anything. You're checking for movement, tilt, missing screws, and cracked glass. If the fixture body pulls away from the ceiling or wall, support it by hand before loosening trim.
Then inspect these points in order:
Canopy or backplate
Look for gaps, wobble, rust stains, or signs the fixture has been rubbing against the surface.Glass, shades, and trim
Hairline cracks matter. So do chipped edges around screw-down retainers.Mounting screws and strap
If screws are stripped or the strap is bent, the fixture may not be secure even if it still lights.Junction box stability
The box itself should not move inside the wall or ceiling opening.
A fixture that works electrically can still fail mechanically. Homeowners often focus on the lamp or switch and miss the loose support hardware.
Check the socket and wiring condition
Once the fixture is open and confirmed de-energized, inspect the socket and conductors. A flashlight helps more than overhead room light here because heat marks and insulation damage are easier to spot with direct light.
Watch for:
- Cracked sockets with broken phenolic or ceramic parts
- Scorched wire nuts or darkened copper
- Brittle insulation that flakes when moved
- Green or white corrosion on terminals
- Burn marks around the hot tab in the socket
Take a few photos before moving wires. That gives you a reference if you need to reassemble the fixture or explain the issue to an electrician. At the end of the inspection, you should know whether the problem is mostly structural, clearly electrical, or likely tied to a control component such as a dimmer or driver.
Diagnosing Electrical and Component Issues
Many broken light fixtures aren't “dead.” They're misdiagnosed. Homeowners replace a whole fixture when the specific failure is a bad socket, a failed driver, a dimmer mismatch, or a smart controller that needs a reset.
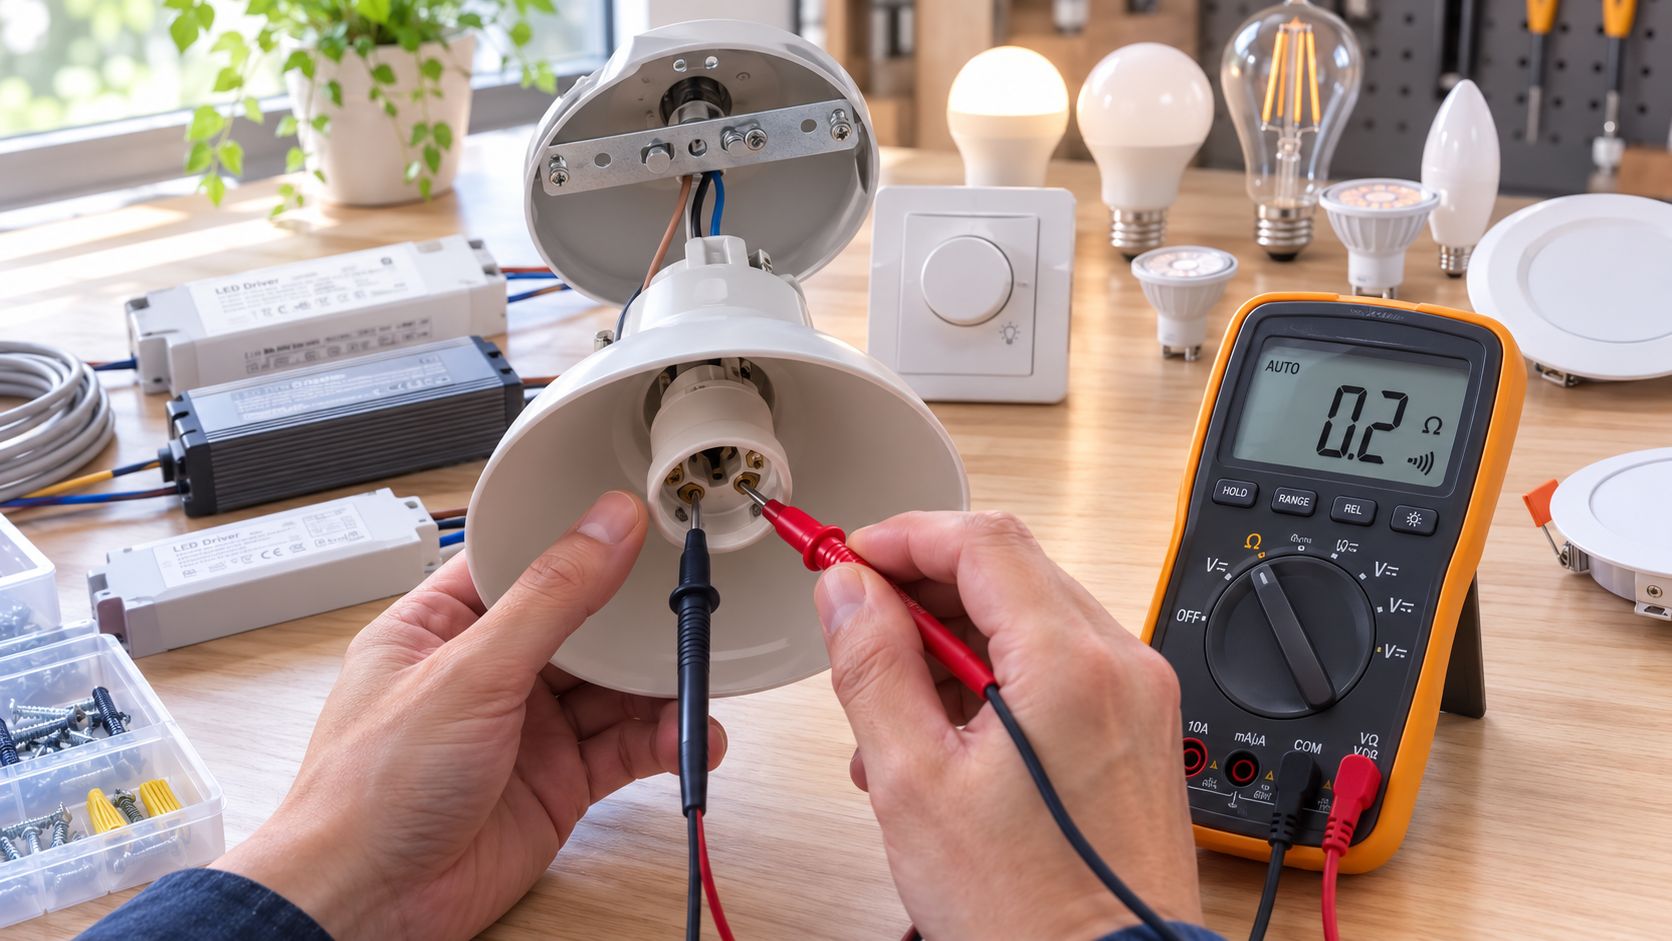
Start simple. Confirm the bulb first, if the fixture uses replaceable lamps. Move a known working bulb from another fixture into the suspect one. If the fixture still fails, test for voltage at the socket or driver input only after following safe testing practice.
Distinguish wiring faults from smart and LED issues
Modern fixtures add a layer that older repair guides often skip. Over 45% of modern LED fixture failures stem from incompatible dimmer switches or outdated controller firmware rather than wiring faults, based on this LED fixture troubleshooting reference. That changes the repair order.
If you have an LED pendant, vanity light, or flush mount that glows faintly, strobes, won't dim smoothly, or won't turn on after a switch change, check compatibility before opening splices. The dimmer may be wrong for the driver. The smart control may need a reset or firmware update. The fixture may be getting power just fine.
Here's a practical diagnostic split:
- Likely wiring problem: no power at the fixture, intermittent power when wires move, visible arcing or heat damage
- Likely socket problem: replaceable bulb works elsewhere, but not in this socket; center contact is flattened or charred
- Likely driver or control problem: integrated LED fixture has power input but no stable output, flickers with a dimmer, or behaves erratically after smart-home changes
For growers and others working around older high-intensity lighting equipment, the logic is similar even if the hardware differs. This guide to ballast replacement for cannabis growers is useful because it shows how power delivery components fail separately from the lamp itself.
A simple diagnostic sequence that works
Use a clean sequence so you don't swap random parts.
| Check | What you're looking for | What it usually means |
|---|---|---|
| Bulb test | Known good bulb still fails | Problem is beyond the bulb |
| Breaker and switch | Breaker is on, switch functions normally | Move to fixture-side diagnosis |
| Voltage at fixture input | Power reaches the fixture | Suspect socket, driver, or internal wiring |
| Socket condition | Burned tab, cracked shell | Replace socket if fixture design allows |
| Dimmer compatibility | Flicker, strobe, dropouts | Replace dimmer or update control setup |
A short visual walk-through can help if you're sorting through a non-working ceiling light with a meter and hand tools:
If the fixture has an integrated LED board and sealed electronics, stop before forcing a repair the product wasn't built to accept. On many newer units, the actual serviceable part is the driver or control, not the light engine.
Repairing and Temporarily Securing Fixtures
Once you know what failed, the next step is choosing between a real repair and a safe temporary hold. That decision matters most when parts are missing, discontinued, or backordered. Homeowners often get stuck because the fixture isn't fully restorable, yet it also shouldn't be left hanging loose or energized.
30% of urban light fixture repair requests are abandoned due to missing parts; structured temporary safety fixes can keep fixtures functional and code-compliant, as discussed in this light fixture repair discussion on missing parts and safe temporary solutions. That lines up with field reality. A fixture doesn't always need perfect cosmetic restoration on day one. It does need to be safe.

Follow a clean repair order
A careful workflow prevents repeat failures:
Turn off the breaker and verify power is absent
Use your tester again before touching conductors.Remove damaged decorative parts first
Take off broken glass, bent trim, or loose shades so they can't fall while you work.Repair the actual failure point
Replace the socket, remake a loose splice with the correct wire connector, or correct the dimmer and driver issue.Rebuild support
Tighten the mounting strap, replace stripped screws, and make sure the junction box can support the fixture.Test before full reassembly
Restore power briefly, confirm operation, then shut power back off to finish assembly.Reinstall covers and secure the body
Nothing should twist, sag, or shift when lightly handled.
Don't use decorative trim to “hold” a fixture against the ceiling. The box and mounting hardware carry the load, not the cover.
Smart LED driver diagnostics that save unnecessary replacements
This is the step many generic guides miss. If the fixture is modern and uses an integrated LED driver or smart dimmer, check compatibility and software before replacing hardware.
A workable protocol looks like this:
- Bypass the suspect dimmer temporarily if the fixture allows standard switching
- Reset the smart control through the manufacturer's normal process
- Confirm firmware status on the controller or hub
- Match the dimmer type to the driver rather than assuming any LED dimmer will work
- Retest at full power before dimming
If the problem disappears on a standard switch, the fixture may not be broken at all. The control chain is.
Temporary fixes that are actually acceptable
Sometimes the right move is to secure or disable the fixture until the proper part arrives. Good temporary fixes are plain, stable, and code-aware.
Examples include:
- Blanking off the box if the fixture must be removed entirely
- Securing a loose body with proper hardware while waiting for a replacement strap
- Removing broken glass shades and operating only if the fixture design safely permits it
- Leaving the circuit off and labeling it when damage is unresolved
If you want to compare how licensed pros approach more involved fixture service work, this example of expert electrical repairs in Palm Beach gives a useful outside reference for the kind of issues that usually move beyond DIY.
What doesn't work is tape as structural support, loose wirenuts tucked behind trim, or “temporary” operation with exposed conductors. Those shortcuts create the next service call.
Deciding on Replacement and Estimating Costs
Not every fixture deserves a repair. If the canopy is bent, the box support is poor, the wiring chamber is heat-damaged, and the replacement parts are obscure, replacement is often cleaner and safer. That's one reason fixture turnover stays steady. The global lighting fixture market was valued at USD 145.0 billion in 2025, which reflects ongoing demand for both new fixtures and replacements tied to wear, failure, and upgrades.
Repair or replace
A repair usually makes sense when the failure is isolated. Think single bad socket, loose mounting strap, or a dimmer compatibility issue on an otherwise sound fixture. Replacement makes more sense when the damage spreads across structure, wiring space, and finish, or when the fixture uses proprietary parts you can't reasonably source.
Use this short checklist:
- Repair it if the fixture body is solid, the failure point is clear, and safe parts are available.
- Replace it if the housing is cracked, support is compromised, or integrated electronics have failed in a non-serviceable unit.
- Call a pro if the junction box moves, the wiring is brittle, or the fixture is tied into a switch loop or smart control setup you can't confidently trace.
For homeowners comparing local lighting upgrades as part of a bigger refresh, these lighting options in Colorado Springs can help frame what a replacement project may involve beyond the fixture itself.
Estimated Fixture Replacement Costs
The numbers below are practical planning ranges rather than fixed bids. Material choice, ceiling height, wiring condition, and access all change the final price.
| Fixture Type | DIY Cost | Professional Cost | Time Required |
|---|---|---|---|
| Basic flush mount | Lower upfront cost if tools and tester are already on hand | Higher upfront cost, but includes safer diagnosis and installation | DIY may take longer; pro work is usually faster |
| Decorative chandelier or pendant | Moderate to high depending on weight and hardware | Higher due to assembly, support, and alignment work | Longer because setup and support matter |
| Smart or integrated LED fixture | Cost depends on fixture and compatible control parts | Higher if driver, dimmer, or control troubleshooting is needed | Often longest because diagnostics come before install |
The cheapest path on day one isn't always the cheapest result. Replacing a good fixture because of a bad dimmer wastes money. Reusing a damaged fixture to save money can create a bigger repair later.
Safe Disposal and Maintenance Tips
Once a fixture comes down, don't toss everything into one trash bag. Broken glass, metal edges, and electronic components need different handling. Wrap sharp glass separately, keep small screws and trim in a container, and isolate any electronic modules or drivers so they don't rattle loose and cut through the bag.
For components that qualify as specialty waste, this guide to proper disposal of universal waste materials is a useful reference point before you load up the car. It helps you sort what belongs in standard disposal versus what needs dedicated handling.
Maintenance that prevents repeat failures
Colorado Springs homes benefit from simple seasonal checks:
- Spring: wipe dust from fixture openings and inspect for loosened glass after windy months
- Summer: check smart controls and LED drivers if fixtures act erratically in hotter spaces
- Fall: tighten exterior-adjacent fixture hardware before colder weather arrives
- Winter: watch for flicker, delayed starts, or movement in fixtures near entries and garages
Clean fixtures also last longer because heat escapes better when vents and housings aren't packed with dust. If a fixture starts buzzing, leaning, or running hot, deal with it early. Small fixture problems are manageable. Delayed ones usually get more expensive and less repairable.
If you're already taking care of lighting, glass, and exterior upkeep around your home, Cultivate House Detailing is a strong local option for keeping the rest of the property in shape. They serve Colorado Springs and nearby communities with professional window cleaning, screen repair, pressure washing, gutter cleaning, and seasonal lighting services, which makes it easier to keep your home looking sharp and functioning well without juggling multiple contractors.
Want it handled by a local crew? Cultivate House Detailing offers holiday lighting installation in Colorado Springs. Get a free quote.