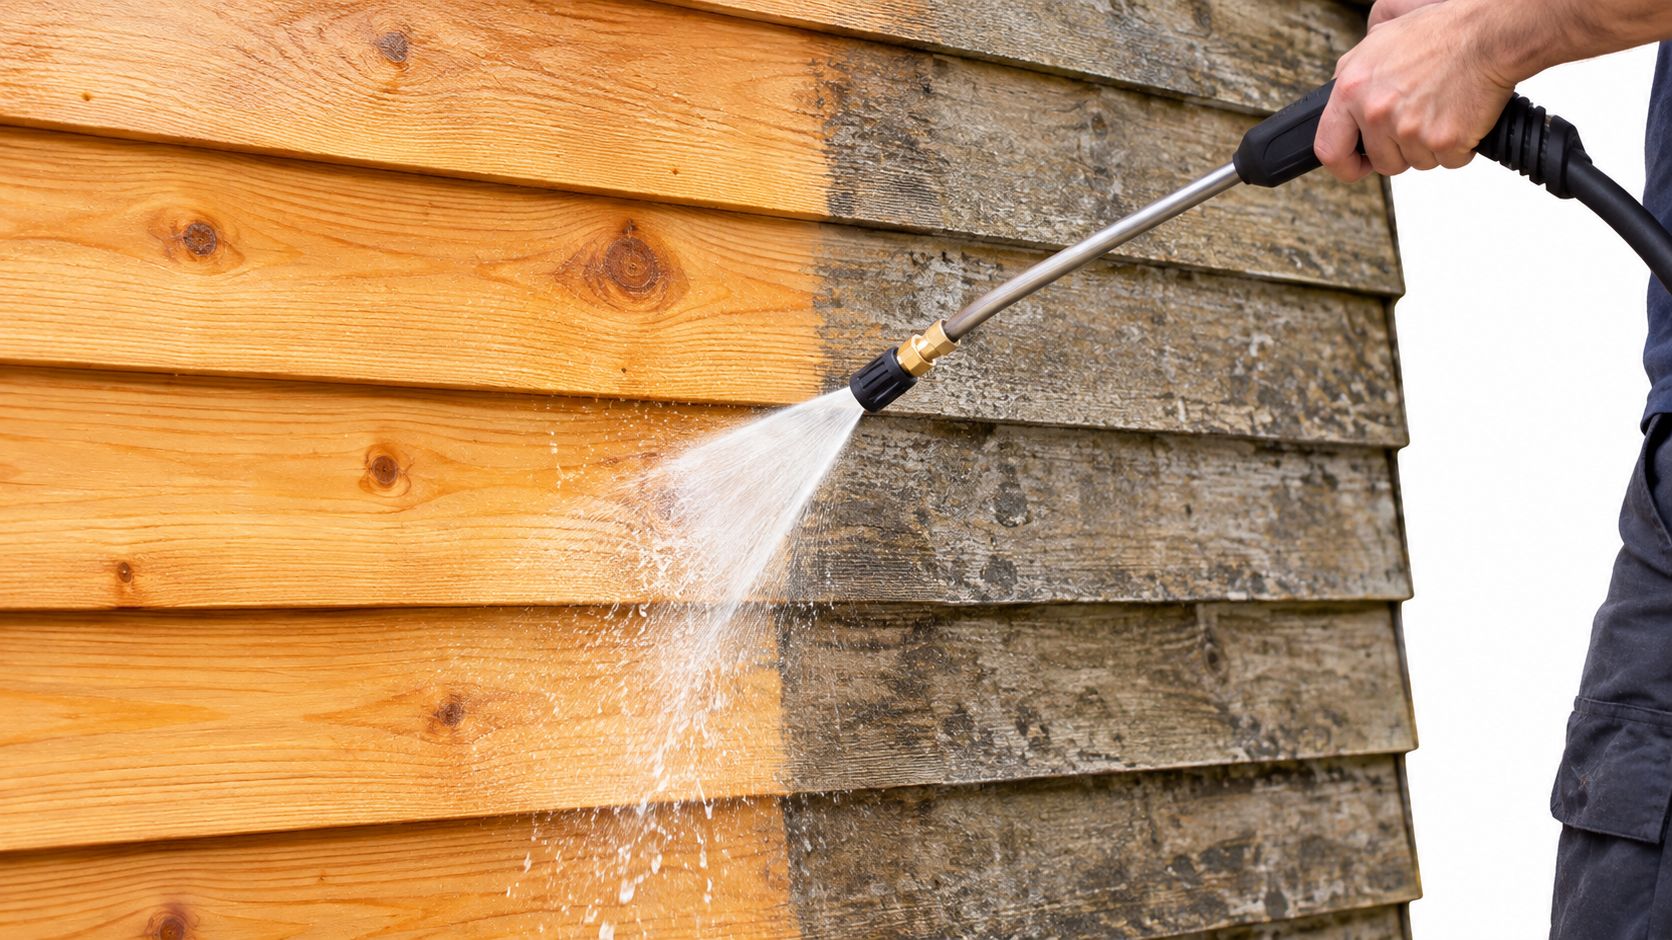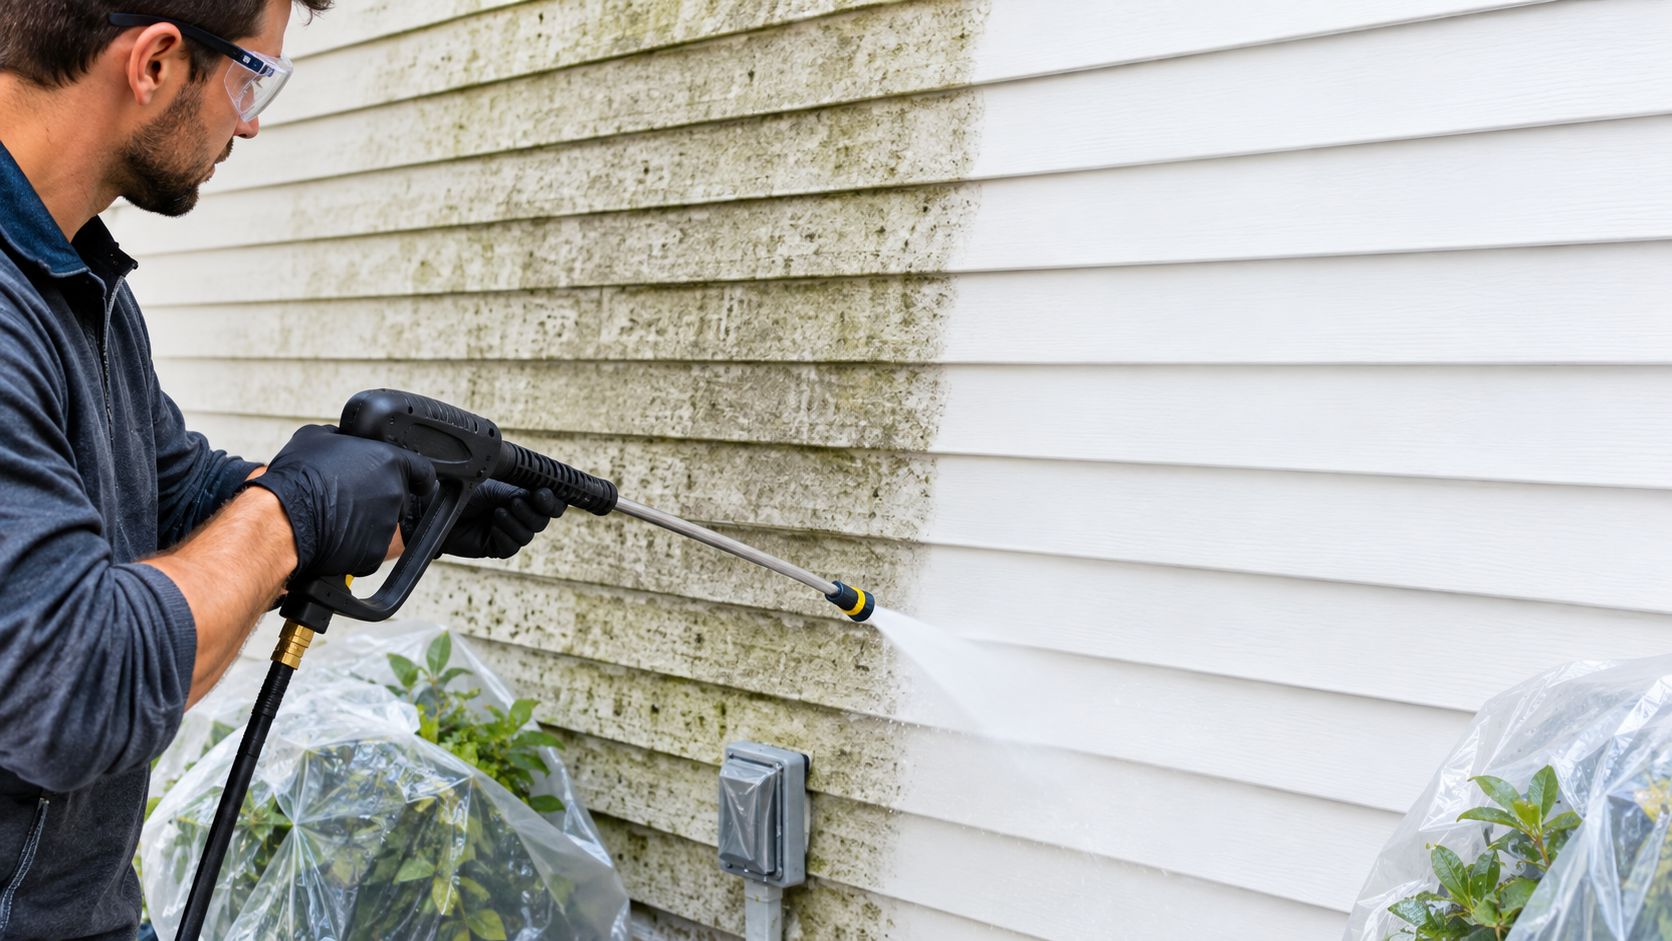
For most residential siding, start with about 1,200 to 1,500 PSI, a wide fan tip, and a downward spray angle. The best way to pressure wash siding usually isn't using more force. It's knowing when low-pressure washing is enough and when a true soft wash is the smarter, safer move.
A lot of homeowners get bad advice on this job. They assume cleaner siding comes from a stronger machine. In practice, most siding damage happens because someone uses too much pressure, picks the wrong nozzle, or sprays up under the laps instead of following the way the wall is built to shed water.
That matters in Colorado Springs, CO, where siding picks up dust, pollen, runoff marks, and organic growth in shaded areas. If you're searching for a practical answer on the best way to pressure wash siding, the question is simpler. Should you be pressure washing this siding at all, or would a low-pressure soft wash clean it more safely?
For homeowners who already care about the look of their property, that same decision-making matters with glass too. Dirty siding and dirty windows usually show up together, especially after wind, seasonal buildup, and hard water exposure. If you're also comparing window cleaning near me, window cleaning in Colorado Springs, CO, or professional window cleaning options, the same rule applies. Good exterior cleaning is about matching the method to the surface, not blasting everything the same way.
Why Pressure Isn't Always the Point of Siding Cleaning
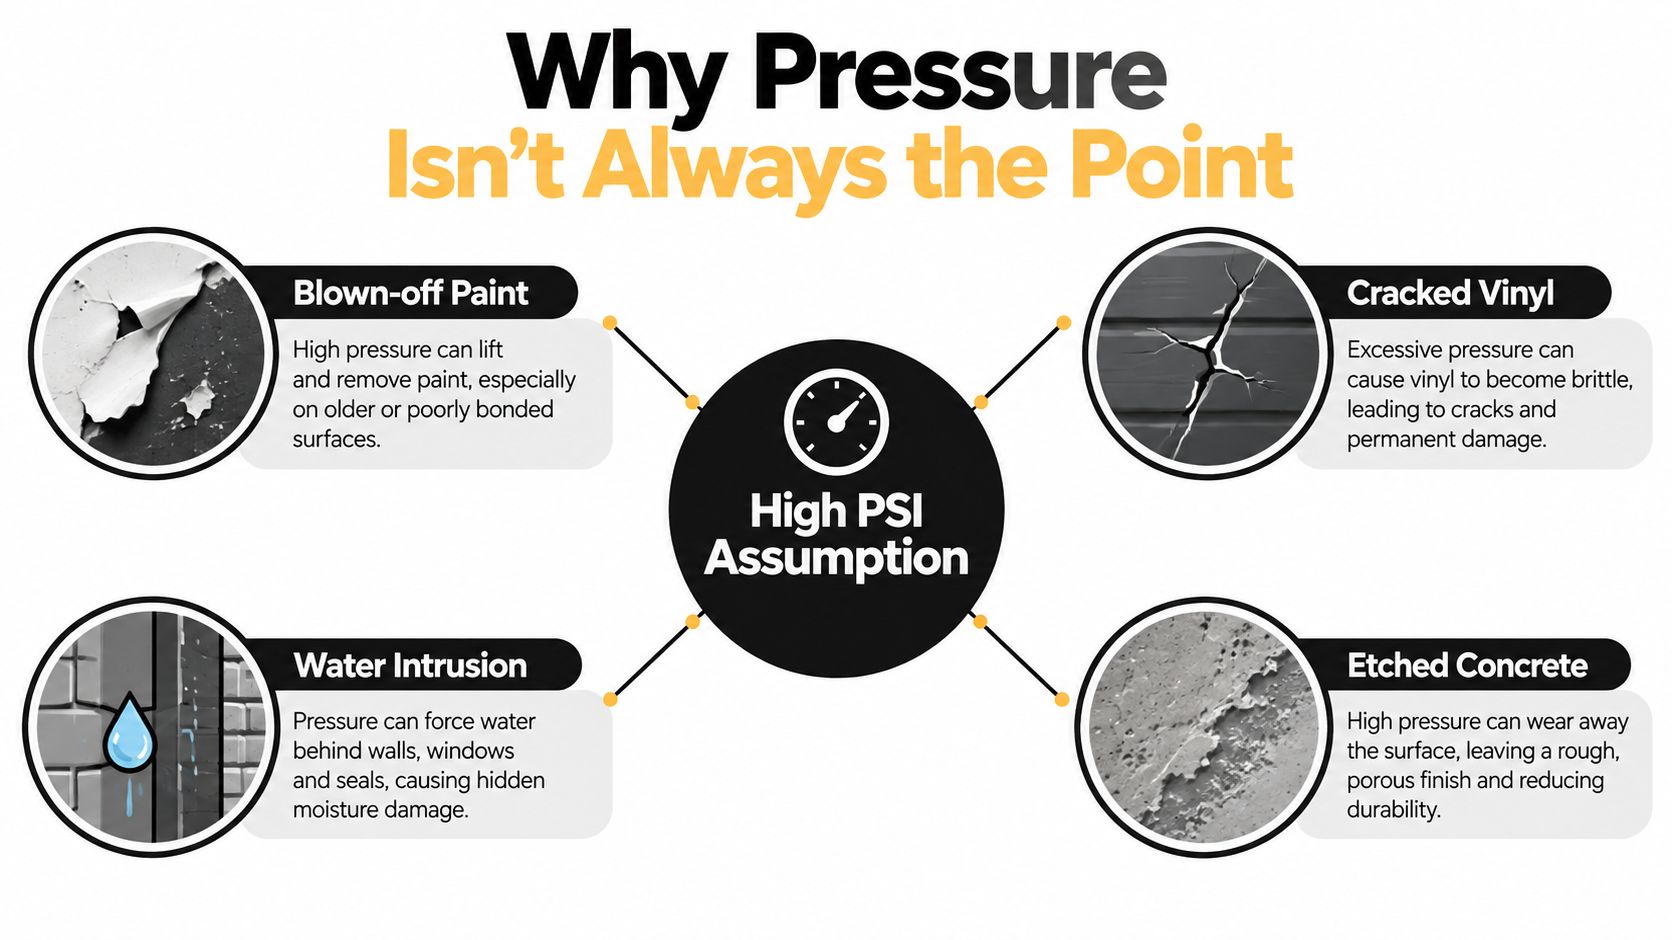
The biggest mistake on a siding wash is thinking PSI does all the work. It doesn't. The cleaner result usually comes from controlling pressure at the wall, nozzle spread, and spray direction, not from chasing the highest number on the machine.
Independent guidance commonly places vinyl siding cleaning around 1,200 to 1,500 PSI with a broad nozzle and a downward spray angle, while also warning that higher pressure can force water behind lap joints and trap moisture where you can't see it yet pressure washing PSI guidance for siding. That hidden moisture is where homeowners get into trouble.
What actually cleans siding
Siding usually needs two things. It needs the soil loosened, and it needs the rinse to carry that material off the wall without driving water into seams, trim, or window edges.
That's why a wide fan tip often beats a tight jet. A broad pattern spreads force across more surface area. You get cleaning action without turning the wand into a cutting tool.
Practical rule: If your setup makes you rely on brute force, your setup is wrong for siding.
What goes wrong when force replaces technique
The failure points are predictable:
- Paint comes off: Older painted surfaces lose finish before grime releases.
- Vinyl joints open up: The spray hits the lap edge and lifts where it should glide past.
- Aluminum dents: Consumer guidance warns aluminum can dent, which is why starting low makes sense.
- Moisture gets behind the wall: That damage often shows up later, not during the wash.
Homeowners in Colorado Springs often focus on visible dirt because that's what they can see from the driveway. The bigger issue is what happens after a bad rinse. A wall can look clean on wash day and still end up with swelling trim, interior staining, or mold risk because the water went where it shouldn't.
That same surface-specific mindset is why people hire professional window cleaning, residential window cleaning, and commercial window cleaning instead of wiping glass with whatever is nearby. Technique protects the finish. Whether it's exterior window cleaning, interior window cleaning, or siding, control matters more than force.
Pressure Washing vs Soft Wash for Siding
A lot of articles treat pressure washing as the default and soft washing as a side note. That's backward for many homes. On siding, the smarter first question is which method matches the material and the grime.
Several guides now frame siding cleaning as a low-pressure chemical-and-rinse task rather than a high-pressure blasting job, especially for vinyl and wood soft washing versus pressure washing for exterior surfaces. That shift matters because the method should match both the surface and the contamination.
Pressure Washing vs Soft Wash at a Glance
| Factor | Pressure Washing | Soft Wash |
|---|---|---|
| Primary cleaning action | Mechanical force removes soil from the surface | Cleaning solution and dwell time loosen and kill buildup before rinsing |
| Best fit | Heavier soil on harder surfaces | Sensitive or aging siding, painted finishes, organic growth |
| Risk profile | Higher chance of damage if nozzle, angle, or distance are wrong | Lower risk to seams, trim, and finishes when done correctly |
| Typical homeowner mistake | Using too aggressive a tip or spraying too close | Letting detergent dry on the wall |
| Good candidate surfaces | Some harder exterior materials and stubborn caked-on grime | Vinyl, aluminum, painted wood, and many situations where water intrusion is the bigger concern |
When pressure washing makes sense
Pressure washing has a place. If the surface is hard enough and the contamination is stubborn enough, mechanical force can move dirt fast. It's useful when you're dealing with baked-on mud, heavy surface grime, or a wall that won't release material through detergent and rinse alone.
When soft wash is the better call
Soft washing is often the safer default on siding because the wall doesn't need to be attacked to get clean. It needs the grime, algae, or mildew loosened so a low-pressure rinse can take it away.
Soft wash isn't the “weaker” method. On many siding jobs, it's the more appropriate one.
This is the part homeowners miss. If the wall is older, painted, brittle, or already vulnerable around seams and trim, a detergent-first approach reduces risk. That's often the best way to pressure wash siding, oddly enough. You use the machine as a controlled rinse tool, not as the thing doing all the cleaning.
If you own a home or commercial property in Colorado Springs, that same thinking applies across the whole exterior. Siding, windows, screens, and tracks all respond better when the method matches the material. That's why window washing, screen cleaning, and track cleaning are usually handled as separate tasks rather than one aggressive rinse for everything.
Matching PSI and Nozzle to Siding Type
There isn't one universal setting for every house. The safe approach is to match the wall material to the pressure range, nozzle width, and spray behavior.
For residential siding, a sound technical starting point is roughly 1,200 to 1,500 PSI with a fan spray rather than a pinpoint jet, which aligns with guidance for common surfaces around the home and reduces the chance of driving water behind seams or trim Consumer Reports guidance on safe pressure washer surfaces.
PSI, Nozzle, and Distance by Siding Material
| Siding Type | PSI at Surface | Nozzle (Degree) | Standoff Distance |
|---|---|---|---|
| Vinyl | 1,200 to 1,500 PSI | 25° or 40° | Keep a comfortable distance and test before committing |
| Aluminum | 1,200 to 1,500 PSI | Wide fan tip | Start at the lowest effective pressure |
| Painted wood | 1,200 to 1,500 PSI | Wide fan spray | Longer distance than you think you need |
| Stucco | 1,200 to 1,500 PSI | 25° to 30° | Controlled, cautious passes |
| Fiber cement | Lower pressure is often preferred, and many pros choose soft wash methods | Wide fan spray | Test a small section first |
The nozzle matters as much as the PSI
For vinyl siding, multiple independent guides keep landing in the same place: use a 25° or 40° nozzle, and avoid a 0° tip because the concentrated stream can damage siding or force water behind panels vinyl siding operator guidance on nozzle choice. That's one of the clearest mechanical rules in the whole job.
Material-specific guidance matters because siding isn't one uniform category. Painted soft-grain wood, aluminum, and traditional stucco are typically grouped in the 1,200 to 1,500 psi range with a wide spray, while fiber cement is often treated more cautiously because stronger blasting can affect the material or finish material-specific siding pressure guidance.
For homeowners who like to compare setups before renting or buying equipment, this overview of the best pressure washer for house siding is useful because it keeps the focus on control, not machine size. If you're also thinking about broader exterior material choices, this guide to residential siding Palm Beach is a practical reference on common siding categories and what each one asks of a cleaning method.
A Practical Siding Washing Sequence
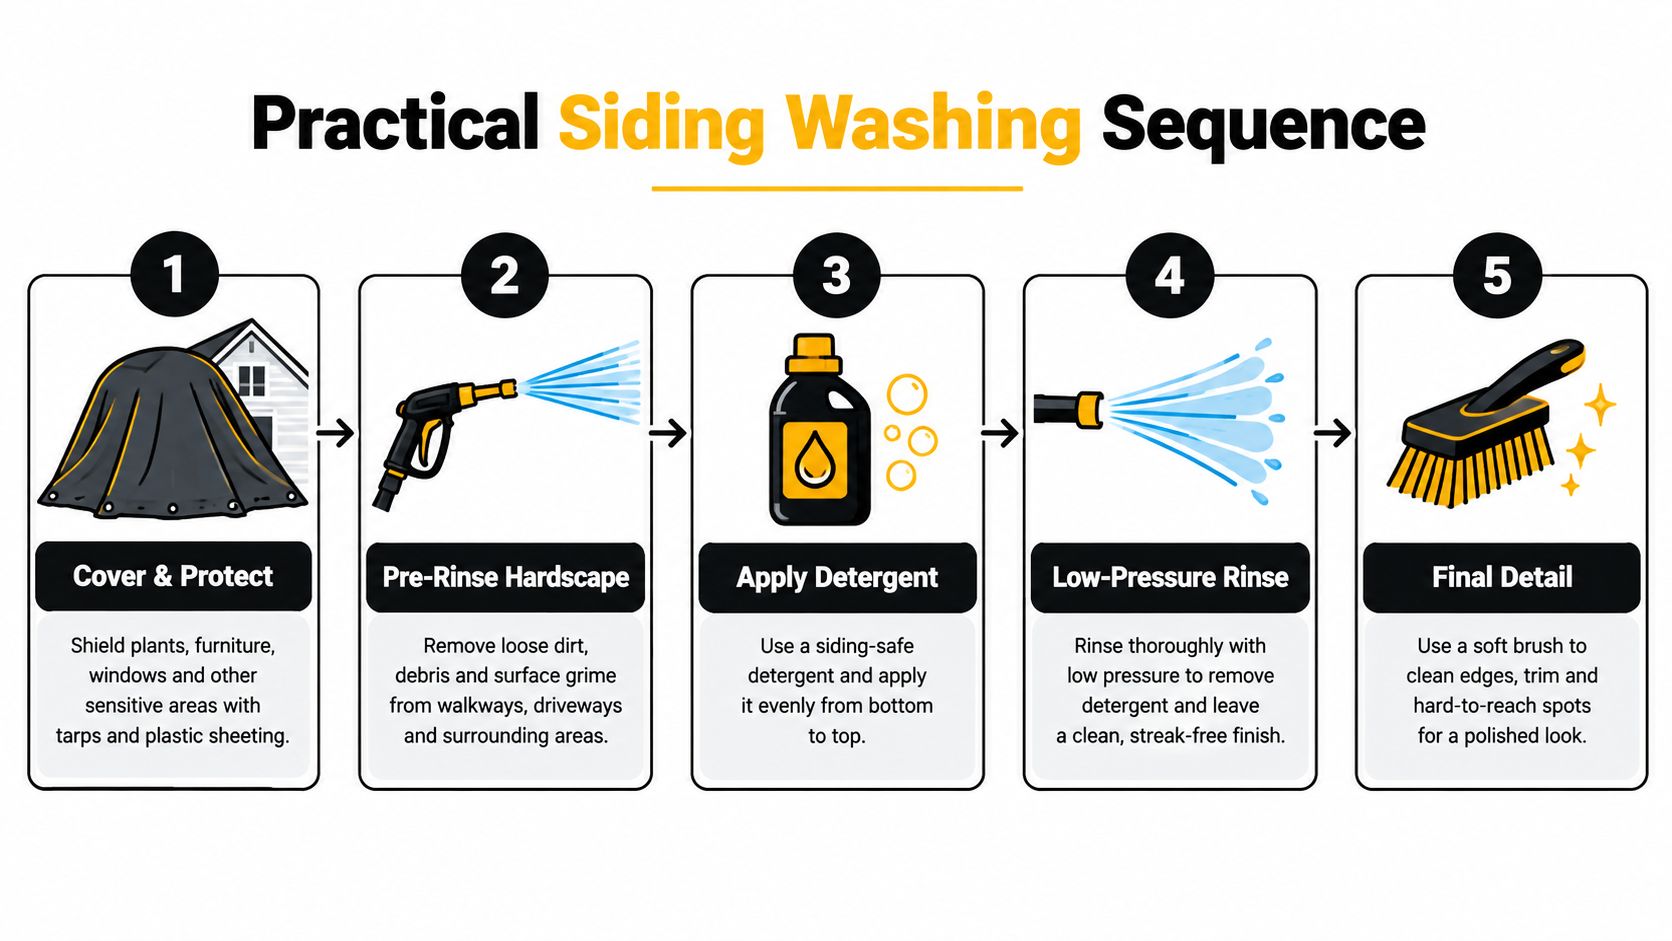
The right wash sequence starts before you pull the trigger. Homeowners get into trouble when they treat siding like concrete and try to solve every stain with more force. On many houses, the better result comes from a low-pressure chemical application followed by a controlled rinse, not a hard blast.
Before water hits the wall
Walk the house first. If you see loose laps, open seams, failed caulk, oxidized paint, brittle dryer vent covers, or chalking on older siding, switch your mindset from pressure washing to soft washing. Those surfaces need cleaning solution, dwell time, and a gentle rinse.
Prep is simple, but it matters.
- Close windows and doors tight: Check screens too. Water finds the one window that did not latch.
- Cover or avoid direct spray on outlets and fixtures: Especially older boxes and loose light trims.
- Pre-wet plants and the soil below the wall: That dilutes overspray and runoff before cleaner lands.
- Move furniture, grills, mats, and decor away from the work zone: Give yourself room to keep the spray angle consistent.
- Spot defects before you wash: Loose trim, cracked caulk, and lifted siding edges change how close you can work.
The wash sequence that works
Start on the shady side if you can. Cleaner drying on hot siding causes streaks and forces you to rewash sections.
Apply detergent with low pressure from the bottom up on a manageable section. Bottom-up application helps prevent dry streaking on the way down. Let it dwell long enough to loosen dirt and algae, but keep it wet. On a warm wall, that may mean working in shorter sections of a few panels at a time.
Then rinse from the top down with a wide fan tip and a downward angle. Keep the nozzle far enough off the wall that the spray fans out before it hits. If the dirt is not releasing, do another chemical pass. Moving closer is how people scar paint, crack old vinyl, and drive water behind the siding.
Work one elevation in this order:
- Rinse surrounding plants and nearby surfaces.
- Apply cleaner to a small section.
- Let it dwell while watching for drying edges.
- Rinse from the top of that section downward, following the siding profile.
- Repeat, overlapping slightly so you do not leave lap lines.
Around windows and penetrations, slow down. Spray past edges, not into them. Around light fixtures, hose bibs, vents, and dryer outlets, use less pressure and more patience. Those details hold grime, but they also leak first when someone gets aggressive.
If you want a visual reference, watch the full walkthrough here: https://www.youtube.com/embed/Y20Vn7Cio_g
What to check before you put the machine away
Do a final walk while the siding is still damp. Looking at the wall straight on is not enough. Step off to the side and let the light show you what is left.
You are checking for:
- Missed soil bands under laps, behind downspouts, and below hose bibs
- Soap residue around trim edges and under window sills
- Tiger striping or lap lines from uneven overlap during the rinse
- Run marks below lights, vents, and corners where dirty water collected
If a spot still looks bad, match the fix to the problem. Organic staining usually needs another cleaner pass and dwell time. Mud, spider webs, and wasp residue may need a brush or mitt. Very few siding problems improve when the operator gets closer and adds force.
For homeowners in Colorado Springs who'd rather not handle ladders, detergents, and finish-sensitive surfaces themselves, one option is the siding-safe pressure washing and soft-wash exterior cleaning offered by Cultivate House Detailing. The value is using the right process for the surface.
Common Mistakes That Damage Siding
Most homeowner damage comes from a short list of avoidable mistakes. The wall usually gives clear warnings before it fails, but people miss them because they're focused on blasting off the stain in front of them.
The five failures that cause trouble
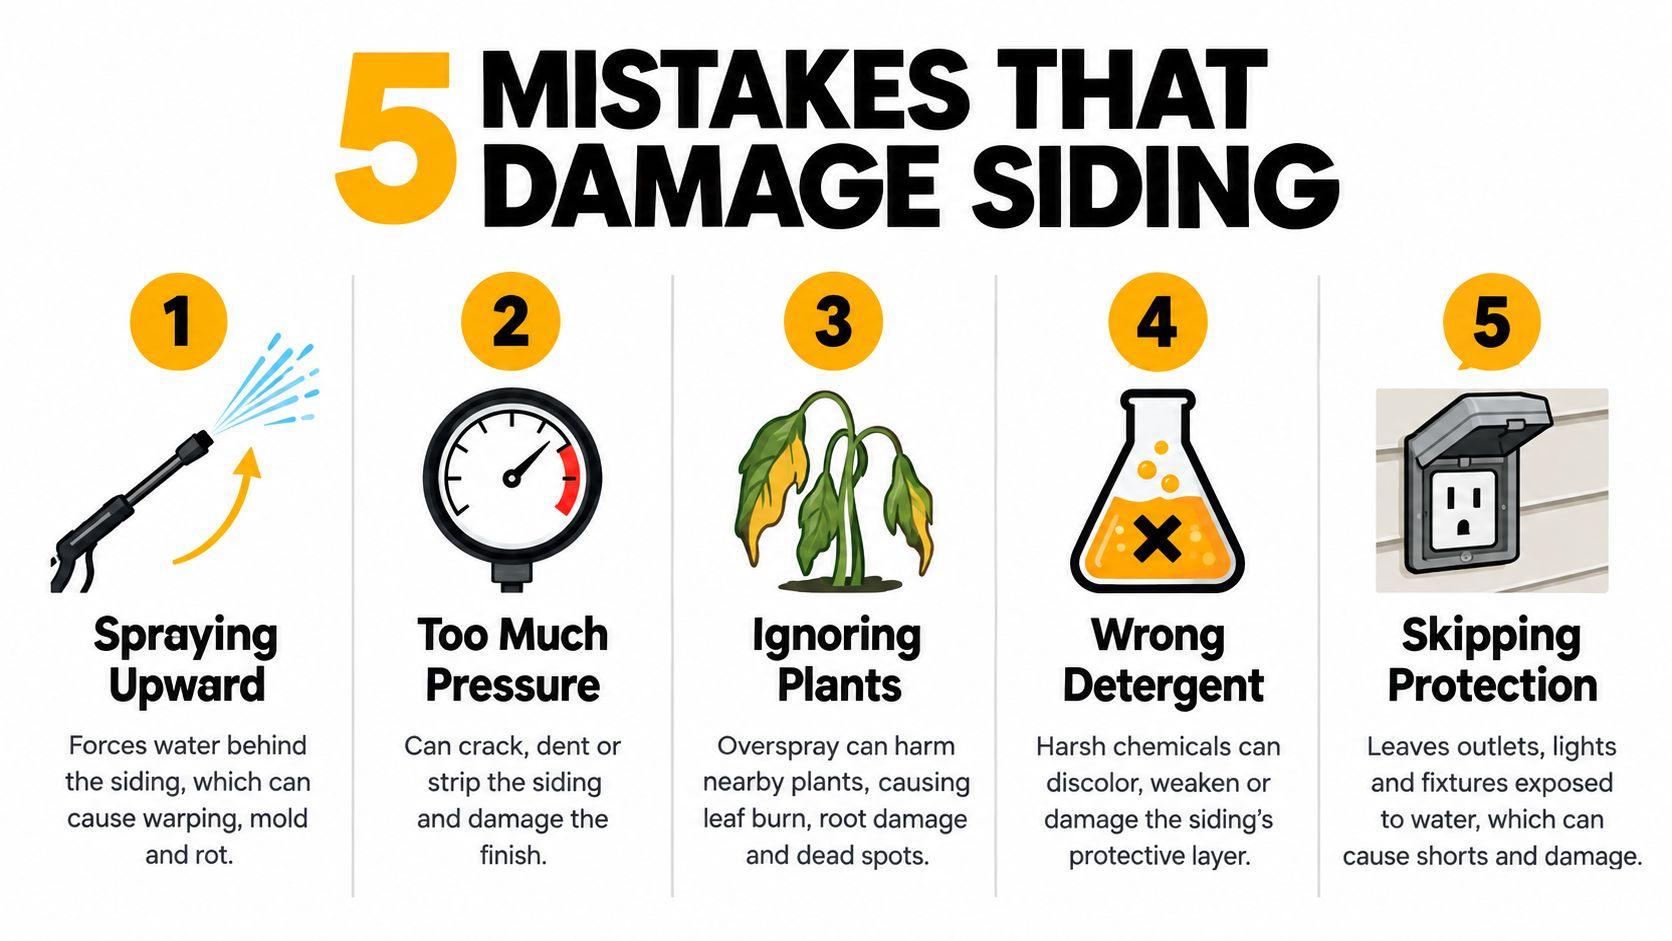
Direction of spray is one of the most important safety mechanics on a siding wash. Guidance repeatedly says to spray downward, never upward, and one source specifically recommends a 45° downward angle so water follows the lap instead of being driven behind it downward spray guidance for siding cleaning.
Here are the mistakes that keep causing damage:
- Spraying upward: Water gets behind panels and may not show itself until much later as trim swelling or interior staining.
- Using an aggressive tip: A concentrated nozzle turns a cleaning tool into a cutting tool.
- Holding the wand too close: Even moderate machine pressure becomes destructive when all that force is focused on a tiny area.
- Skipping detergent: The grime doesn't release well, so people compensate with force.
- Working in hot direct sun: Cleaner dries too fast and can leave streaks or residue.
The correction a technician gives on site
Each mistake has a simple fix.
Keep the wand aimed down, keep it moving, and let the cleaner do part of the work.
If the siding still isn't releasing, widen the fan pattern, step back, and revisit the chemistry before increasing force. That advice applies just as much to trim, soffits, and nearby glass. It also explains why homeowners who care about a polished exterior often pair siding maintenance with streak-free window cleaning, hard water stain removal, and seasonal detail work instead of trying to wash every surface the same way.
Diagnosing Streaking, Lines, and Lingering Spots
A wall can look wrong during drying and still end up fine. It can also look clean at first and show problems later. Knowing the difference saves a lot of unnecessary rework.
Read the pattern before you react
Vertical streaks under lap joints usually mean the rinse didn't fully carry material off the lower edge of that course. Re-rinse that section with a wider fan and keep the pass continuous.
Horizontal lines usually point to a section that dried unevenly during the rinse. Wet the area back down and complete the rinse in one smooth pass so you don't leave a drying edge across the wall.
What common residues usually mean
White chalky residue often shows up on older aluminum or weathered vinyl. That can be oxidation lifting from the surface rather than fresh damage from the wash itself. In those cases, a light follow-up with a soft brush and a gentle second pass usually makes more sense than stronger pressure.
Brown or dingy spots that come back after the wall dries often mean detergent or loosened grime stayed in the surface. A full clear-water rinse is the fix.
If a spot returns hours later, assume residue first. Don't assume the wall needs more force.
If green growth comes back quickly, look beyond the siding. Gutters, nearby vegetation, and shaded damp zones often feed the same problem back onto the wall. On homes around Colorado Springs, that same pattern often affects glass too. Window frames, screens, and siding collect similar debris, which is why seasonal window cleaning and exterior maintenance are often scheduled together.
When to DIY and When to Call a Pro
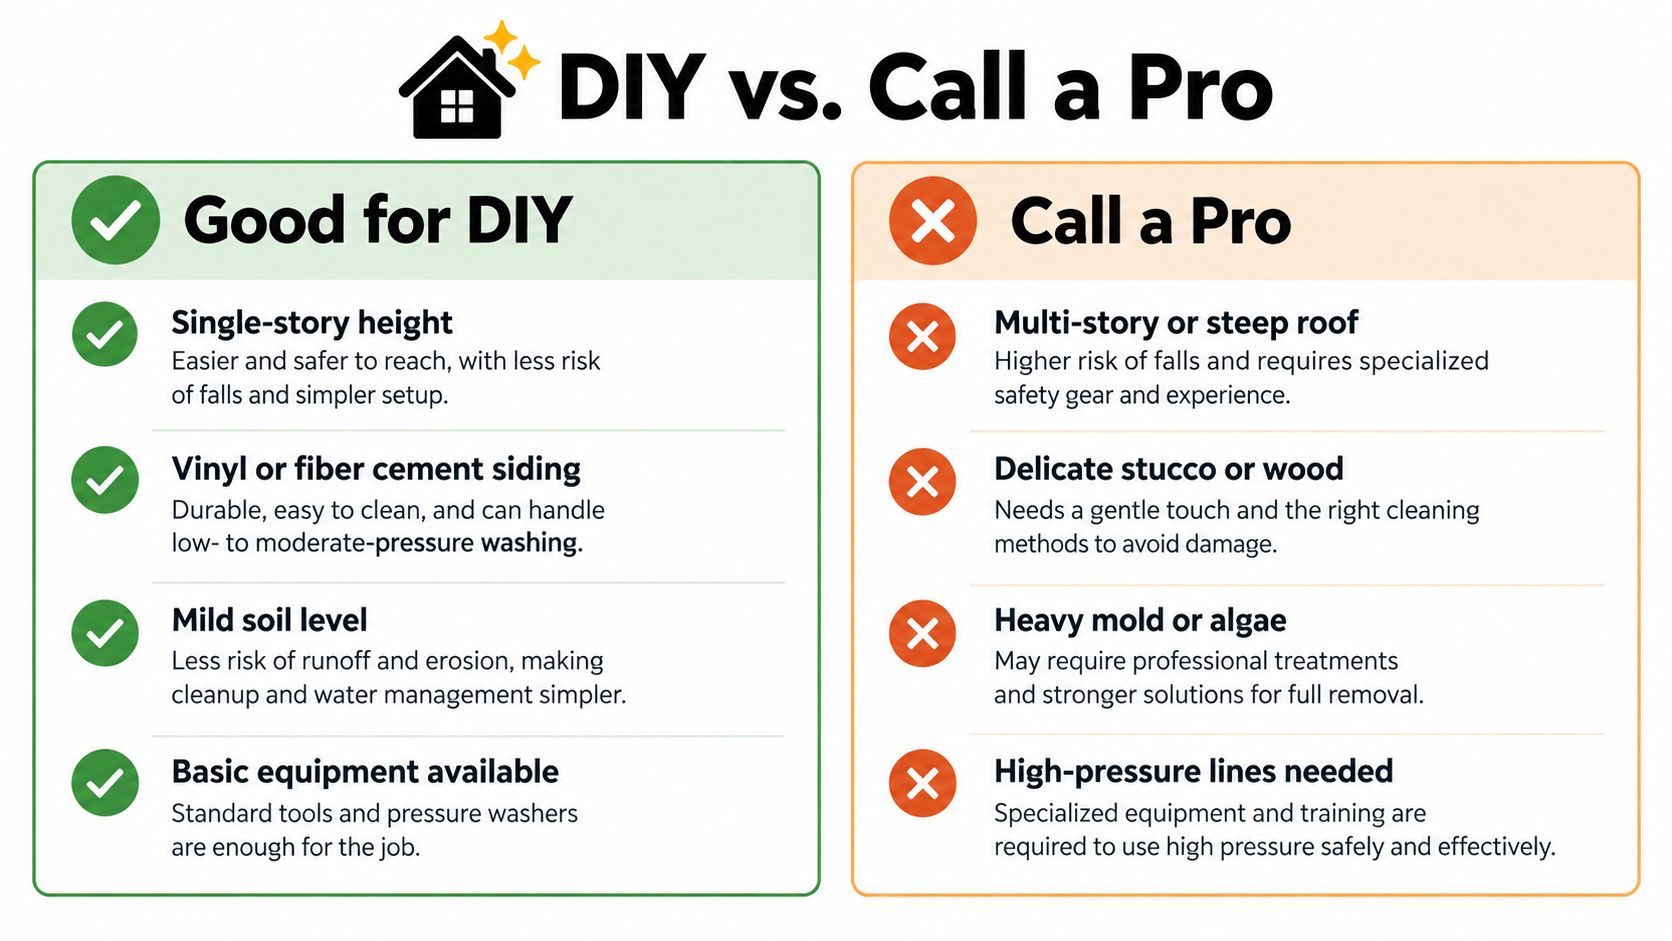
Some siding jobs are perfectly reasonable for a careful homeowner. Others aren't worth the risk. The right decision comes down to your wall material, the height of the work, the severity of the buildup, and how much damage a mistake could create.
Good DIY conditions
A DIY wash makes sense when the house is easy to reach and the siding is forgiving.
- Single-story access: You can keep your footing and your spray angle under control from the ground.
- Moderate buildup: Dust, light grime, and minor organic staining are manageable.
- Sound siding condition: No obvious loose panels, open seams, or past moisture issues.
- Willingness to work gently: You're comfortable starting low and testing before going further.
Jobs that should push you toward a pro
Two-story elevations, steep grades, painted wood, stucco, older siding, or any wall with a history of water intrusion all raise the stakes. Those are the projects where the wrong nozzle angle can do more damage than the dirt ever did.
A professional crew should be willing to spell out the scope in writing. Ask what pressure range they plan to use, what nozzle type they'll use, what detergent they apply, and whether they're pressure washing or soft washing the siding. That makes it easier to compare bids fairly and avoid a crew that defaults to high pressure on a surface that shouldn't get it.
This same mindset applies when hiring window cleaning in Colorado Springs, CO. Homeowners and business owners usually aren't just looking for someone to spray or wipe a surface. They want a methodical service that protects finishes, improves appearance, and handles the details correctly. That's true for residential window cleaning, commercial window cleaning, exterior window cleaning, and interior window cleaning alike.
The best way to pressure wash siding is often deciding not to rely on pressure first. If the wall needs cleaning but can't tolerate much force, soft wash is usually the smarter path.
If your siding, windows, screens, or exterior surfaces need a careful cleaning plan, Cultivate House Detailing handles the kind of work where method matters as much as the result. Homeowners and businesses in Colorado Springs and nearby communities can visit Cultivate House Detailing to request a quote, compare services, and schedule siding cleaning or professional window cleaning with a process that fits the surface.