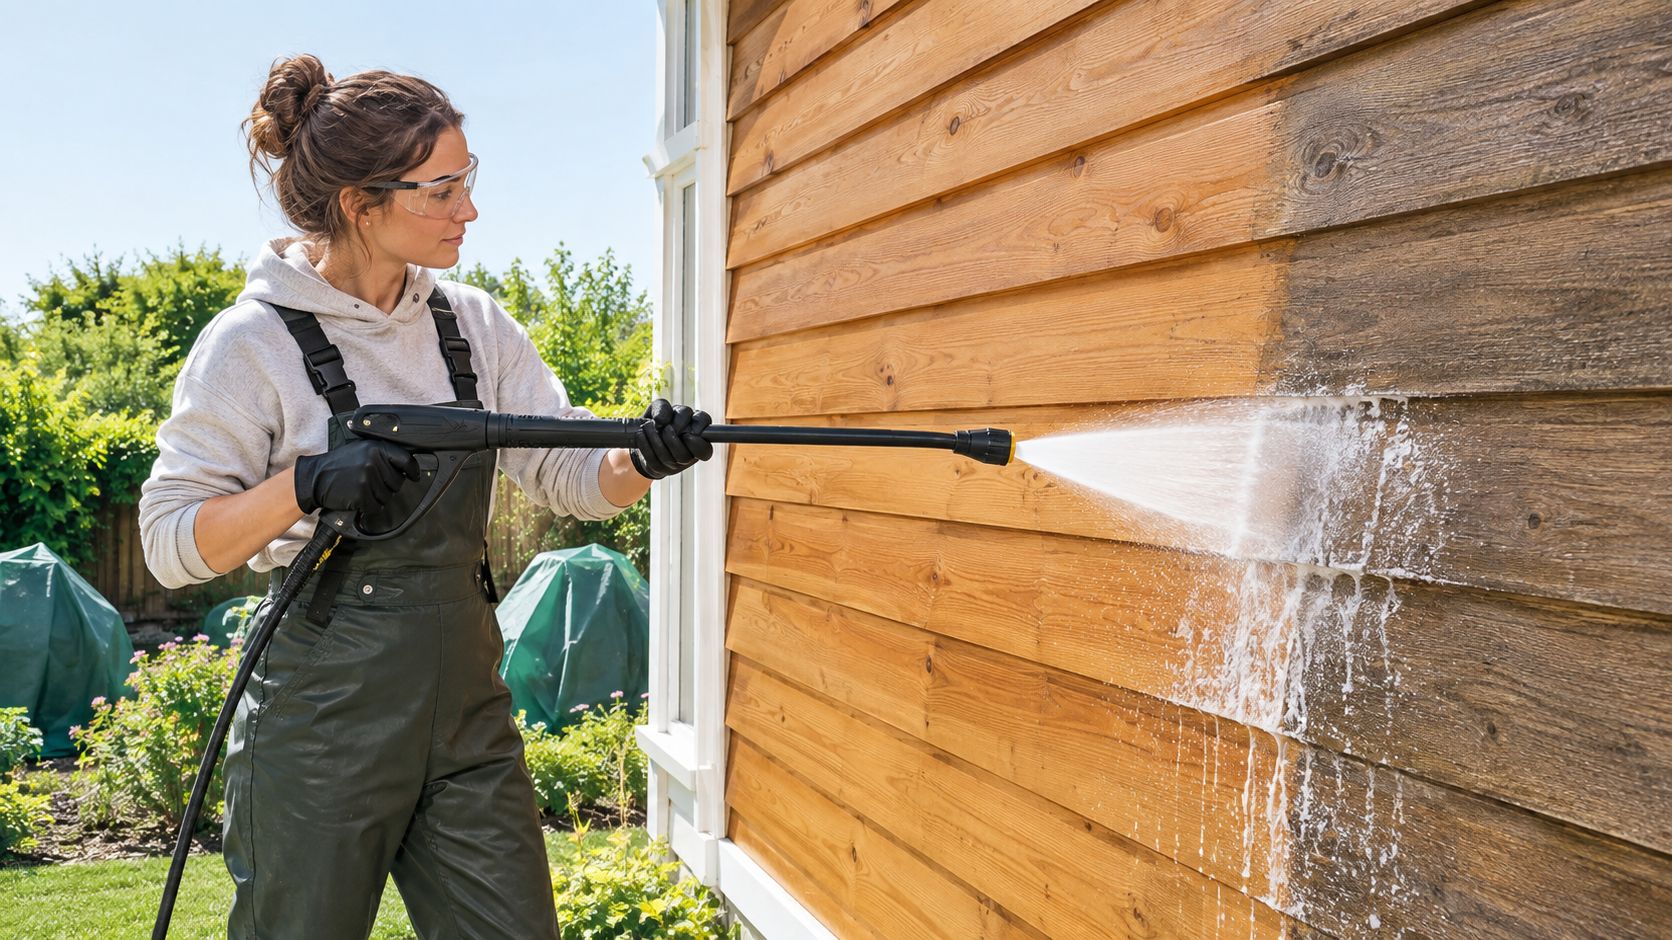
Your wood siding probably doesn't need “more pressure.” It needs a better decision.
A lot of homeowners in Colorado Springs start in the same place. The siding looks dingy after wind, dust, pollen, and runoff have had their turn. You rent a washer, grab a tip, and assume the job is just a matter of blasting the wall until it looks clean again. That's where wood gets damaged.
If you want to know how to pressure wash wood siding safely, start by dropping the one-size-fits-all mindset. Sound boards with solid finish can often handle careful low-pressure washing. Dry, peeling, older, or suspect siding often shouldn't be pressure washed at all. It should be soft washed or hand washed. That judgment call matters more than machine size.
Cultivate House Detailing works with homeowners around Colorado Springs, CO who care about exterior upkeep, curb appeal, and protecting the materials they already own. The same homeowner-first thinking that matters in professional window cleaning, exterior window cleaning, and routine maintenance applies here too. You don't clean delicate surfaces by force. You clean them by reading the surface correctly.
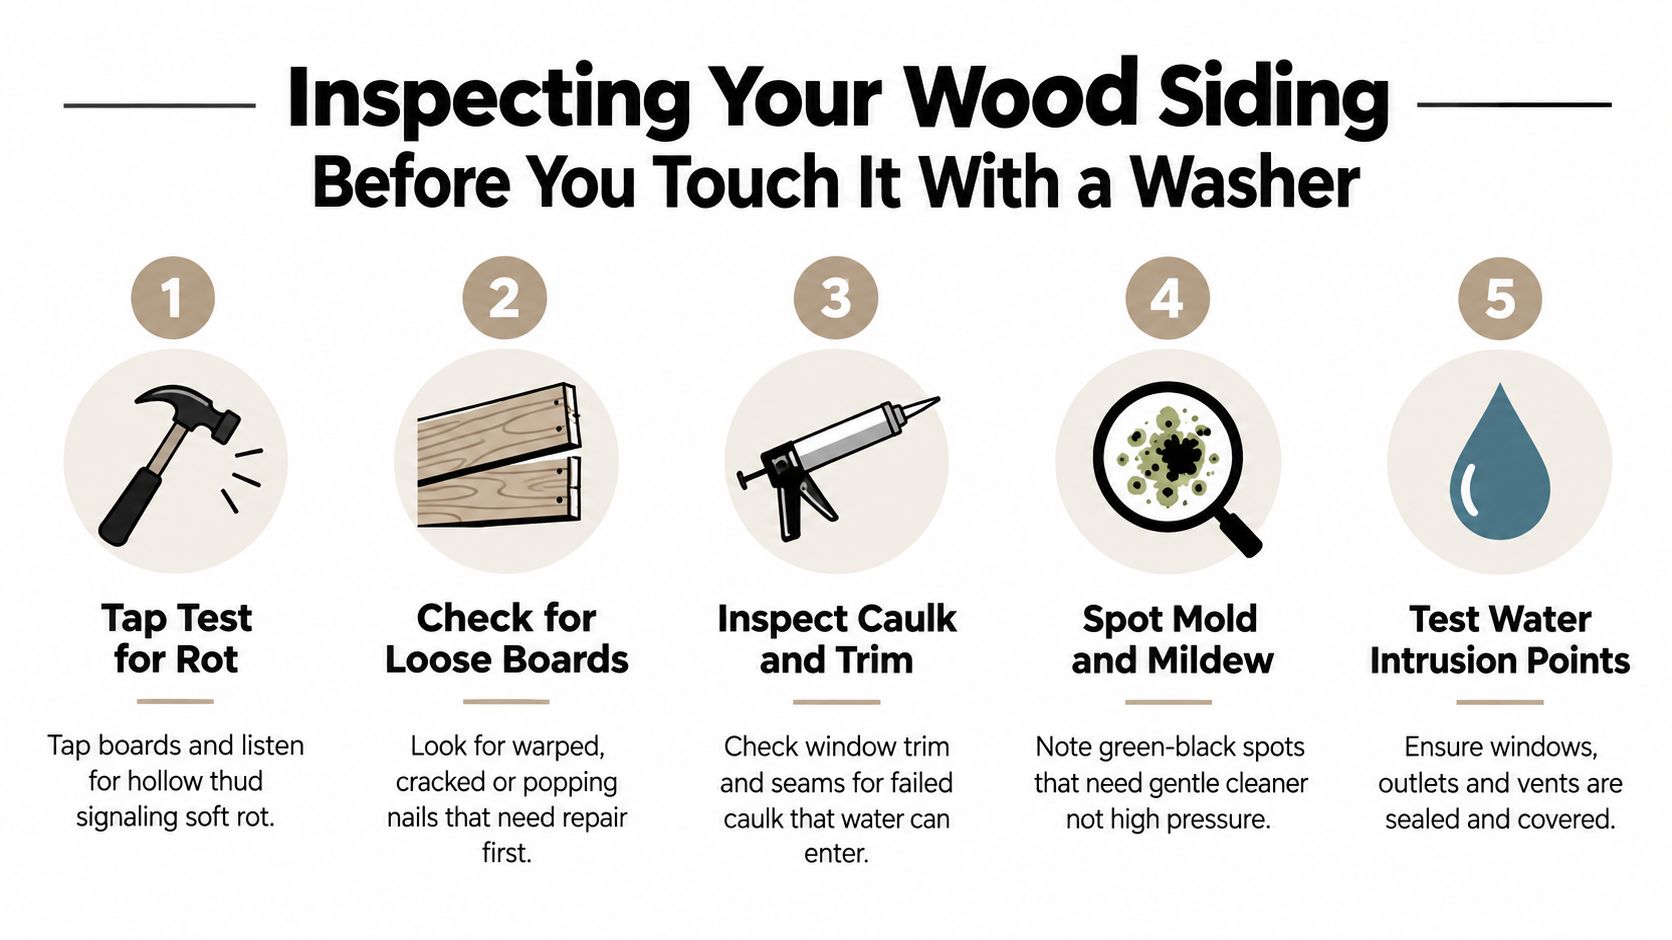
Inspecting Your Wood Siding Before You Touch It With a Washer
The washer stays off until you walk the house.
I mean slowly. Start at one corner and work all the way around. Tap each board with the heel of your hand. If a spot sounds hollow or dead compared with the boards around it, stop there and inspect closer. Near the ground line, under windows, below downspouts, and at gutter ends, press gently with a screwdriver tip in any suspicious area. If the wood gives too easily, that board isn't ready for pressure.
What to look for before any cleaning starts
You're not just checking for dirt. You're checking whether the siding can survive the cleaning method.
- Soft spots and swelling: Press around lap joints, lower edges, trim returns, and butt joints.
- Peeling or chalking finish: If paint is coming off in sheets or rubbing off as powder, pressure can make it much worse.
- Failed caulk: Look where trim meets siding, around windows, and at penetrations.
- Raised grain and splinters: Run a finger along horizontal seams and board faces.
- Loose boards or popped nails: Water finds every weakness you ignore.
Photograph problem areas. Mark them with chalk if needed. That sounds fussy until you're rinsing a wall and can't remember which seam was already split.
Practical rule: If you find more than a handful of compromised boards, stop thinking “pressure wash” and start thinking “soft wash or hand scrub.”
The finish matters as much as the wood
Painted wood, stained wood, and bare weathered wood don't behave the same way. Painted siding with loose edges can strip fast. Stained siding can blotch. Old dry boards can fur up even if they looked decent from the driveway.
Guidance on older painted surfaces also leans conservative. Homes built before 1978 should be checked for lead-based paint before disturbing the coating, and current homeowner guidance increasingly favors soft washing or very low pressure on older or failing painted wood, along with a test spot first, as noted in this painted wood siding guidance.
If the wall fails inspection, that's not bad news. It's useful news. You just saved yourself from turning a cleaning day into a repair project.
Matching PSI, Nozzle, and Flow to Your Siding Type
Settings come after the siding passes inspection. If the wall is dry, sound, and holding its finish, then pressure might make sense. If it is brittle, peeling, or fuzzy before you start, lower pressure is not the fix. A soft wash or hand wash is.
For wood siding, the safest approach is to treat pressure as a last adjustment, not the starting point. Surface-specific guidance from Doorstep HQ keeps wood far below concrete-type pressures. Softwoods such as cedar, redwood, and pine are commonly cleaned in the 500 to 800 PSI range. Painted wood in good shape often stays closer to 400 to 600 PSI. Once you push much past 1,200 to 1,500 PSI, you are in splinter, fur, and gouge territory.
Start with nozzle choice, not machine bragging rights
A wide fan does more for wood than raw pressure ever will. Use a 40-degree tip first. If the wall is solid and still not cleaning, step to a 25-degree tip for stubborn grime, then back off again. A narrow pattern concentrates force too fast, which is how homeowners stripe siding, carve latewood, and drive water into laps.
Distance matters just as much. Keep the wand roughly 12 to 24 inches off the siding, and hold that distance consistently, as outlined in this house washing guide. Crowding the wall is the fastest way to turn a rinse into a repair.
Pressure washer settings that actually fit wood
| Siding Type | PSI Range | Nozzle | Wand Distance | Flow |
|---|---|---|---|---|
| Cedar or redwood siding | 500 to 800 | 40-degree fan | 12 to 24 inches | Moderate to higher flow helps rinse faster |
| Pine siding | 500 to 800 | 40-degree fan | 12 to 24 inches | Moderate to higher flow helps rinse faster |
| Painted wood siding in sound condition | 400 to 600 | 40-degree fan | 12 to 24 inches | Moderate flow is usually enough |
| Dense wood or heavily soiled but intact finish | 500 to 1,000 | 25-degree only if needed | 12 to 24 inches | Higher flow shortens dwell on one spot |
| Peeling or failing painted wood | Skip pressure washing | Soft-wash applicator or hand wash | Test from farther back | Cleaning solution matters more than flow |
Flow gets overlooked, and that is a mistake. More gallons per minute usually cleans wood more safely than chasing higher PSI, because you rinse faster and spend less time hammering one patch of siding. If you are comparing machines for this kind of work, this guide to the best pressure washer for house siding gives a useful breakdown of what to look for on exterior walls.
One hard rule. Never use a zero-degree tip on wood siding. There is no practical upside, and plenty of downside.
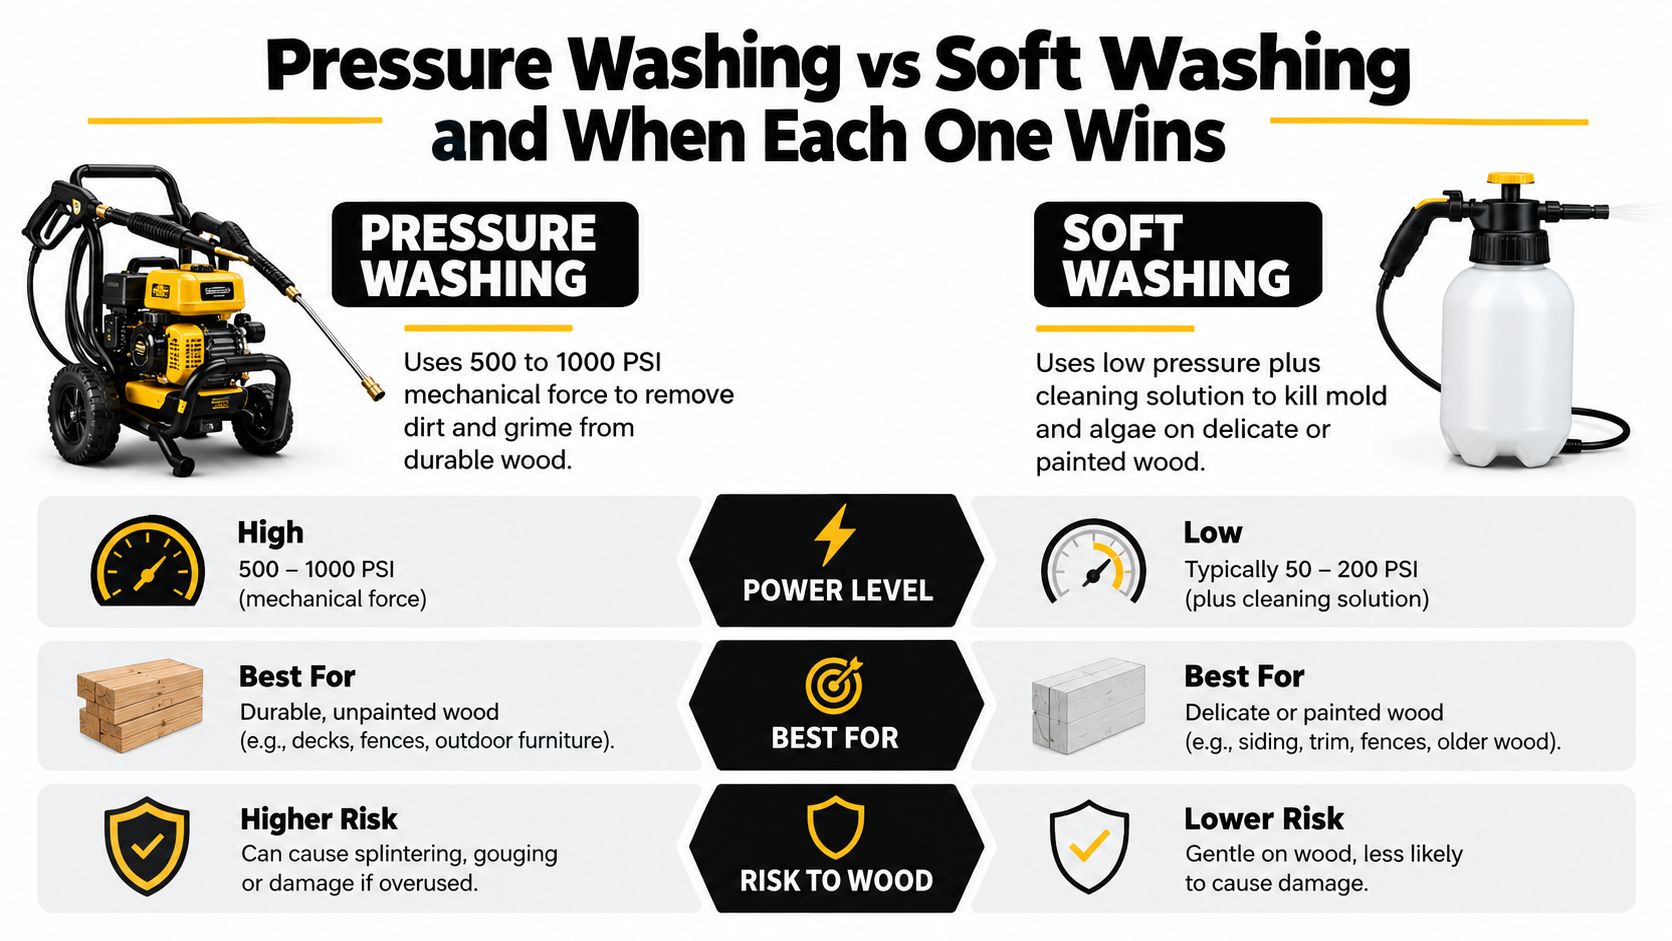
Pressure Washing vs Soft Washing and When Each One Wins
You do not choose the method first. You read the wall first.
Wood siding is rarely uniform. One elevation may be solid and well-coated, while the shady side has swollen butt joints, mildew around trim, and paint that is one rinse away from lifting. That is why blanket advice about PSI misses the point. On wood, pressure washing is a judgment call.
When pressure washing is the right tool
Use pressure only on siding that is sound, firmly attached, and holding its finish well. Good candidates are newer stained or painted walls with basic dirt, pollen, cobwebs, and light surface grime. In those cases, a careful rinse can save time and leave a clean, even result.
Use pressure as a rinse tool, not a stripping tool. If you have to stand close, slow down, or keep hitting the same spot to make it look clean, you picked the wrong method. Wood loses that fight fast.
Top-down washing still matters here because water forced upward at laps and joints is how you turn a cleaning job into a moisture problem. As noted earlier, wood siding should stay on the low end of pressure and rely on nozzle choice, distance, and flow to do the work safely.
When soft washing wins
Soft washing is the better call on older siding, chalky paint, dry or checked boards, repaired patches, and walls with mildew packed into seams and textured grain. It is also the right move when the dirt is bonded organic growth rather than loose surface grime.
Chemistry does the cleaning. The rinse just removes what the cleaner loosened.
That approach gives you more margin for error, especially on painted wood. If you want a clear side-by-side breakdown, this guide to soft washing vs pressure washing explains the trade-offs well.
If you are on the fence, choose the gentler method. Homeowners regret gouging cedar. They do not regret being a little too cautious.
The method that wins most often
On real houses, the best answer is usually a hybrid. Apply a wood-safe cleaner, let it dwell, brush trouble spots by hand if needed, then rinse with low pressure and plenty of water flow. That gets the mildew, keeps the finish intact, and avoids forcing water where it should not go.
That is the standard I recommend. Clean the siding based on its condition, not your machine's max output.
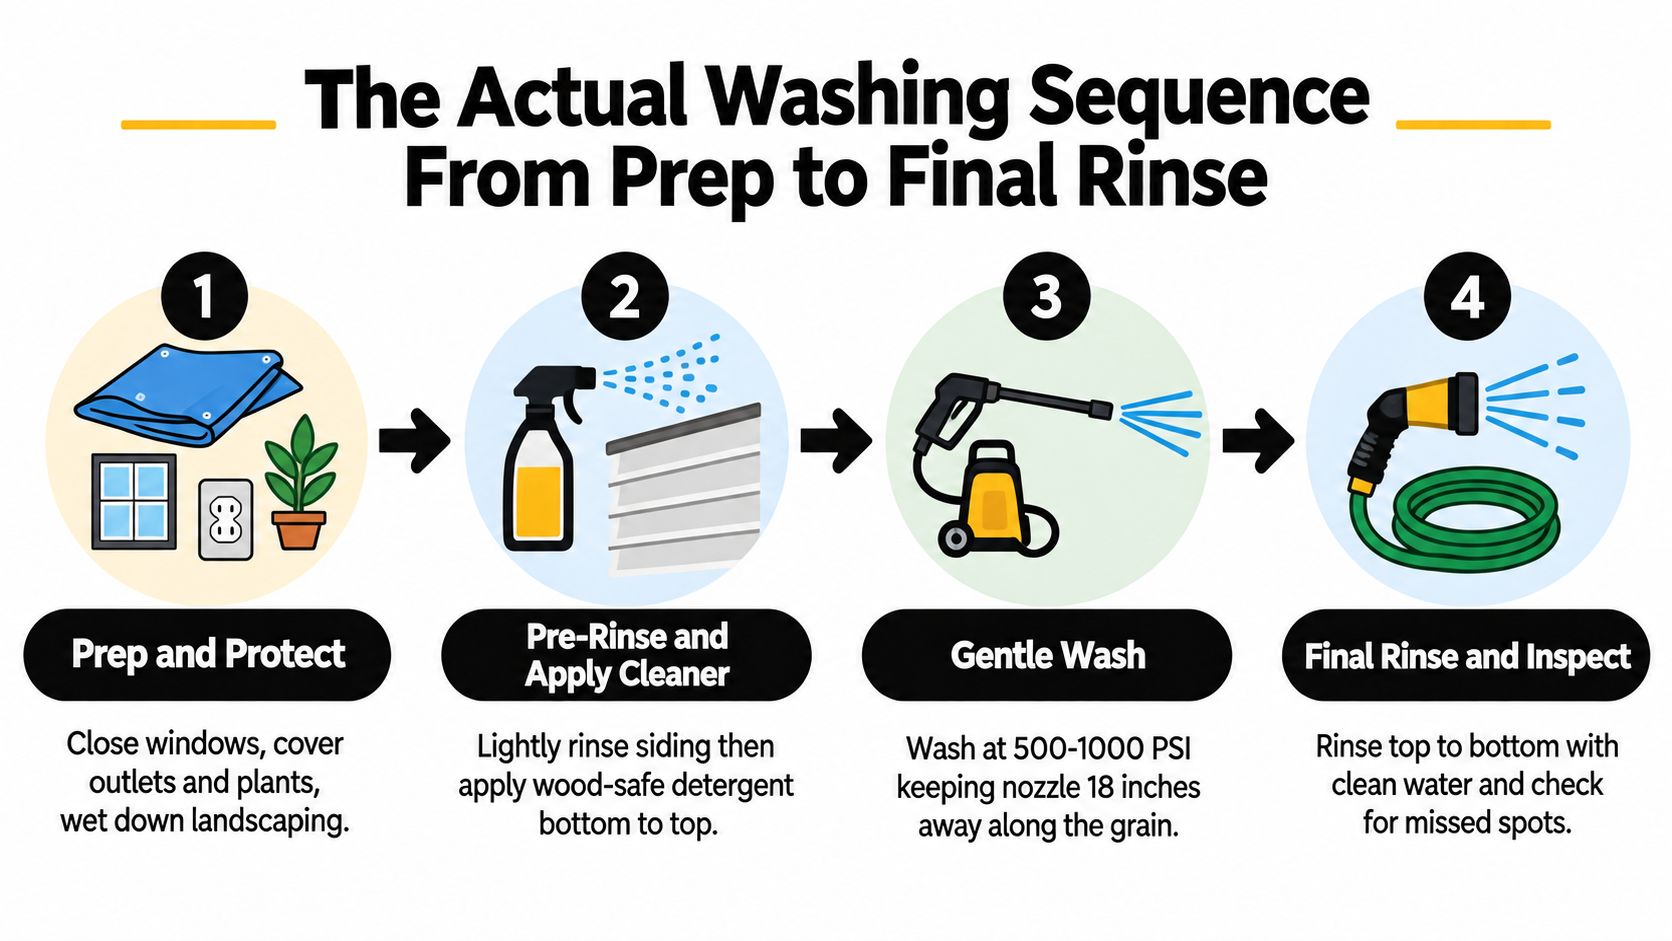
The Actual Washing Sequence From Prep to Final Rinse
A bad wash job usually starts before the machine ever turns on. The wall was hot, the plants were dry, a window was cracked open, or somebody treated old wood like concrete. Get the setup right first.
Before you spray, shut and latch windows, cover exterior outlets, and move furniture, grills, rugs, and anything porous out of the runoff path. Pre-wet nearby plants and soil so they do not pull in cleaner. Pick a cool, shaded side of the house if you can. Wood siding is less forgiving on a hot wall.
This visual shows the order clearly before you start.
Prep and detergent application
Start with a light pre-rinse to cool the surface and knock off loose grit. Do not soak the wall for no reason. You want damp siding, not water driven into every joint before cleaning even begins.
Apply a wood-safe cleaner with a pump sprayer or downstream injector. Let it dwell long enough to loosen mildew and dirt, but do not let it dry on the siding. If one section starts drying, mist it lightly or rinse it and reset. On weathered paint, old stain, or patched boards, this step does most of the work. The washer is there to rinse, not to grind contamination out of the grain.
If you also have stone hardscape that needs cleanup after the siding work, this guide on grime removal for patio stones is worth a look because rinse runoff and loosened debris often end up on the surfaces below.
The rinse pass that protects the wall
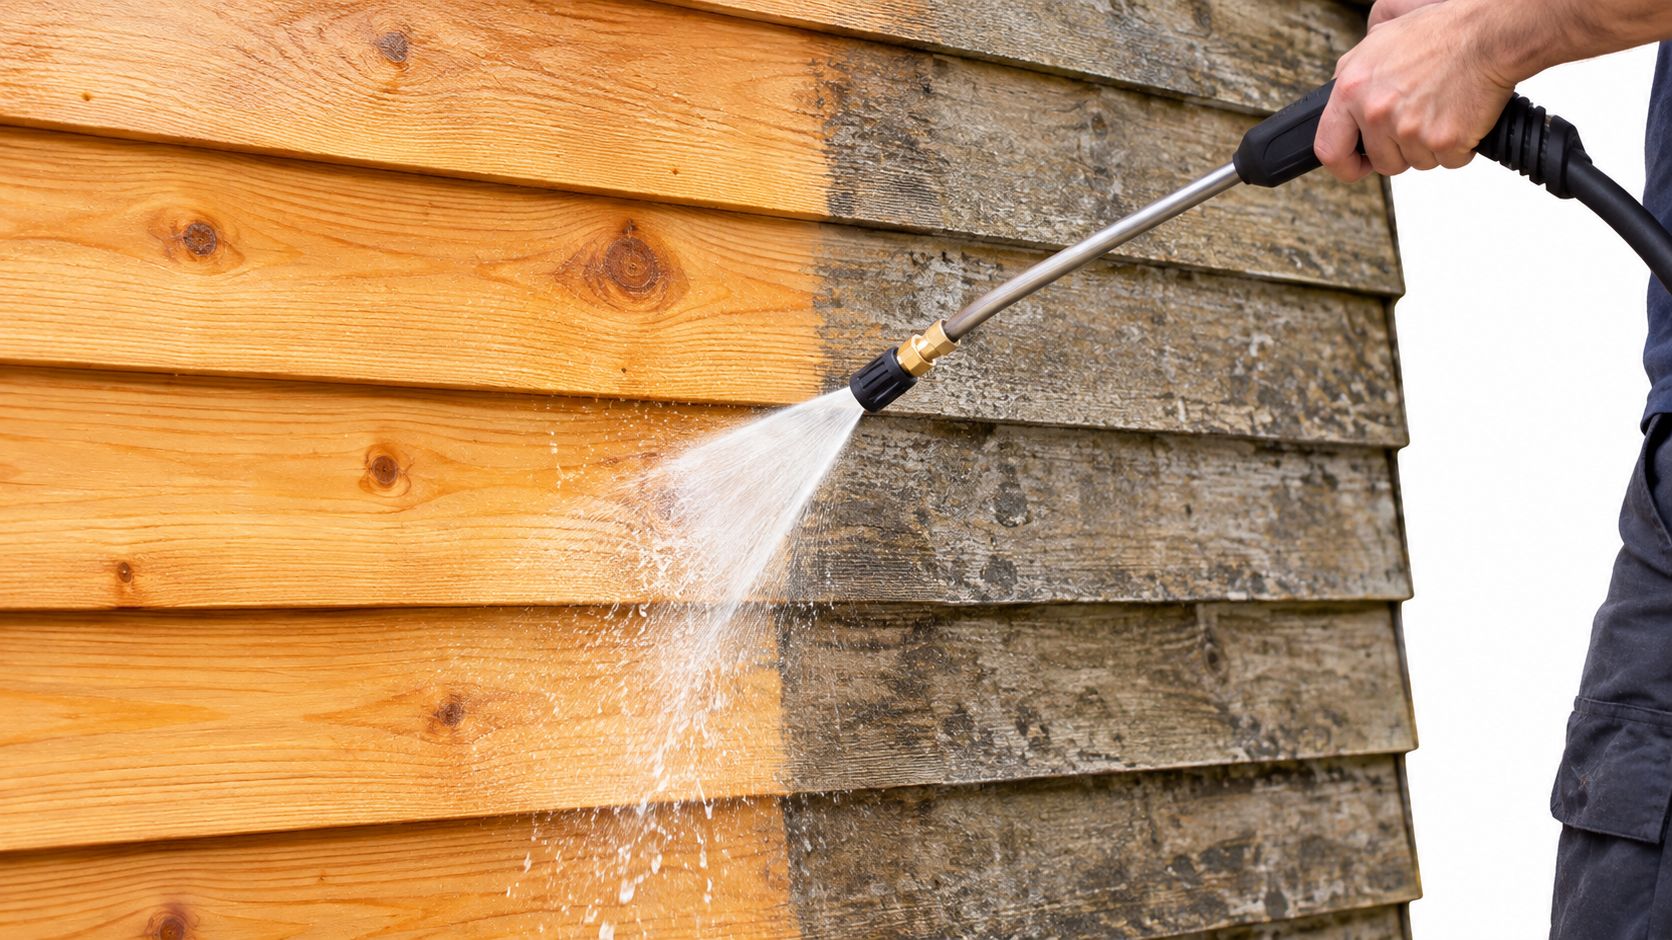
Rinse from the top down with a wide fan tip, low pressure, and steady movement. Keep the wand angled with the wall so water sheds off the face instead of getting shoved behind the laps. Stay back far enough that the spray is rinsing evenly, not cutting a bright stripe through the finish.
As noted earlier, wood siding belongs on the gentle end of the pressure range. Your distance, angle, and pace matter more than squeezing a little more force out of the machine.
Work in manageable sections. Rinse one wall area fully before the cleaner dries, then move on. Overlap each pass so you do not leave dirty edges or detergent trails.
Here's a quick visual example of the motion and pacing you're aiming for.
Final rinse around trim and openings
Slow down near windows, vents, light fixtures, door trim, and belly bands. Those spots hold residue, and they are also where people force water where it should never go. Shorter trigger pulls help here. So does stepping back another foot and letting the fan pattern do the rinsing.
Check the wall as you go. If you see dirty water bleeding from a lap joint, fibers starting to lift, or paint flaking under the spray, stop and switch methods. That is your cue to hand wash the problem area or finish the wall as a soft rinse only.
A good final rinse leaves the siding uniformly clean, with no streaks, no fuzzy grain, and no water pushed into seams. That is the standard.
Hidden Damage Risks Most Pressure Washing Guides Skip
A lot of bad pressure washing jobs look fine the day they're finished.
The trouble shows up later. Paint starts peeling where it held before. A wall stays damp too long. A stain appears inside near a window. The cleaning didn't fail because the dirt stayed. It failed because water went where it never should have gone.
Water behind laps and trim
Several sources warn against spraying upward or into seams and stress downward angles, low pressure, and wide fan tips because water can get forced behind laps, seams, windows, and trim. That moisture can contribute to rot, warping, and paint failure, and most guides don't spend enough time on that hidden risk, as outlined in this pressure washing damage prevention article.
Warning signs during the job are simple. Water bubbling out where it shouldn't. Dark seams that stay wet longer than surrounding boards. Drips appearing below windows or trim returns after you've moved on.
Fuzzed wood and stripped finish
Wood doesn't always split dramatically when you overdo pressure. Sometimes it just gets fuzzy. Cedar and pine are especially prone to raised grain and furred fibers when the spray is too concentrated or held too long in one spot.
The wall may look cleaner today and hold more dirt next month because you roughed up the fibers.
Watch for a dull, hairy texture after rinsing. That's damage, not just “lifted dirt.”
Lead paint changes the whole conversation
If the home was built before 1978, old paint should be treated cautiously. Pressure washing can disturb lead-based coatings and turn a cleaning project into a health and compliance problem.
At that point, this stops being a DIY question about nozzle control. It becomes a containment and lead-safe work question. Different issue. Different standard.
Drying, Post-Wash Inspection, and Smart Repair Choices
Once the wall is clean, leave it alone long enough to tell the truth.
Wood siding needs 48 to 72 hours of dry weather to equalize moisture content before you judge next steps or think about coatings. If you paint or stain damp boards, you trap moisture and buy yourself peeling later.
What to inspect while the siding dries
Give the wall a slow second walkaround after it has had time to dry.
- Raised grain: Light fuzz means the wood took more force than it liked.
- Lifted lap edges: Check lower board edges and butt joints.
- Missing caulk: Trim joints often open up after washing.
- Soft spots that stayed dark: Those need more than cosmetic work.
- Bare wood from finish loss: Spot-prime those areas before they weather further.
If you're unsure whether a board has dried enough for repair or recoating, this explanation of normal moisture levels in wood helps you think more clearly about what a moisture meter is telling you.
Repairs a homeowner can usually handle
Small fixes are fair game. Re-caulk minor failed seams. Set popped nails flush. Spot-prime exposed wood. Clean up any lifted fibers before you touch up finish.
Hold off on a full repaint for about a week if you can. That extra time helps you catch lingering moisture issues, recurring staining under laps, or sections that didn't dry evenly.
For bigger problems, don't fake confidence. If a soft area spans beyond a small isolated spot, mildew keeps returning from under overlaps, or broad sections of paint fail after washing, cleaning wasn't the problem. Moisture management and carpentry are.
How Often to Wash Wood Siding and When to Call a Pro
You walk outside in April, see a dirty wall, and reach for the pressure washer. Stop there. Wood siding should be cleaned on condition, not on habit. Some walls need a light hand wash. Some need a soft wash. Some can handle pressure. Some should be left alone until a carpenter fixes the underlying problem.
Exposure decides the schedule. North-facing walls, tree cover, sprinkler splash, and tight side yards stay damp longer and grow grime faster. South-facing walls with good airflow often go longer between cleanings. In Colorado Springs, dust and pollen can make siding look worse than it is, so don't mistake surface buildup for a green light to blast the wall.
The best wash window is usually late spring or early fall. Pick a stretch of mild, dry weather so the boards can dry evenly and you can see what condition the finish is really in after cleaning.
Wood Siding Wash Frequency and Cost by Method
| Siding Type | Typical Wash Interval | Best-Fit Cleaning Method | DIY Cost Estimate | Pro Service Cost |
|---|---|---|---|---|
| Painted wood siding in good shape | Every 1 to 2 years | Soft wash or low-pressure rinse | $40 to $120 for cleaner, hose-end gear, brushes, and touch-up supplies | $350 to $700 |
| Stained cedar with light mildew or dust | Every 2 to 3 years | Hand wash or soft wash | $60 to $180 for wood-safe cleaner, brushes, and stain touch-up materials | $400 to $850 |
| Sealed hardwood or dense specialty wood siding | Every 3 to 4 years | Hand wash first. Use pressure only if the finish and joints are sound | $75 to $200 for specialty cleaner, pads, and repair supplies | $500 to $1,000 |
Those ranges overlap for a reason. Labor, wall height, oxidation, mildew, and how much detail work the house has usually matter more than the species alone. A simple one-story painted wall can be cheap to clean. A stained cedar house with heavy buildup, high gables, and delicate finish work gets expensive fast.
Call a pro when the wall needs judgment, not just labor.
That includes peeling paint, soft spots, open joints, gray weathered boards, suspected lead paint, second-story access, or any area where water could be driven behind the siding. If you are not fully confident controlling distance, angle, and runoff, hire it out. Replacing wood costs a lot more than cleaning it.
If you already bundle exterior upkeep, it can make sense to pair siding work with residential window cleaning, interior window cleaning, screen cleaning, and track cleaning so the house looks finished all at once. The same logic applies on small commercial properties that also need window cleaning near me, commercial window cleaning, or window cleaning in Colorado Springs, CO.
If you already hire out for professional window cleaning, streak-free window cleaning, exterior window washing, hard water stain removal, or seasonal maintenance services, wood siding belongs in the same decision bucket. The core value is avoiding damage while getting the wall clean enough to inspect.
If your siding needs a careful wash and you'd rather not gamble with wood, finish, or moisture intrusion, Cultivate can handle the evaluation and cleaning approach that fits the wall instead of forcing a one-method job. For homeowners and property managers in Colorado Springs and nearby communities who want help with siding, glass, and exterior maintenance, visit Cultivate House Detailing and request a quote.