A lot of homeowners around Colorado Springs start looking into permanent lighting the same way. They're standing in the driveway after sunset, looking at a dark roofline, a shadowed front walk, or the old tangle of seasonal lights they swore they'd never hang again.
That feeling gets stronger here because our homes are built to be seen. Stucco, stone, timber accents, deep eaves, mountain views, patios that stay useful well past summer. A house in Colorado Springs can look sharp in daylight and then disappear at night. Permanent outdoor lighting changes that. It gives the home a finished look every evening, adds usable light where people walk and gather, and removes the yearly cycle of ladders, clips, and rushed installs before a holiday.
Most DIY videos stop at the fun part. They show color changes, app controls, and the final reveal. What they usually skip is the part that matters after the first week. How the system is mounted on real fascia. How it handles sun, snow, wind, and dust. What happens when one section needs service years later. That's the side of permanent outdoor lighting installation that determines whether you're happy with the project long term.
Brighten Your Home Year-Round with Permanent Lighting
In Colorado Springs, outdoor living doesn't stop when the sun drops behind the Front Range. People still grill, sit under the patio cover, let the dog out, welcome friends at the front walk, and want the house to feel alive after dark. Permanent lighting fits that rhythm better than seasonal strings ever did.
One of the most common situations is simple. A homeowner wants warm, clean roofline lighting most of the year, then wants holiday color without climbing a ladder when the weather turns. That's where permanent systems make sense. They stay discreet during the day, then switch roles at night. On one evening they act like architectural lighting. On another, they become event lighting for Christmas, a graduation, or game day.
Why this upgrade isn't niche anymore
The wider market supports what installers have been seeing on the ground. The global outdoor lighting market was valued at USD 39.4 billion in 2024 and is projected to reach USD 64.4 billion by 2034, with the LED segment projected to grow to USD 20.7 billion in that same period, according to outdoor lighting market analysis from Global Market Insights. That matters because permanent systems are typically LED-based, and homeowners are buying them for the same reasons the larger market is growing: beautification, safety, security, and energy efficiency.
That trend also explains why more homeowners are comparing permanent roofline systems with other outdoor lighting categories instead of viewing them as “just holiday lights.” If you want a broader look at where LED and solar options fit in the exterior-lighting conversation, this industrial LED solar lighting buyer's guide is useful background reading.
Permanent lighting works best when you stop thinking about it as a seasonal decoration and start treating it like part of the house.
What homeowners usually want most
In practice, the goals usually fall into a few buckets:
- Cleaner curb appeal: The roofline, peaks, and entry feel intentional at night instead of fading into darkness.
- Less annual hassle: No bins of tangled lights. No repeated setup and takedown.
- More usable evenings: Patios, walkways, and entries feel finished and safer to use.
- Flexible looks: Warm white for everyday use, color scenes for holidays and events.
Around here, that flexibility matters. One home might need subtle lighting that keeps peace with an HOA. Another might want a stronger effect on a tall gable or covered entry. The right permanent outdoor lighting installation starts with that context, not with a box of lights.
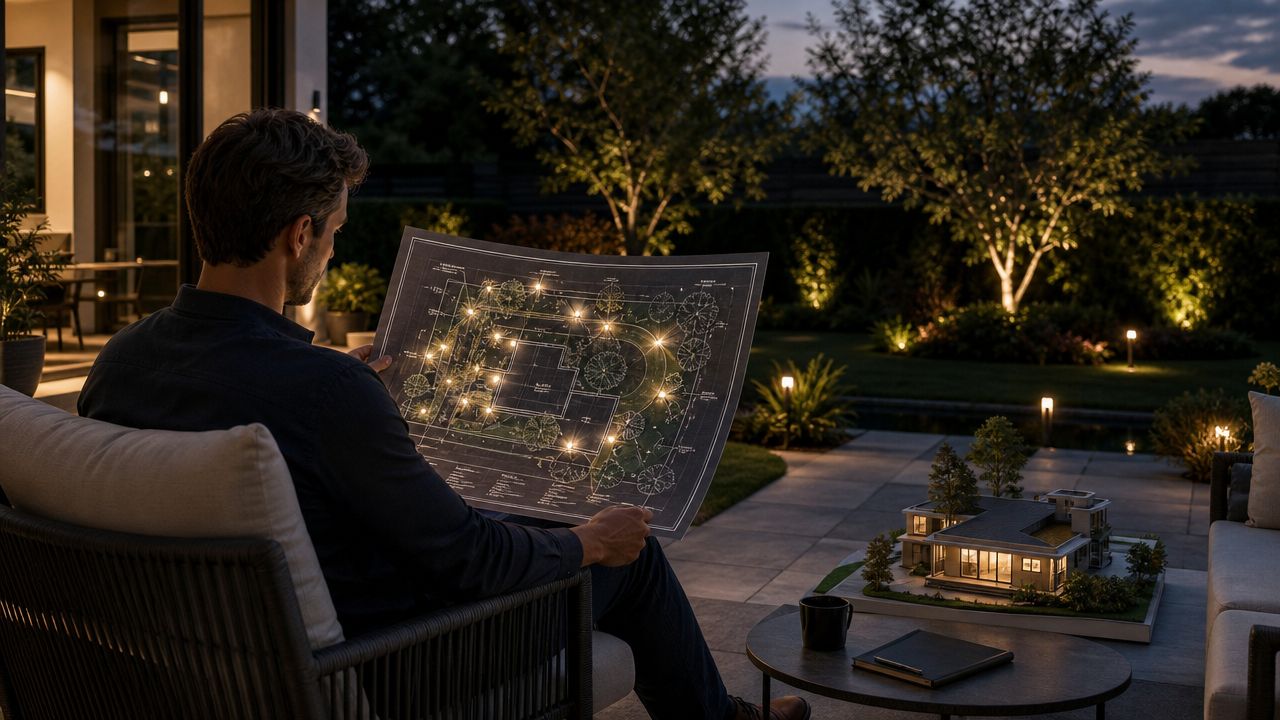
From Vision to Design Planning Your Outdoor Lighting
The best installs start on paper, not on a ladder. Before anyone runs wire or snaps a track into place, you need to decide what the house should look like at night. Not just brighter. Better.
Some homeowners want a soft architectural outline that disappears into the home during the day. Others want a system that can handle holidays, parties, and everyday lighting without looking busy. Those are different design goals, and they lead to different fixture placement, spacing, and control choices.
Start with the job you want the lighting to do
Ask yourself a few practical questions:
- Do you want everyday elegance or mostly holiday color?
- Do you want the front of the home lit, or the sides and backyard too?
- Are dark entry points or side yards bothering you now?
- Does your HOA prefer subtle, warm lighting over bright animated scenes?
A mountain modern home in Colorado Springs often looks best with crisp, hidden roofline lighting and selective accenting. A craftsman or traditional home can handle a warmer, more welcoming glow under the eaves. Taller facades usually benefit from restraint. Smaller homes can look overdone fast if every edge is lit.
Simple lighting ideas that work
A few design approaches consistently hold up well:
Downlighting under soffits
This is the workhorse approach for permanent roofline systems. Fixtures mounted under soffits can throw a controlled wash down the wall and toward the ground. It's clean, practical, and usually HOA-friendly because the light source stays tucked away.
Accenting peaks and entry points
If the home has strong rooflines, front porch beams, stone columns, or a standout gable, these features deserve priority. Good lighting should guide the eye. It shouldn't compete with every inch of the house.
Mixing everyday and event scenes
A permanent system should have an “ordinary Tuesday” setting, not just a holiday setting. Warm white or soft neutral tones for regular evenings, then saved scenes for Christmas, Fourth of July, birthdays, or school colors. That's usually a better long-term plan than designing around constant color effects.
For homeowners comparing broader design ideas, this overview of residential outdoor lighting solutions gives a helpful look at how different exterior lighting layers can work together.
Design mistakes that create regret
There are a few common misses:
| Mistake | What happens |
|---|---|
| Lighting every edge | The house looks outlined instead of designed |
| Ignoring viewing angles | The effect looks good from one spot and awkward from the street |
| Over-bright settings | Neighbors notice the glare before they notice the architecture |
| Skipping service planning | Hidden wires become frustrating when repairs are needed |
A good design looks intentional at night and nearly invisible during the day.
That's the standard to aim for. If the layout respects the architecture, the installation has a much better chance of feeling like a home upgrade instead of an add-on.
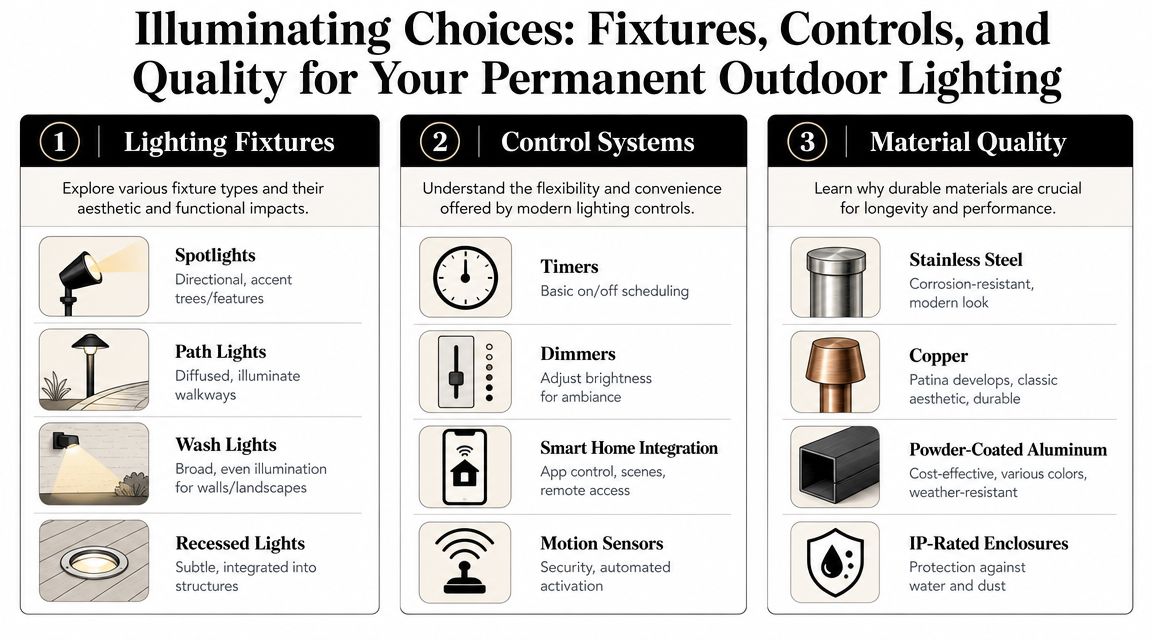
Choosing Your System Fixtures Controls and Quality
A permanent outdoor lighting installation is only as good as the hardware behind it. Homeowners usually notice the color and app first. Installers pay attention to the housing, mounting method, wire path, connector quality, and whether the system will still behave after years of sun and weather.
What matters in the actual lights
Modern systems are usually built around long-life LEDs, often rated at about 50,000 hours, which supports the install-once, use-for-years model. The same source notes that households can save hundreds of dollars over 3 to 5 years by avoiding recurring seasonal installation and removal costs when they switch to permanent lights, as explained in this overview of permanent outdoor lights and LED lifespan.
That sounds good on paper, but the fixture design still matters. A durable LED inside a weak mount or poor connector won't give you the long service life you expected.
Fixtures versus effects
Not every lighting type does the same job. Here's a practical perspective:
- Low-profile roofline modules: Best when you want a clean daytime look and flexible nighttime scenes.
- Spot-style accents: Useful for trees, columns, and specific features, but they can create hot spots if overused.
- Wash lighting: Better for broad, even coverage on walls and larger surfaces.
- Recessed or integrated fixtures: Great visually, but only if future access has been considered.
If you're comparing styles beyond roofline systems, this roundup of outdoor lighting solutions for homeowners is a helpful way to think through fixture roles.
Controls and component quality
A lot of frustration comes from buying a “smart” system that isn't practical. App control is useful. So are scenes, schedules, and dimming. But none of that matters if the power supply is undersized, the connectors let in moisture, or the housing doesn't tolerate UV exposure.
What to look for
- Reliable white light option: If you want everyday architectural lighting, a system that renders white attractively matters more than flashy color demos.
- Weather-ready connections: Exterior splices and joins need proper sealing. That is essential.
- Stable mounting track or clips: The mounting method affects the look and the long-term hold.
- Usable controls: The app or controller should be simple enough that you'll use it regularly.
What usually disappoints
- Systems that look bright in online videos but harsh in person
- Cheap controls with clunky scene management
- Mounts that rely too much on adhesive
- Parts that are difficult to replace individually
For Colorado Springs homes, the sweet spot is usually a system that stays subtle in daylight, gives you a dependable warm everyday setting, and doesn't require a complicated workaround when one component eventually needs service.
The Installation Journey What to Expect in Colorado Springs
Installation day should feel organized, not chaotic. Homeowners usually want to know three things. How visible the work will be, whether the house is going to get damaged, and what corners a real installer won't cut.
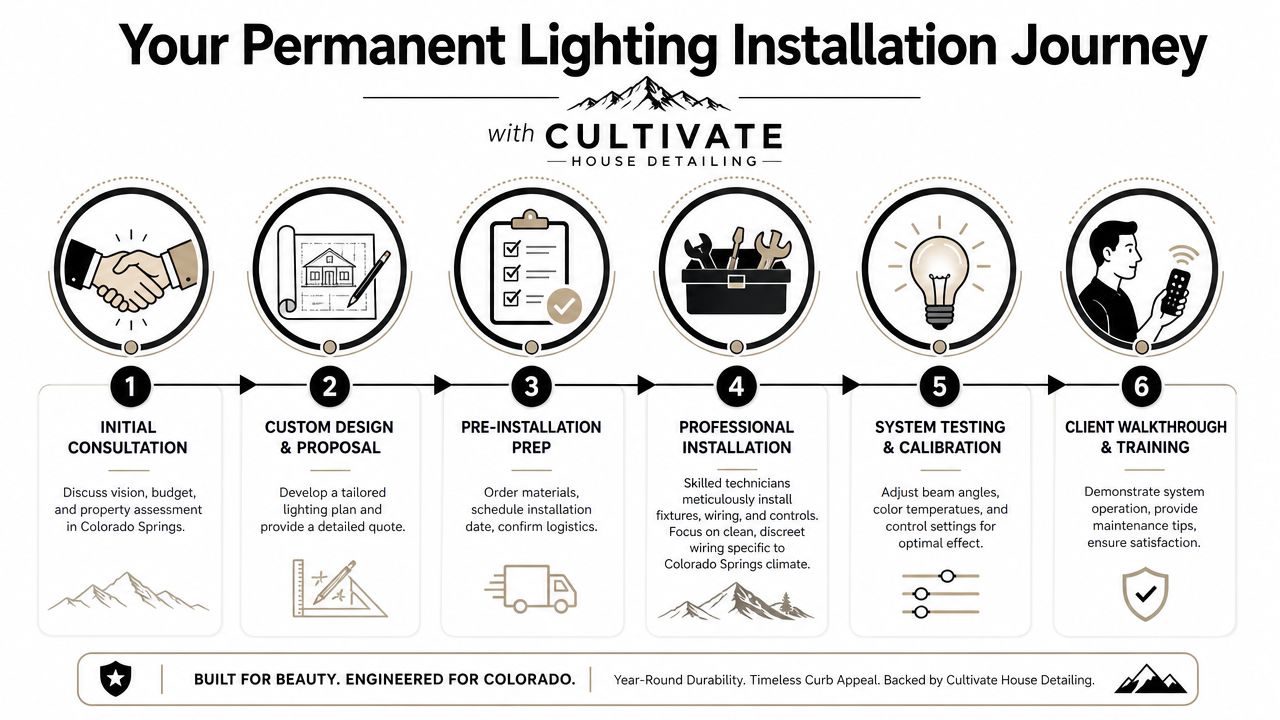
The first walkthrough sets the tone
Before mounting anything, the installer should walk the property and confirm the plan against the actual home. Roof breaks, soffit depth, downspouts, trim transitions, stucco returns, and access points all affect the final layout.
In Colorado Springs, this part matters more than homeowners often realize. Homes here vary a lot. Some have smooth fascia and generous soffits. Others have tighter lines, textured surfaces, or mixed materials that change the mounting strategy. Wind exposure and sun intensity also influence how conservative you should be about placement and fastening.
If you want to see how a local provider approaches the service itself, permanent lighting in Colorado Springs is one example of how this kind of project is offered in the area.
What a solid mounting workflow looks like
This is where experienced installers separate themselves from quick installs. Independent installer guidance consistently points to the same workflow: clean the mounting line, dry-fit the layout, use adhesive-backed or 3M-backed clips as the initial hold, and add a screw fastener where the system allows it. That method is discussed directly in this installer walkthrough on permanent light mounting and retention.
Practical rule: Adhesive helps position the system. Mechanical fastening helps keep it there.
That matters because slick paint, dust, or rushed prep can lead to clips pulling loose later. A mount that looks fine on install day can fail after weather exposure if the surface wasn't cleaned well or the installer trusted adhesive alone where a screw backup was possible.
Here's what homeowners should expect from a careful install:
Surface prep first
Soffits and fascia get cleaned where mounts will attach. Dirt, oxidation, and chalky residue are a bad foundation.Dry-fit before final fastening
The run gets laid out and checked before everything is locked in. This catches spacing problems and awkward transitions early.Wire routing with restraint
Wires should stay untwisted, supported, and tucked cleanly. They shouldn't be forced around breaks or pinched into places that make future service miserable.Weather-tight joins
Every splice or connector exposed to the elements needs to be treated like a future failure point unless it's sealed properly.
A quick visual can help if you want to see the overall flow in motion:
Colorado-specific challenges installers should respect
A clean install here has to account for more than appearance.
- High UV exposure: Materials bake faster than homeowners expect.
- Snow and freeze-thaw cycles: Water management around splices and penetrations matters.
- Wind on exposed rooflines: Retention needs to be more than “good enough.”
- Stucco and textured trim: Some surfaces need a different fastening approach than smooth painted wood or metal.
The final walkthrough should include testing, scene setup, and a realistic conversation about where components are located for future access. If that part gets skipped, the job may still look good at dusk, but the homeowner is left guessing later.
DIY vs Hiring a Pro A Crucial Decision for Homeowners
DIY permanent lighting has obvious appeal. You can spread the project over weekends, control the material choices, and save on labor. For some homeowners, especially those comfortable on ladders and detail-oriented with layout work, that's enough reason to try it.
But permanent outdoor lighting installation isn't just a craft project on the edge of the roof. It combines design, mounting, wiring, weather exposure, and long-term serviceability. A system can look fine for a month and still be poorly installed.
Where DIY can make sense
DIY tends to work best when the home is straightforward. Simple rooflines. Easy access. Predictable mounting surfaces. A homeowner who doesn't mind troubleshooting and accepts that the first plan might need revision.
There's also value in understanding your own home. Some homeowners enjoy the process and don't mind learning by doing.
Where DIY often goes sideways
The problems usually aren't visible at first. They show up later.
According to retailer and installation guidance, many discussions of permanent lighting focus on appearance but don't address long-term serviceability, safe wire routing, or waterproof splicing well enough. Those hidden details are a major part of durability and safety, as noted in this guide to permanent exterior lighting considerations.
Common trouble spots include:
- Ladder risk: Long roofline work is tiring, repetitive, and easy to rush.
- Bad spacing decisions: Slight layout errors become obvious from the street.
- Weak wire paths: Tucked away doesn't always mean safe or serviceable.
- Water-prone splices: One vulnerable join can create headaches later.
- Over-hidden installs: The cleaner it looks today, the harder it may be to repair tomorrow.
The cleanest-looking system isn't always the smartest install. If no one can access a failed section without tearing into trim, the finish detail becomes a long-term liability.
What a professional really adds
Hiring a pro isn't only about convenience. It's about reducing avoidable mistakes.
A solid installer should bring:
| DIY concern | Professional advantage |
|---|---|
| Uncertain layout | Experienced design judgment |
| Trial-and-error fastening | Proven mounting workflow |
| Time-heavy install | Faster, more organized execution |
| Troubleshooting alone | Support when something acts up |
| Mixed material surfaces | Better adaptation to soffit, fascia, trim, and transitions |
Questions to ask any installer
This is worth doing even if you already have someone in mind.
- How do you mount the system on my specific soffit or fascia material?
- Do you rely only on adhesive, or do you use mechanical backup where possible?
- How are splices and connectors protected from weather?
- How do you handle service calls if a section fails later?
- Can individual components be replaced without disturbing the whole run?
- Have you worked with homes like mine, including HOA-sensitive designs?
A trustworthy installer won't dodge those questions. They'll answer them clearly, and the answers will sound practical, not rehearsed.
Budgeting Maintenance and Long-Term Value
Homeowners usually ask about cost first, but the smarter question is what ownership feels like after the install. That's where permanent lighting becomes either a good investment or an expensive annoyance.
The final price depends on the shape of the roofline, the number of runs and transitions, accessibility, the control system, and how much effort the installer puts into concealment and future serviceability. A straightforward single-story front elevation won't be approached the same way as a tall home with multiple peaks, break lines, and tricky side access. HOA expectations can also affect scope if the design has to stay especially subtle.
What to budget for besides the initial install
Think beyond fixtures and labor.
Design and fit
Custom fitting takes time. The cleaner the daytime look, the more planning is required.
Access and complexity
Multiple levels, tight soffits, and broken roof segments usually add effort. So do surfaces that need special mounting care.
Future service
This is the part many homeowners never hear enough about. The public conversation around permanent lighting spends a lot of time on install day and not enough on what happens later. As shown in this discussion of maintenance, water intrusion, and serviceability in permanent lighting, long-term ownership depends heavily on whether the system was designed for access, repair, and fixture replacement, not just concealment.
What happens if a light goes out years later
A good system should let an installer diagnose the failed section without turning your soffit into a repair project. That's why modularity and access matter so much. If one light or one segment fails in five years, the goal is targeted service, not guesswork and unnecessary disturbance to the house.
That's also why homeowners in Colorado Springs should ask about HOA rules before installation. Some neighborhoods care about brightness, color usage, or where lighting is visible from the street. If electrical modifications are involved, permit requirements can vary by project scope, so it's smart to verify local requirements up front instead of assuming.
For homeowners trying to understand the financial side in more detail, this guide to permanent Christmas lights cost is a practical place to start.
A simple ownership checklist
- Run the system occasionally year-round: Don't ignore it for long stretches.
- Check visible mounts after major weather: Look for any section starting to loosen.
- Keep debris off roof edges and soffits: Dirt and buildup can hide issues.
- Report flicker or outage early: Small electrical or connector issues are easier to address before they spread.
- Save your layout and control info: Future service gets easier when settings and components are documented.
If you think about permanent lighting as part of the exterior system of the home, the decision gets clearer. You're not just buying a nighttime effect. You're buying convenience, curb appeal, and years of use, but only if the installation was planned for the full lifecycle.
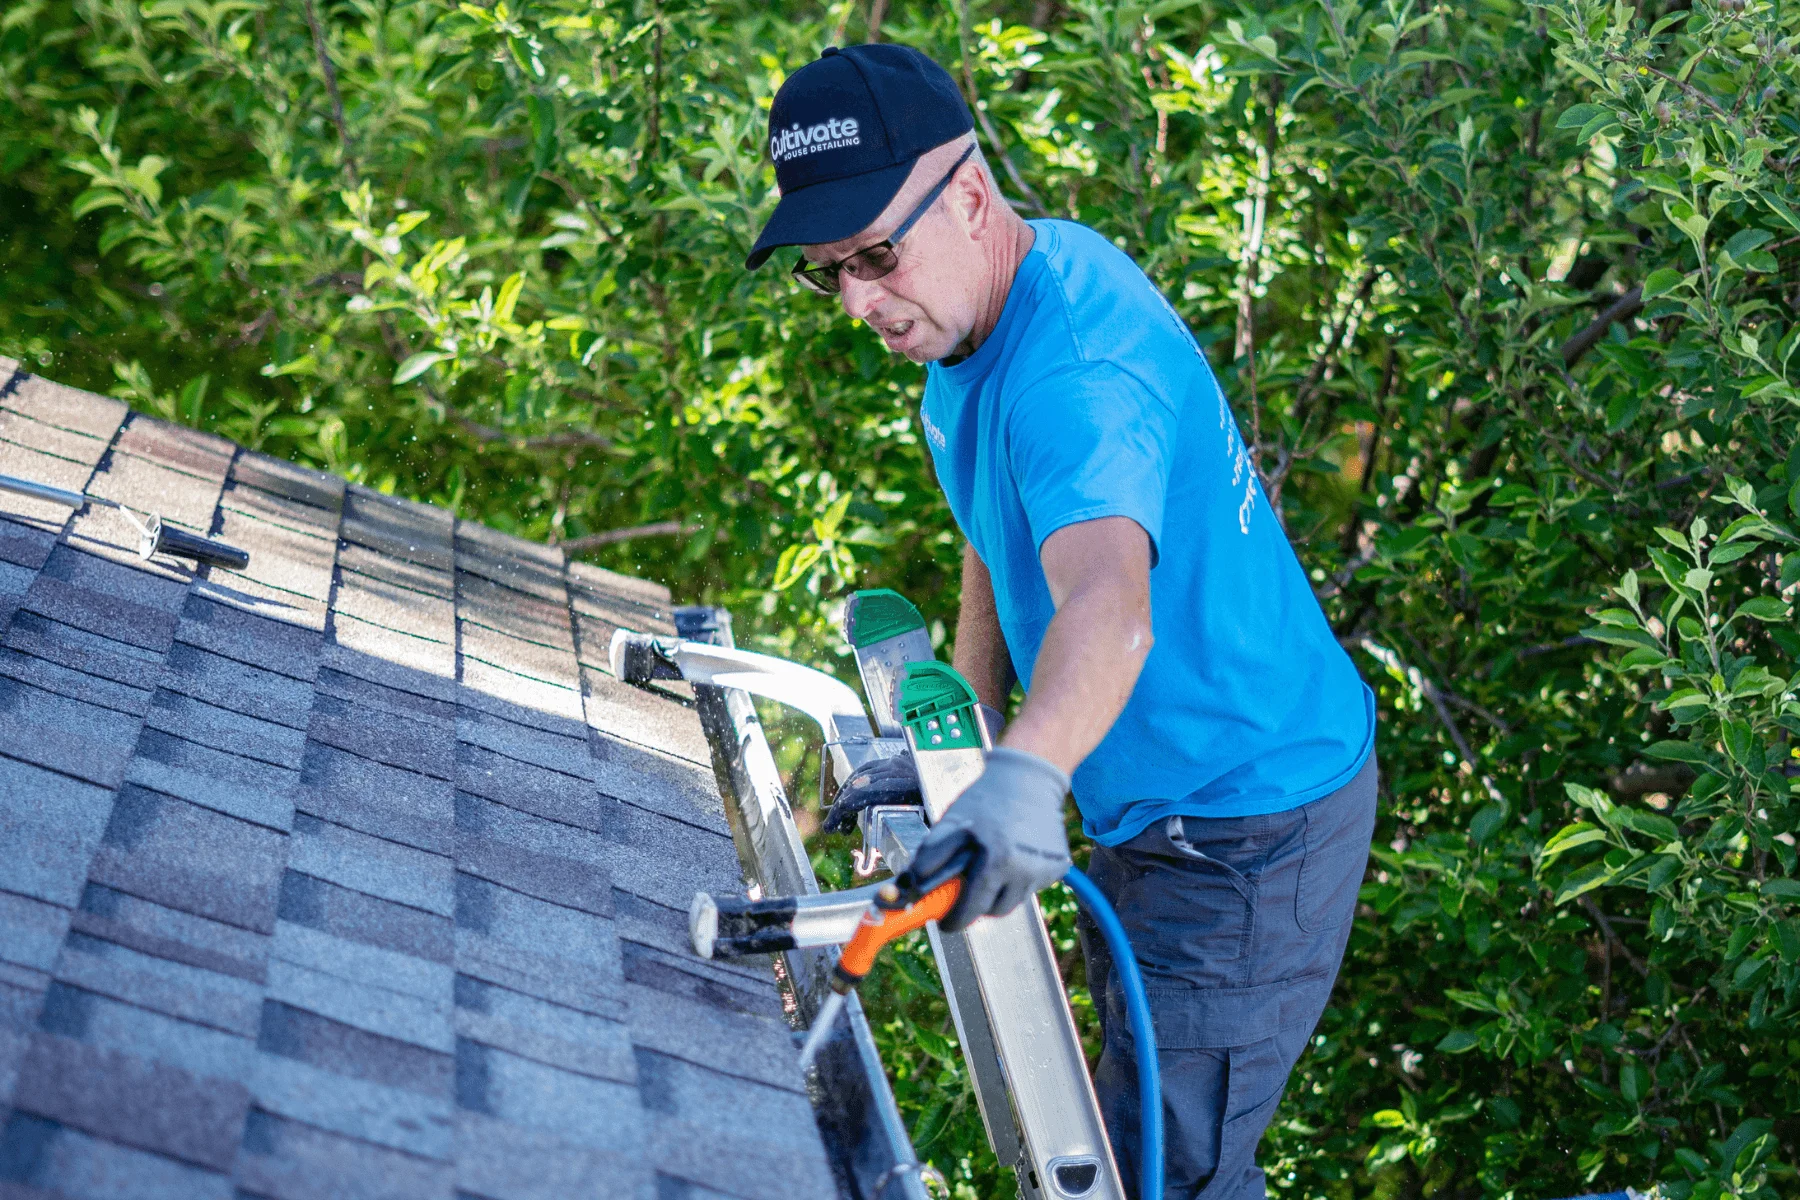
If you're considering permanent outdoor lighting installation for your Colorado Springs home and want a layout that looks clean now and stays serviceable later, contact Cultivate House Detailing for a quote. They handle exterior home services locally and can help you sort through design ideas, installation details, and what long-term ownership should look like before you commit.