
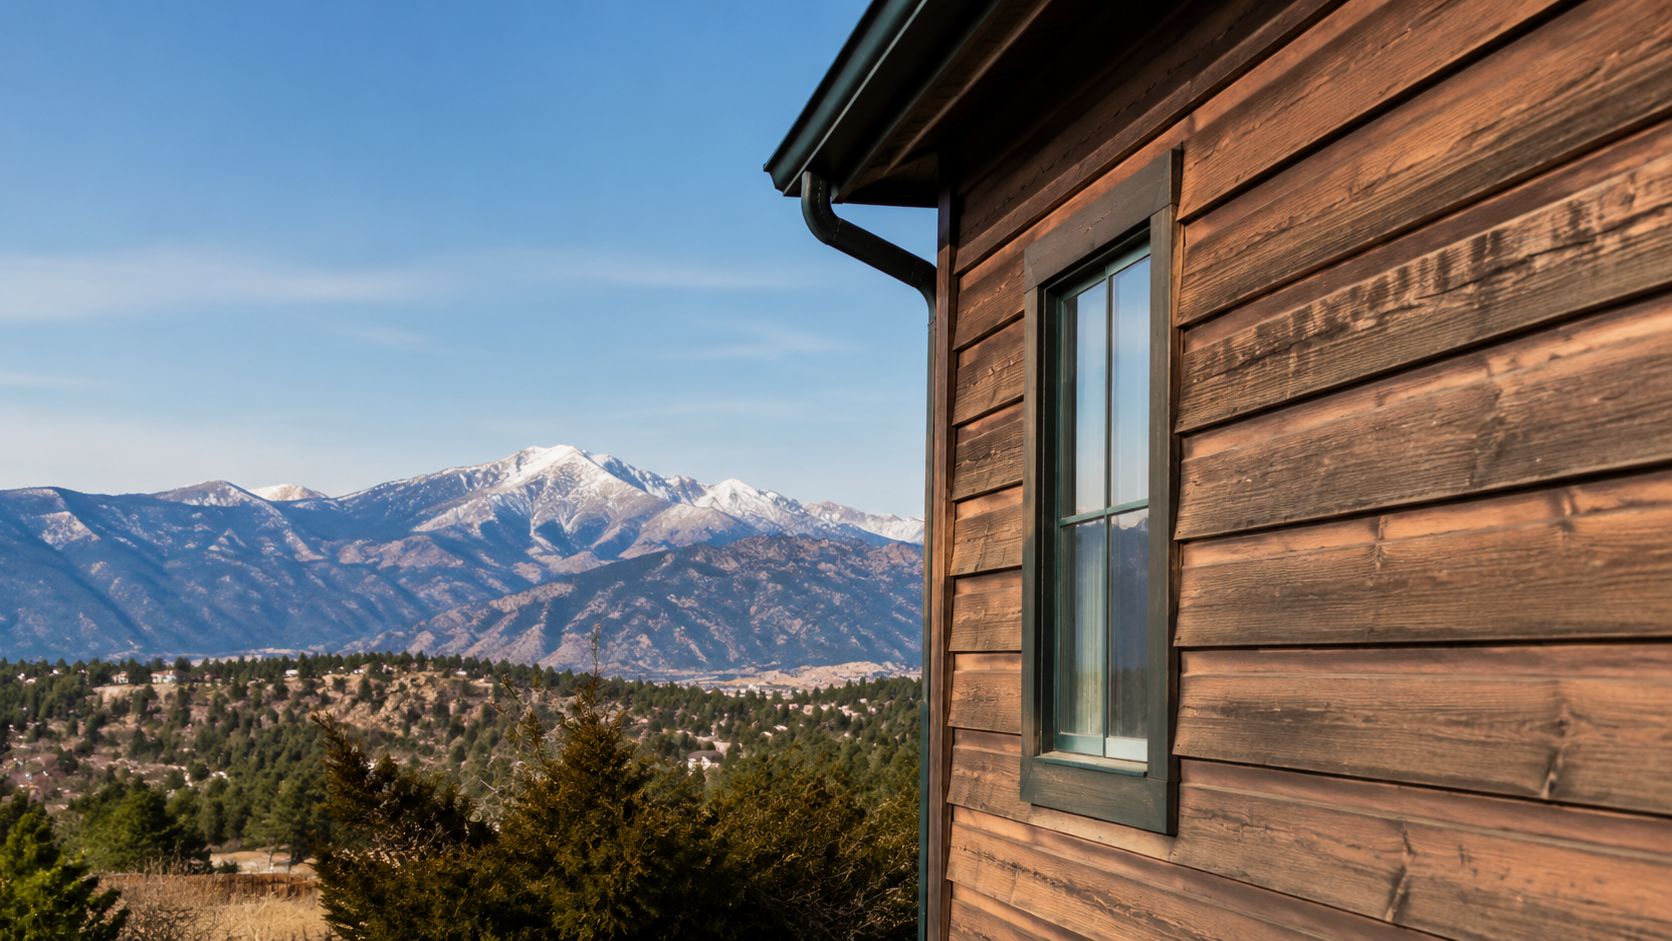
Wood siding looks right at home in Colorado Springs. It fits the pines in Black Forest, the older neighborhoods near downtown, and the mountain feel you get heading toward Manitou Springs. But if you're looking at your siding today and thinking it seems dull, dusty, or a little green on the shaded side, that's normal for this area.
Our climate is hard on exterior surfaces in very specific ways. Wind pushes grit against the house. Irrigation and hard water leave mineral marks. North-facing walls stay cooler and hold moisture longer than people expect in a dry climate. Then the sun at altitude works on the finish day after day until clean wood starts to look tired.
Protecting Your Colorado Springs Home's Natural Charm
A lot of homeowners notice the problem gradually. One wall still looks fine from the street, but the side yard tells a different story. The wood near the downspout has dark streaks. The back elevation under the trees has that faint green cast that usually means mildew is starting to take hold. The stained areas around trim don't rinse off with a quick pass from the hose.
That's when wood siding cleaning stops being a cosmetic project and starts being maintenance.
What Colorado Springs homes deal with
In Colorado Springs, siding doesn't just get “dirty.” It gets a mix of local wear that builds in layers.
- Windblown dust: Fine grit settles into grain, joints, and rough-sawn textures.
- Shade-related growth: Mildew often shows up on the sides of the home that don't get strong drying sun.
- Sun-faded finish: Strong UV exposure makes stain and paint look chalky or uneven.
- Sprinkler splash: Lower courses can collect soil, splash marks, and mineral residue.
A national cleaning guide usually treats wood siding like it behaves the same everywhere. It doesn't. A home in Colorado Springs has different pressure points than a home in a humid coastal area or a rainy southern market. That's why seasonal care matters. If you're building out your annual exterior routine, this guide to essential seasonal home upkeep is a useful companion because siding condition usually connects to drainage, trim, gutters, and exposure.
Wood siding usually gives you a warning before it gives you a repair bill. The warning is discoloration, trapped grime, or finish failure that keeps spreading.
Clean wood looks better and lasts longer
Good cleaning restores color and contrast, but the bigger value is what it helps you catch and prevent. When dirt, mildew, and residue stay on the surface, you can miss failing caulk, soft spots, and finish breakdown until they become a larger project.
That's especially true on homes with stained cedar, painted lap siding, or older wood trim details. The goal isn't to blast the surface until it looks raw. The goal is to remove contamination while keeping the wood, paint, and stain intact.
For homeowners who want to handle it themselves, the process is manageable if the siding is in sound condition and you use the right method. For homes with higher walls, older finishes, or signs of moisture trouble, professional help makes sense. In Colorado Springs, that usually comes down to knowing what you're seeing before you start spraying water at it.
First Assess Your Siding's Condition Before You Clean
The inspection comes first. Always. A careful walk-around tells you whether you're dealing with simple surface grime or a problem that cleaning alone won't solve.
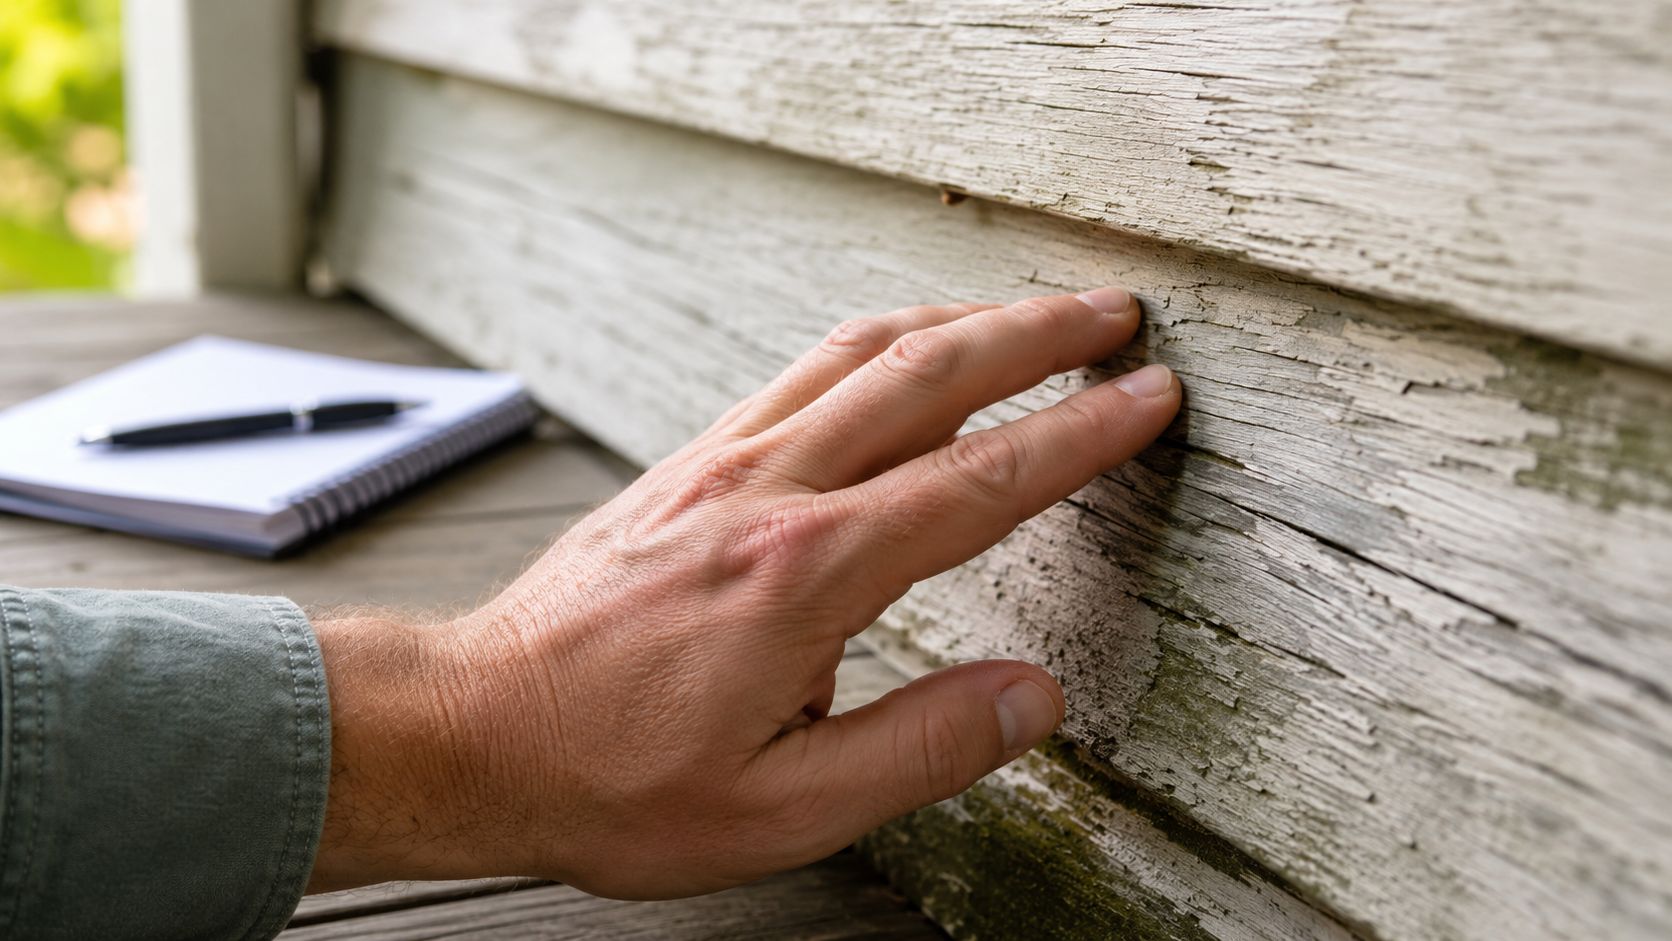
What to check before any washing starts
Stand close to the wall and then step back. Up close, you're looking for texture changes, soft areas, and failed finish. From a few yards away, you're looking for patterns. Streaks below windows, persistent dark bands, and isolated damage often point to a source.
Use this pre-clean checklist:
- Peeling or chipping paint: Loose paint can come off fast during washing. That changes a cleaning project into paint prep.
- Soft or spongy wood: Press gently with a fingertip or a small blunt tool. If the wood gives easily, stop. Wet cleaning can worsen the issue.
- Open seams and gaps: Check around trim, butt joints, windows, doors, and penetrations where water can enter.
- Dark staining that follows a line: This can point to repeated water intrusion from flashing, gutters, or trim above.
- Heavy green or black spotting: That usually means organic growth, not just dirt.
- Insect concerns: If you see frass, pinholes, tunneling, or damaged trim, have that evaluated before cleaning. Homeowners already dealing with a sale, inspection, or suspicious wood damage may find this overview of a home pest inspection for buyers helpful for understanding what gets checked when wood-destroying insects are a concern.
Know the difference between dirt and damage
Surface dirt sits on top. It looks dusty, dull, or muddy near grade. Mildew usually appears as blotchy discoloration, especially where airflow is limited. Rot is different. Rot changes the wood itself. It can look cracked, swollen, soft, or uneven around joints and edges.
Practical rule: If the wood feels weak, cleaning is not the next step. Repair is.
A lot of DIY trouble starts when someone assumes every dark mark is just grime. Then they scrub too aggressively, use too much pressure, or soak an already compromised wall. Inspection prevents that.
Decide if it's a cleaning job or a repair-first job
A simple cleaning is reasonable when the siding is structurally sound, the finish is mostly intact, and the staining is limited to dirt, mildew, light mineral spotting, or pollen residue. It's not a DIY candidate when you've got open caulk joints, suspicious softness, failing boards, or staining that suggests moisture is getting behind the cladding.
If you're unsure, trust the substrate over the appearance. A wall that looks dirty but feels solid is one thing. A wall that looks stained and feels soft is telling you to slow down.
Choose Your Method Soft Wash vs Pressure Wash for Wood
Most siding damage I see from cleaning didn't come from the cleaner itself. It came from the method. Homeowners hear “pressure washing” and use it as a catch-all term for exterior cleaning, but wood is where that shortcut gets expensive.
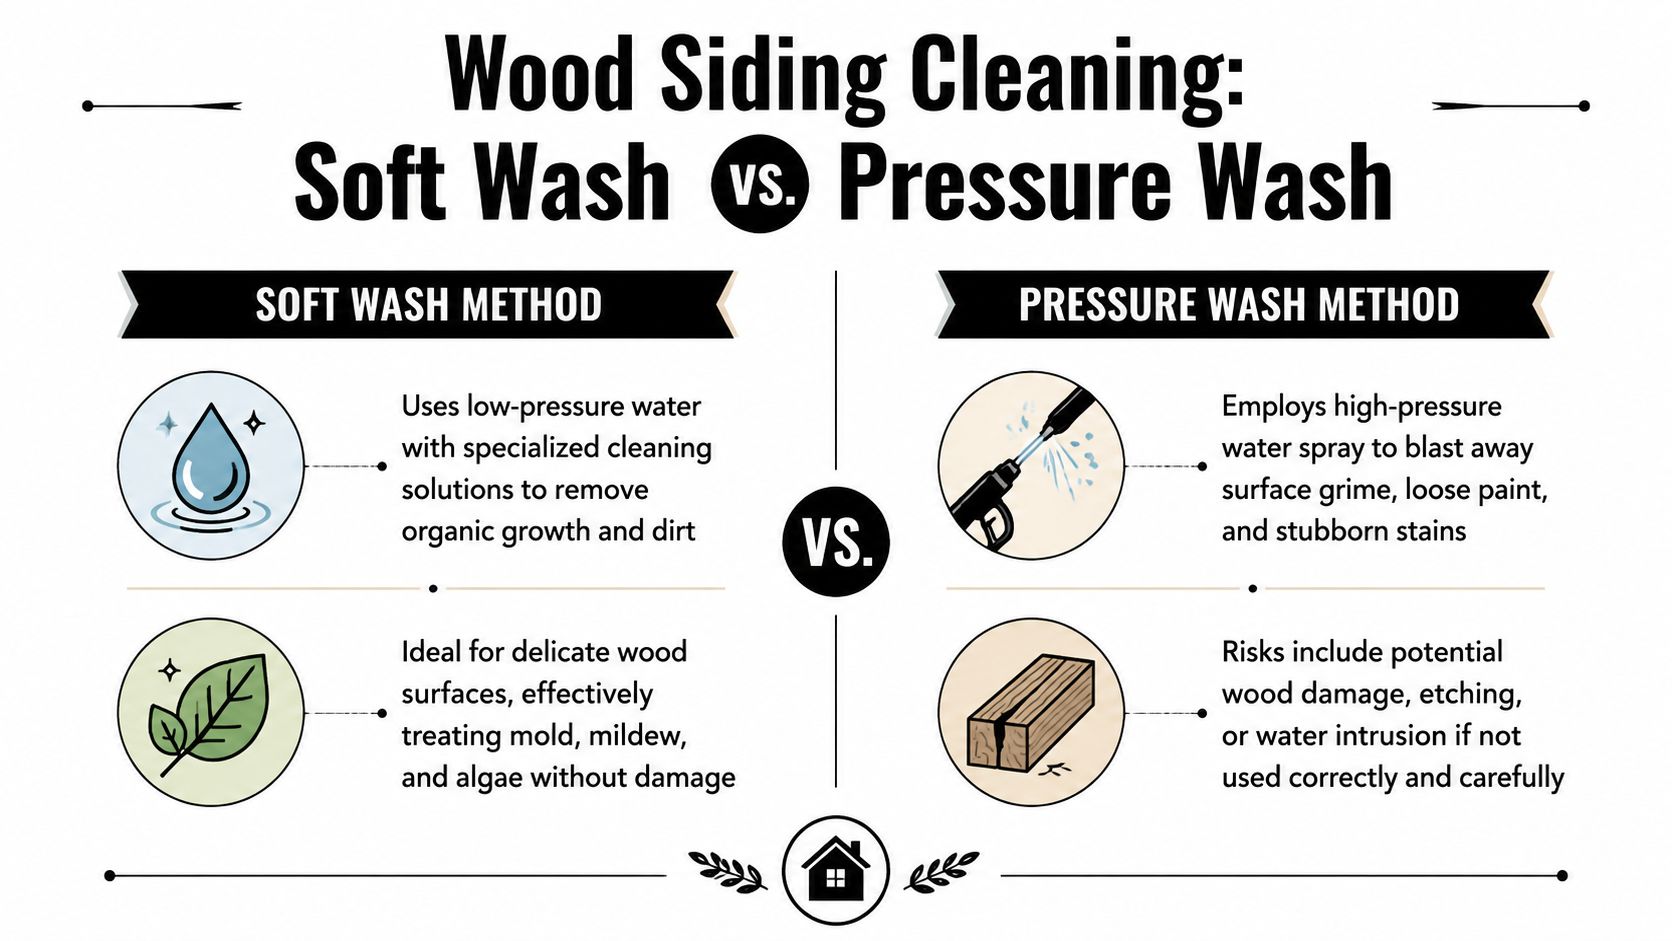
What pressure washing does to wood
Pressure washing uses force to strip contamination off the surface. On concrete, that can be effective. On wood siding, it often creates new problems:
| Method | How it cleans | What can go wrong on wood |
|---|---|---|
| Pressure washing | Blasts surface buildup away with a concentrated stream | Raises grain, splinters soft wood, strips paint or stain, drives water behind laps |
| Soft washing | Uses a cleaning solution and low-pressure rinse | Takes more patience, but protects the surface when done correctly |
The risk isn't only visible damage. The bigger issue is hidden water intrusion. When water gets forced upward into lap edges, behind trim, or into checks in the wood, the siding may look cleaner for a week while the wall assembly dries poorly behind it.
Why soft washing is the safer choice
Soft washing relies on chemistry, dwell time, agitation where needed, and a controlled rinse. That's what wood wants. You're removing dirt and organic growth without attacking the fibers.
This is the right approach for painted wood, stained cedar, older lap siding, trim-heavy elevations, and most homes where the finish still has life left in it. If you want a deeper breakdown of how the two approaches differ, this guide on soft washing vs pressure washing lays out the decision clearly.
If you're not fully sure what the siding can handle, low pressure is the safe starting point.
What works and what doesn't
What works:
- Low-pressure application: Lets the cleaner do the heavy lifting.
- Soft-bristle brushing in problem spots: Good for stubborn grime around trim and lower courses.
- Short controlled dwell time: Enough to loosen buildup without drying onto the wall.
- Thorough rinsing: Removes residue before it leaves streaks.
What doesn't:
- Turbo nozzles or narrow spray patterns: These cut into wood fast.
- Standing too close with a wand: Even moderate pressure becomes aggressive at close range.
- Trying to “blast off” mildew: You may remove the visible staining while leaving the underlying growth pattern to return.
- Skipping the wall inspection: Water finds weak points.
Pressure washing does have a place in exterior work. Patios, walkways, and some masonry surfaces can handle it. Wood siding is different. A proper wood siding cleaning job should leave the surface cleaner, not rougher.
A Step by Step Guide to Cleaning Wood Siding Safely
A careful DIY wash can go well when the siding is sound and the setup is simple. The key is to slow down and treat the project like finish maintenance, not demolition.
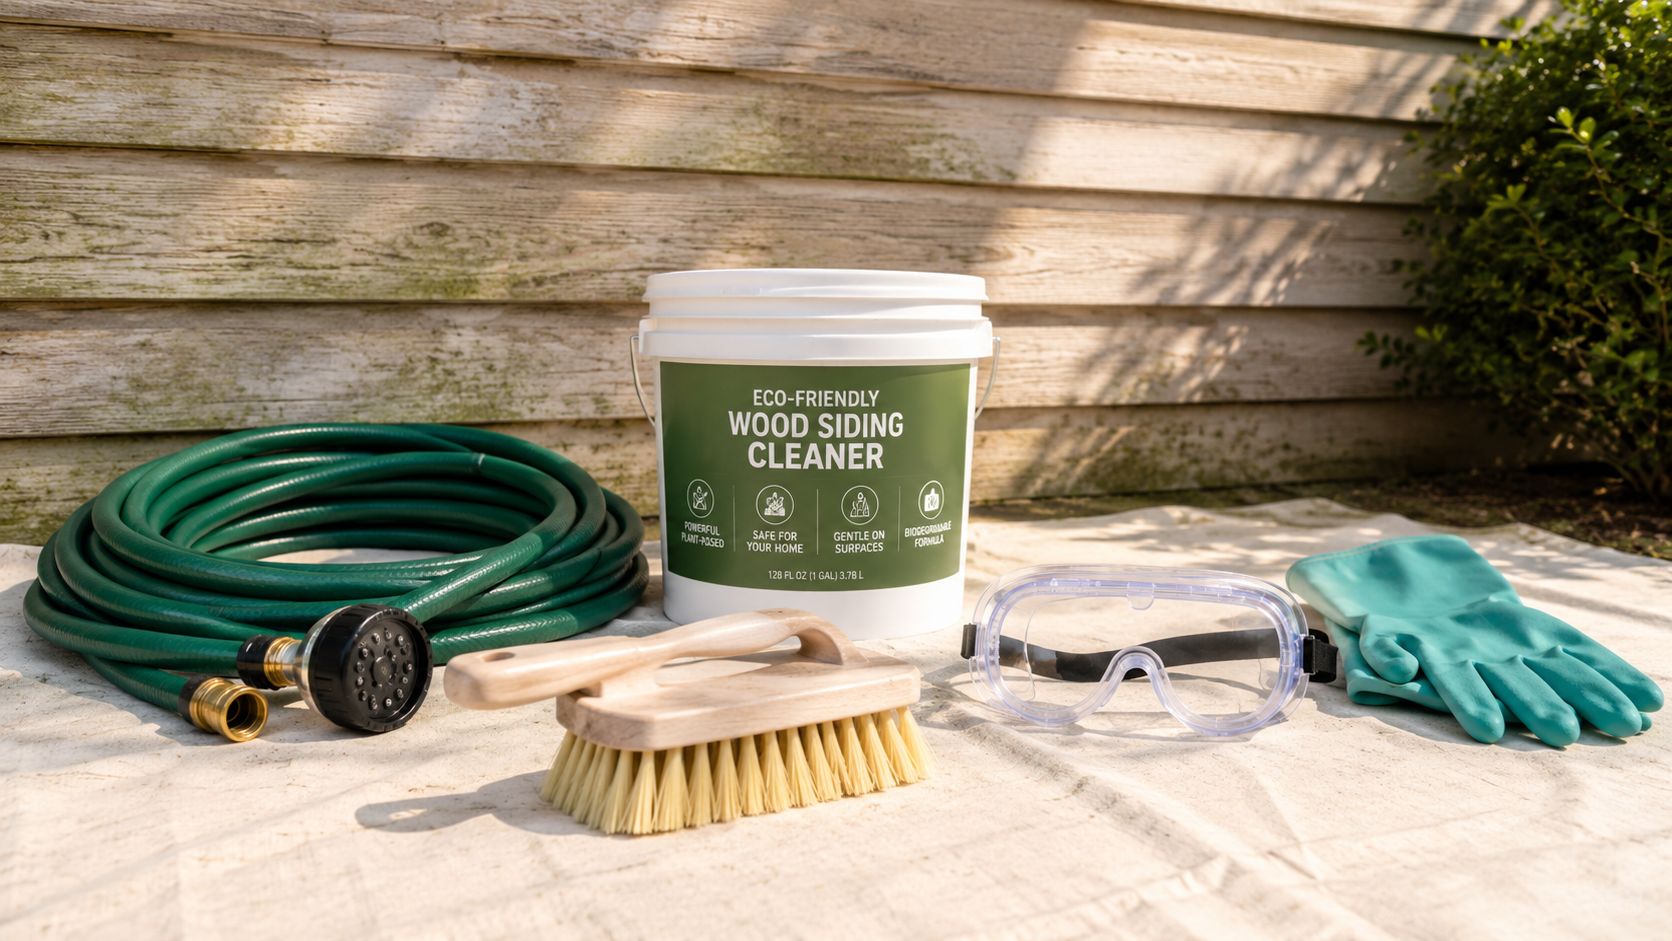
Gather the right gear
Use tools that are gentle by design. A garden hose with a spray nozzle, a pump sprayer, a soft-bristle brush, microfiber cloths, safety goggles, gloves, and a stable ladder if you need one are the basics. For cleaners, stick with a mild detergent solution made for exterior washing or a wood-safe house wash product.
Avoid wire brushes, abrasive pads, and strong mystery mixes from online forums. If a cleaner isn't clear about where it can be used, don't test it on your siding first.
A basic setup should include:
- Eye and hand protection: Cleaners can splash back when you scrub or rinse overhead.
- Soft-bristle brush on a pole: Lets you reach higher areas without leaning hard on a ladder.
- Pump sprayer: Gives you better control than dumping solution with a bucket and rag.
- Garden hose: A steady rinse is all most wood siding needs.
Prep the area before the wall gets wet
Move outdoor furniture, grills, planters, and anything fabric-covered away from the work area. Wet down nearby plants and soil first. That helps dilute any cleaner that lands below the wall. Cover delicate plants if needed, but don't trap them under plastic in direct sun for long.
Close windows tightly and check exterior outlets, fixtures, and doorbell components. If you have damaged caulk around windows or trim, hold off and address that first.
Mix and test before full application
Use a mild detergent mixed with water according to the product label, or choose a premixed exterior cleaner intended for wood surfaces. Stronger isn't better. Over-concentrated cleaner can dull a finish, dry unevenly, or leave residue that's harder to rinse than the dirt you started with.
Always test in a hidden area first. Behind a shrub, near a side elevation, or low on the rear wall works well. Apply, let it sit briefly, agitate lightly, and rinse. Let that test patch dry before you judge the result.
Test spots save finishes. A wall can look fine when it's wet and tell a different story after it dries.
Here's a useful visual on technique before you start the main wash:
Work in manageable sections
Don't try to coat the entire house at once. Clean one small section at a time so the solution doesn't dry on the siding.
The process is straightforward:
- Apply from the bottom up: That reduces streaking on dry siding.
- Let it dwell briefly: Give the cleaner time to loosen grime and organic film.
- Agitate only where needed: Brush stained areas gently with the grain when possible.
- Rinse from the top down: Flush residue away completely.
Keep the spray angle controlled and avoid forcing water up under the laps. Think rinse, not blast.
Pay attention to trim, joints, and lower courses
The dirtiest spots are often near the ground, around hose bibs, under windows, and below trim transitions. These areas may need a second light pass. That's fine. Several gentle passes are better than one aggressive one.
If you're dealing with screens, exterior glass, or tracks while you're already working outside, some homeowners bundle that work together with exterior maintenance. Companies such as Cultivate House Detailing also handle related exterior cleaning services in Colorado Springs, which can make sense if the siding project overlaps with windows, screens, or access challenges.
Let it dry and inspect the result
Once the wall dries, walk it again. You're looking for missed mildew shadows, uneven rinse lines, and areas where the finish looks thin. Sometimes the cleaning reveals what dirt had been hiding, especially around old caulk repairs or sun-faded boards.
That isn't a failed cleaning. It's useful information. A proper wash makes the true condition of the siding easier to see.
Solving Unique Colorado Springs Siding Challenges
Colorado Springs gives wood siding a very specific workload. Homes here deal with intense sun, mineral-heavy water, fast temperature swings, and odd pockets of moisture that surprise people who assume dry air means mold can't grow.
High-altitude sun breaks finishes down faster
UV exposure shows up first as fading, chalkiness, and patchy color. South- and west-facing walls usually age harder. Homeowners often assume the siding is dirty when the real issue is a tired stain or paint film that no longer sheds grime well.
The fix is part cleaning, part expectation. Wash the surface gently, then look at whether the finish still has uniform protection. If water darkens the wood quickly in one section and beads in another, that wall may be telling you recoat time is approaching.
Hard water leaves a different kind of stain
Sprinkler overspray and repeated mineral exposure can leave pale spotting, drip lines, or crusty residue, especially on lower siding courses. Normal soap may loosen some of it, but mineral buildup often needs a more targeted cleaner and a cautious test spot first.
If staining is paired with mildew or algae, treat the organic growth before chasing the mineral mark. Otherwise you end up scrubbing at two different problems with one method that doesn't fully solve either. For homes where biological growth is part of the issue, this article on how to remove mold from house siding is a helpful next read.
Freeze and thaw punish seams and edges
Water that sits in checks, joints, and unsealed end grain can expand during cold snaps and widen weak points over time. That's why rinsing technique matters so much here. If you flood vulnerable seams during cleaning, colder weather can turn a small opening into a larger failure.
Check these areas closely after a wash:
- Bottom edges of boards: They catch runoff and often stay wet longer.
- Trim intersections: Small gaps near windows and doors become water entry points.
- North-facing walls: Less direct sun means slower drying.
- Areas below roof lines: Splash and runoff patterns can keep repeating in the same spots.
North-facing siding in Colorado Springs can grow mildew even when the rest of the property feels bone dry.
Shade still creates mildew in a dry climate
Dry air helps, but it doesn't cancel out local moisture. Shade from fences, stacked landscaping, tree cover, and tight side yards can keep wood damp long enough for growth to take hold. If the same wall keeps turning green, improve airflow and reduce splash-back in addition to cleaning it.
That local pattern is why wood siding cleaning here works best when it's tied to the cause, not just the stain.
When to Call a Professional Exterior Cleaning Service
Some wood siding jobs are perfect DIY projects. Some really aren't. The trick is knowing the difference before you're on a ladder with wet gloves, a pump sprayer, and siding that's reacting badly.
Call a professional if any of these apply:
- The home has upper-story access issues: Reaching high gables, dormers, or steep grades safely is a real concern.
- You found signs of damage during inspection: Soft wood, failed caulk, open seams, or suspicious staining should change the plan.
- The finish is delicate or older: A cautious wash matters more when the surface is already vulnerable.
- The staining is heavy or recurring: Repeated mildew, mineral buildup, or deep discoloration usually needs a more specialized approach.
- You want adjacent surfaces cleaned too: Exterior windows, screens, tracks, walkways, and trim often turn one project into a full exterior service day.
A professional service should protect plants, control runoff, choose the right cleaning chemistry, and keep water out of the wall assembly. That matters more than speed.
If what you're seeing looks less like ordinary mildew and more like a serious contamination issue tied to moisture damage, broad educational resources on topics such as Marion County black mold removal can help you understand when the problem has moved beyond surface cleaning and into remediation territory.
For homeowners in Colorado Springs, the right call is usually simple. If the siding is sound, reachable, and lightly soiled, you can likely handle it carefully. If safety, access, or hidden damage enters the picture, hand it off before a cleaning project turns into a repair project.
If your wood siding needs a careful evaluation or you'd rather have the job handled professionally, reach out to Cultivate House Detailing for a quote. They serve Colorado Springs and nearby communities with exterior cleaning services that focus on safe methods, clear communication, and protecting the surfaces that make your home look like home.